
How to Pair DJI FPV Remote Controller with Flight Controller
I. Principle
Using the built-in SBUS receiver of the DJI air unit to establish a connection with the DJI transmitter is one of the common remote control solutions in current HD digital video transmission systems. This solution eliminates the need for additional traditional receivers, simplifying wiring and installation processes. It allows for direct SBUS signal output from the air unit to the flight controller, enabling remote control channel input.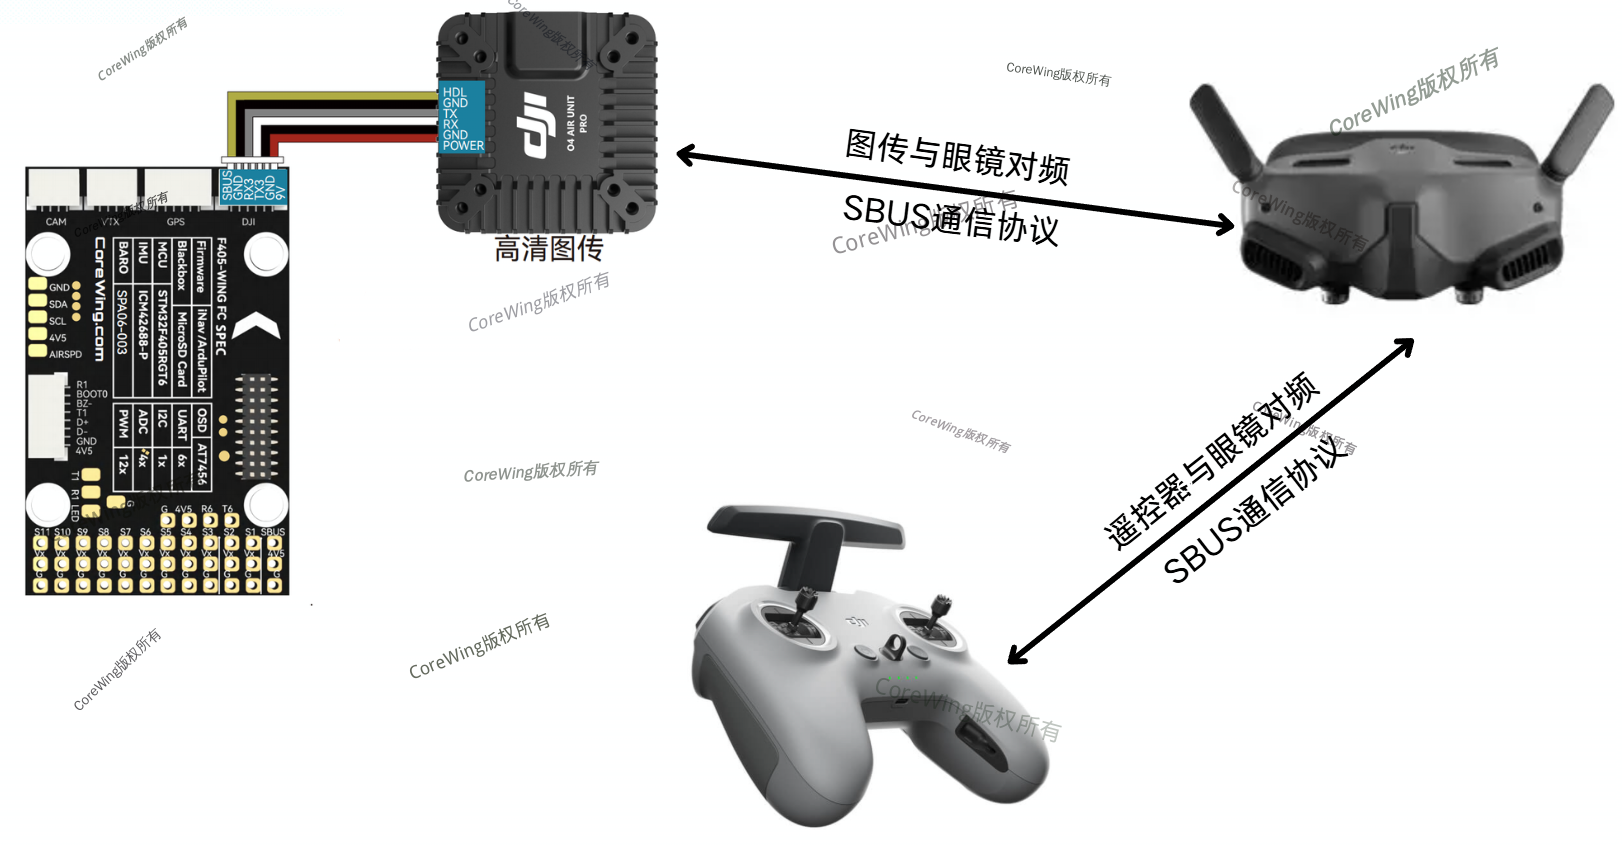
II. Equipment Preparation
1) Flight Controller: Any flight controller such as CoreWing F405 WING V2 / CoreWing F405 WING MINI V2 is suitable for this tutorial.
2) Video Transmitter: DJI Air Unit, such as any DJI O3 series, DJI O4 series, or other air units with built-in receivers
3) Transmitter: DJI FPV series, such as DJI FPV2, DJI FPV3, etc.
4) Goggles: DJI Ground Unit, such as DJI G3, DJI G2, DJI N2, etc.
III. Specific Operations
Step 1: Confirm the VTX firmware is the latest version
Important
Before binding, ensure all devices have been upgraded to the latest firmware through DJI Assistant 2 (Consumer Series) tuning software.
Important
DJI Assistant 2 download link: https://www.dji.com/cn/o4-air-unit/downloads
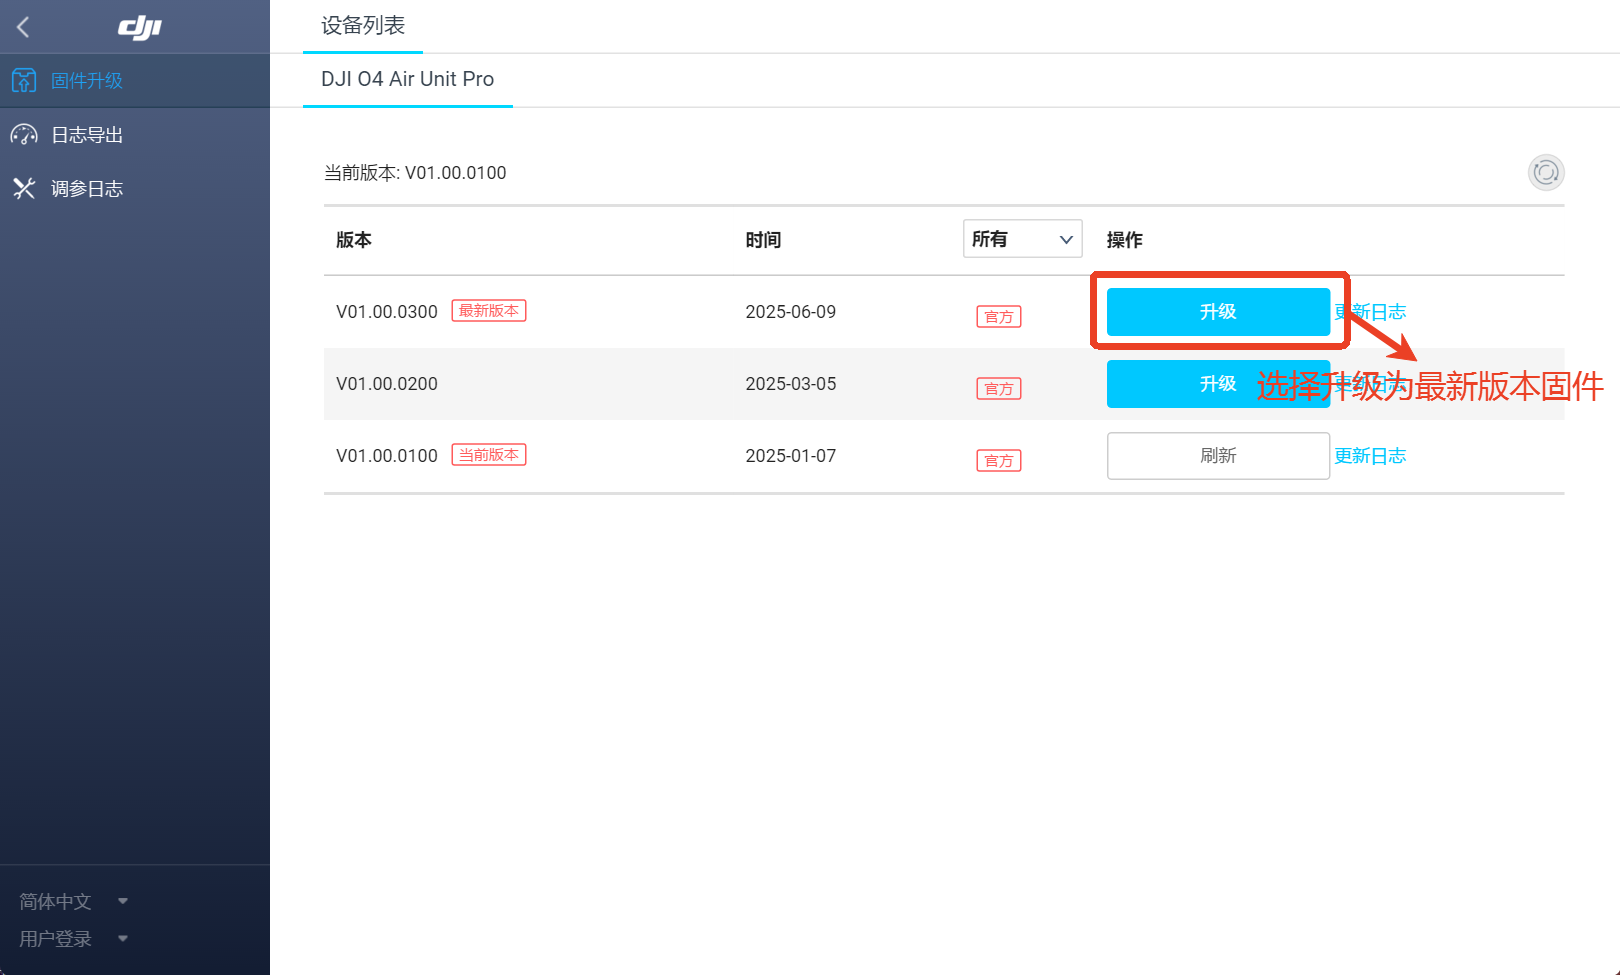
- Connect the VTX to the computer with a USB data cable, open DJI Assistant 2 and wait for device recognition
- Click to upgrade to the latest firmware version
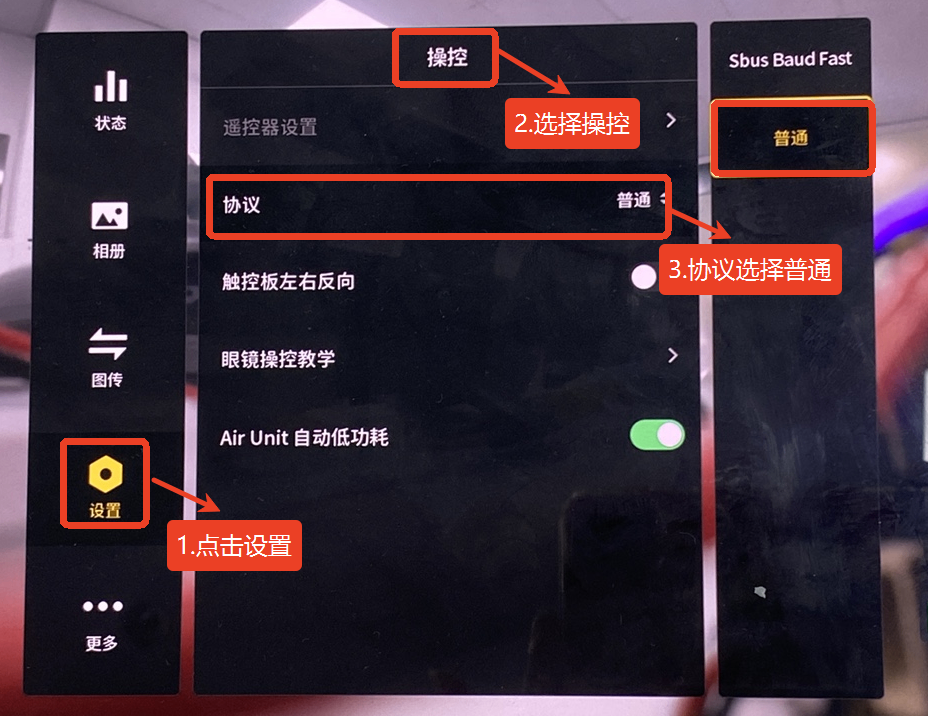
Step 2: Set related parameters - Power on the DJI Goggles, open the menu, and click on settings
- Select Control, and change the protocol to Normal
Important
ArduPilot firmware does not require the following settings; INAV firmware requires connecting to a ground control station to set parameters
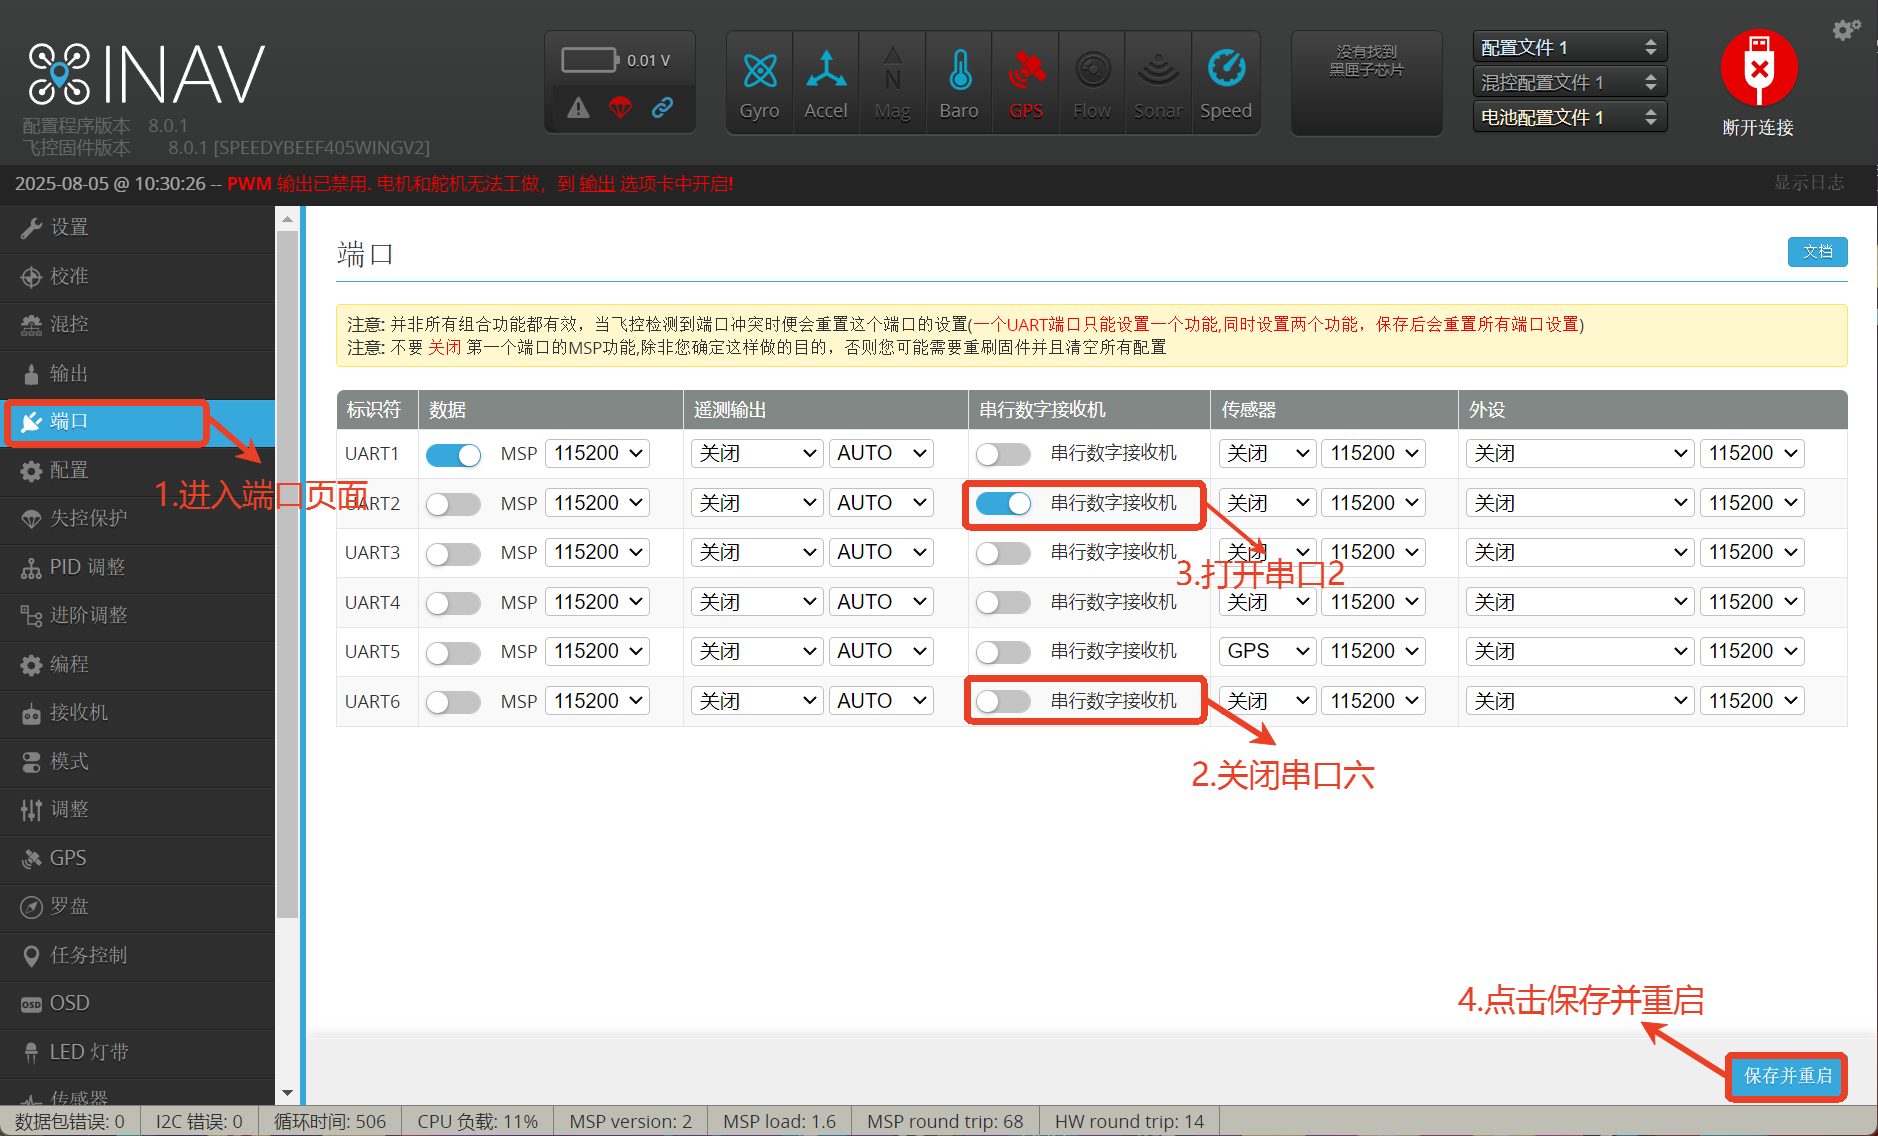
CoreWing F405 WING V2:
- Go to the Ports page, turn off Serial 6, turn on Serial 2
- Click Save and Restart
- Go to the Receiver page, and change the receiver protocol to
SBUS - Click Save and Restart
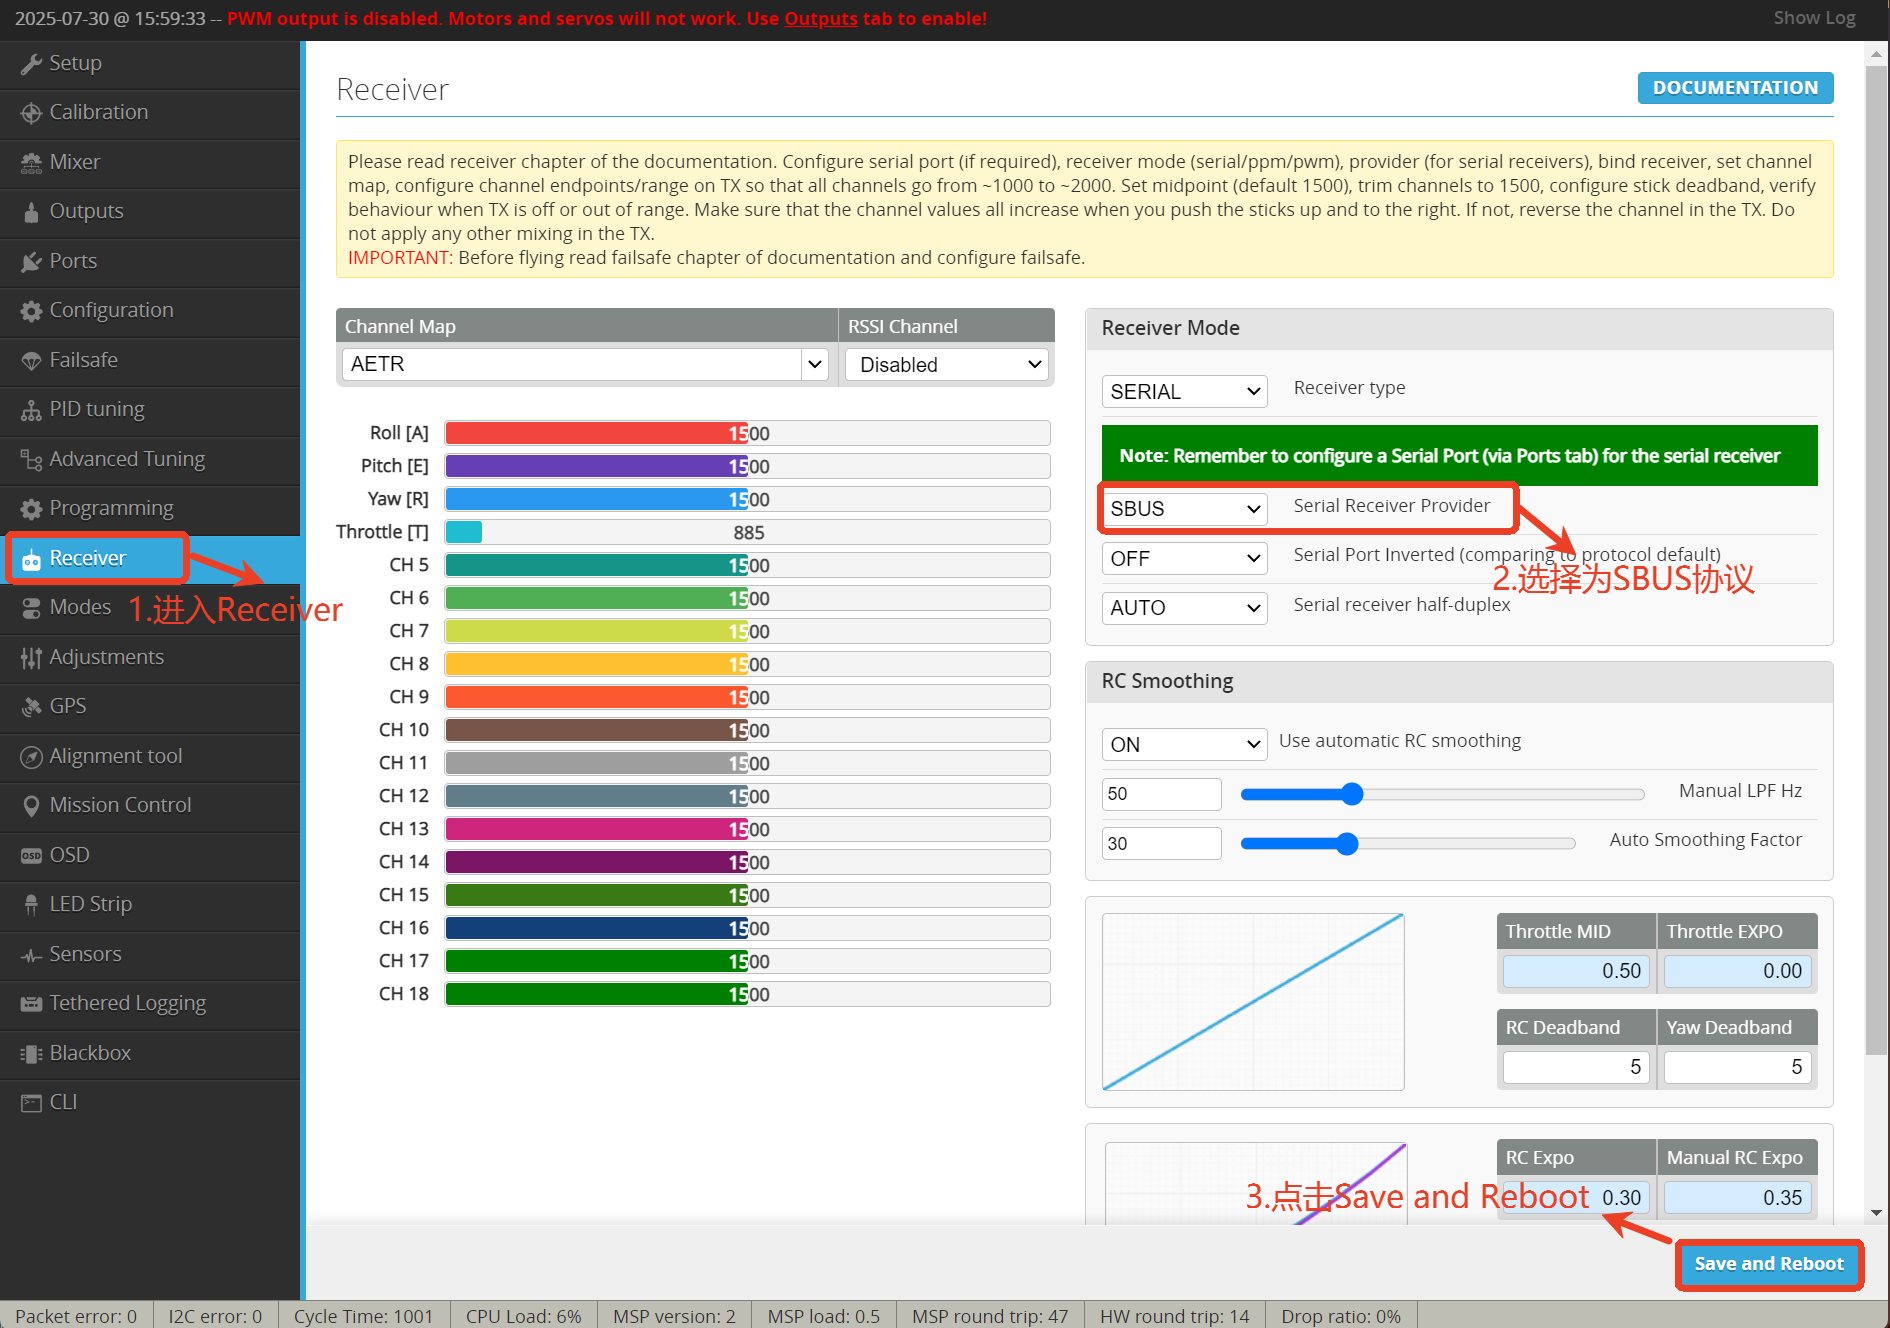
Important
Note: The goggles must be bound to the air unit first, otherwise the air unit cannot bind to the transmitter
Step 3: Bind DJI Goggles with DJI Air Unit
- Connect the VTX to the flight controller, and power on the flight controller and goggles
- Open the goggles menu, select Status, and click the top-right corner to switch to the air unit to be bound.
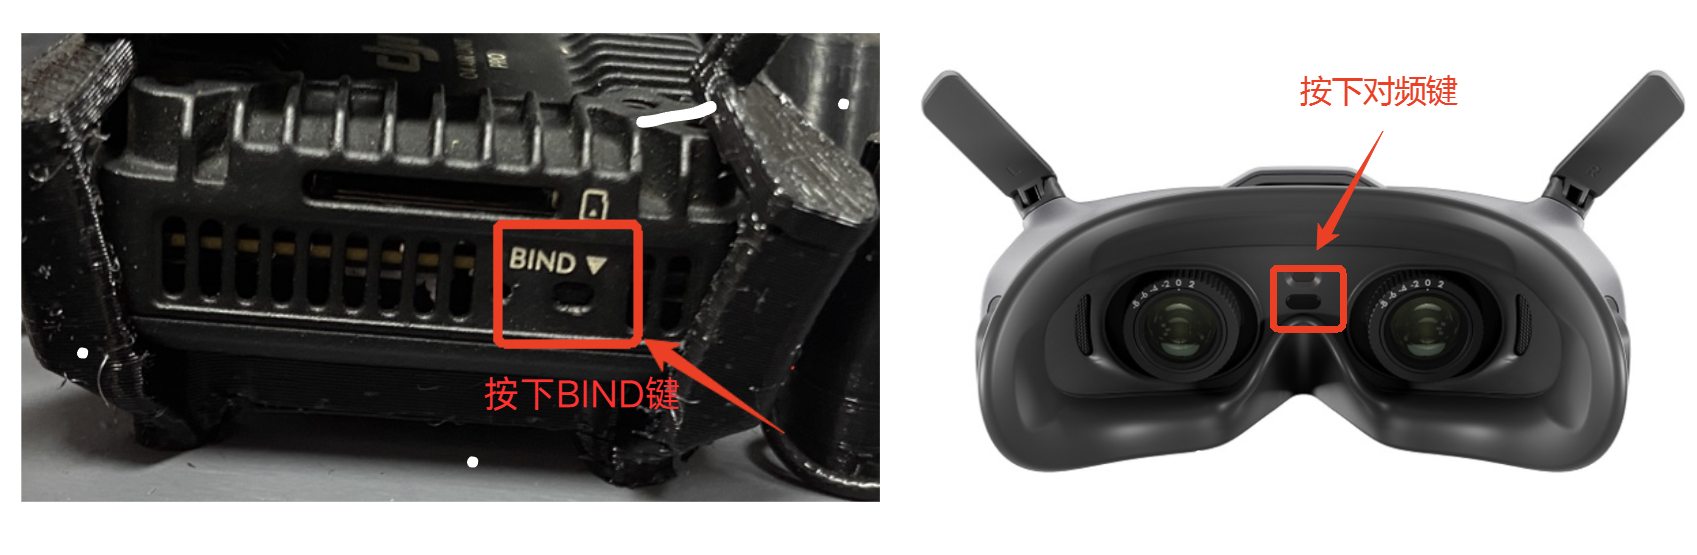
- Press the BIND button on the VTX until the red light flashes to enter binding mode
- Press the binding button on the goggles, which will emit a "beep-beep" sound to enter binding mode.
- Wait for the prompt sound to end, binding is successful.
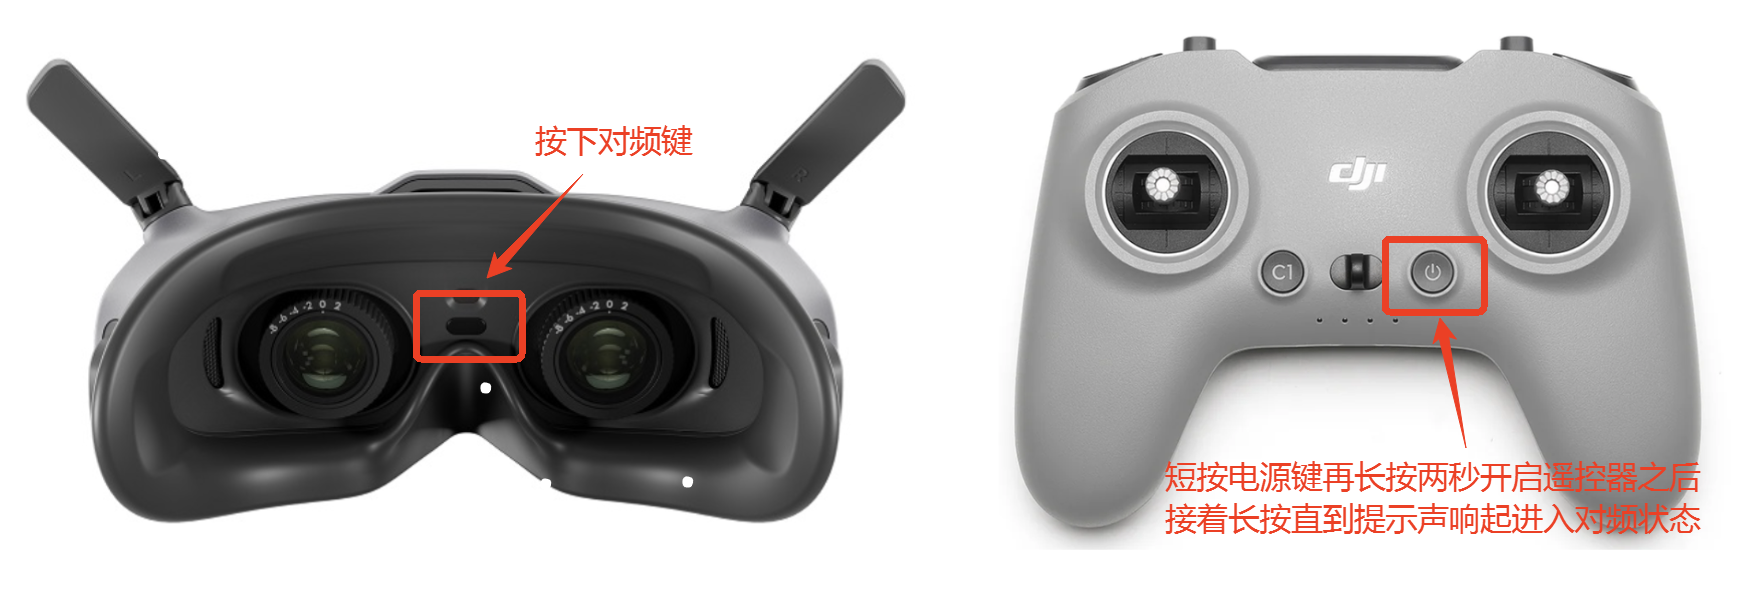
Step 4: Bind DJI Goggles with DJI FPV Transmitter - Press the transmitter power button once briefly, then press and hold for 2 seconds or more to turn on the transmitter.
- Press and hold the transmitter power button until a prompt sound is emitted, while the battery indicator light flashes cyclically to enter binding mode
- Press the DJI Goggles binding button, and wait for the goggles and transmitter to bind
- After successful binding, the transmitter battery indicator light displays the battery level, and the prompt sounds from the goggles and transmitter stop
Important
For video tutorial reference: https://www.bilibili.com/video/BV1Et411F7r9/?spm\_id\_from=333.1391.0.0&vd\_source=a19a8436f64276dca9c25373587681e6
Important
After successful binding, you can connect to the ground control station and move the transmitter sticks to confirm if there are any channel mapping changes
INAV ground control station channel mapping display:
MP ground control station channel mapping display: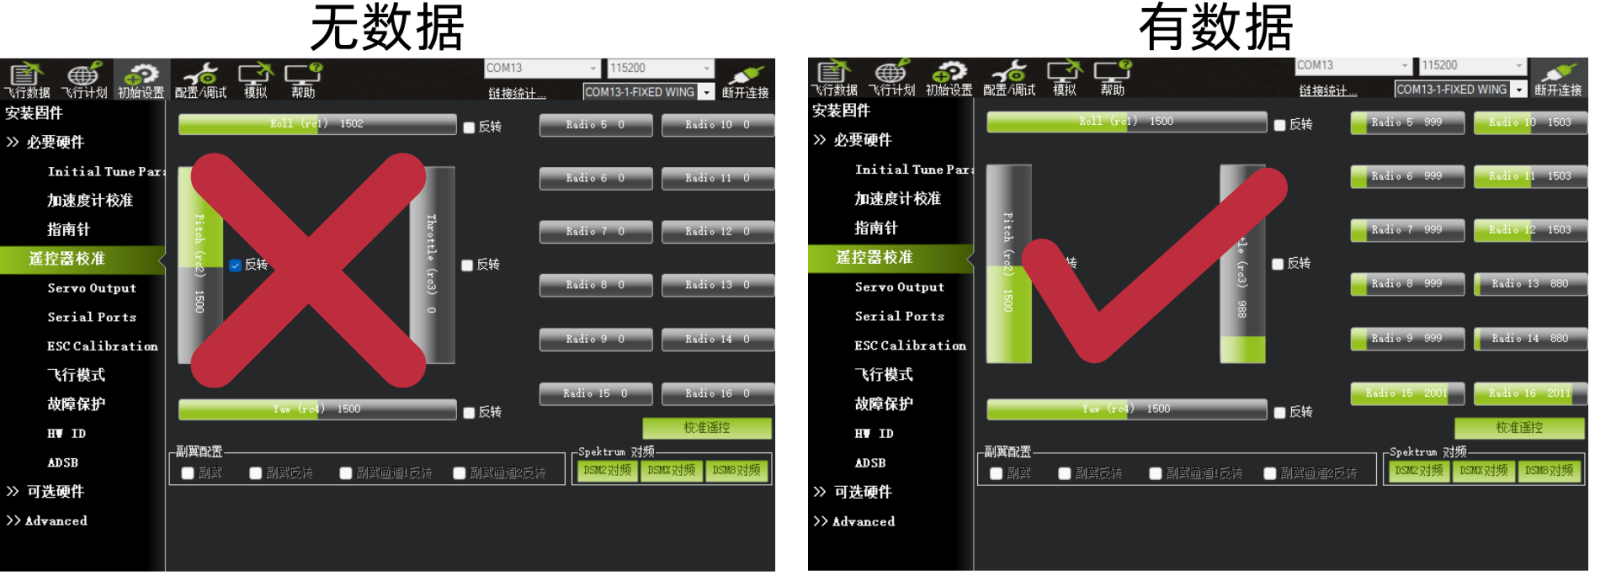
IV. Q&A
