
How to Configure the Battery Indicator on Wireless Board PRO
I. Principle
To provide users with a more intuitive understanding of the current battery status of the flight controller system, the CoreWing F405 WING V2 wireless USB expansion board features a completely upgraded battery indicator system. This system offers higher accuracy and faster response speed, capable of reflecting battery voltage changes in real time.
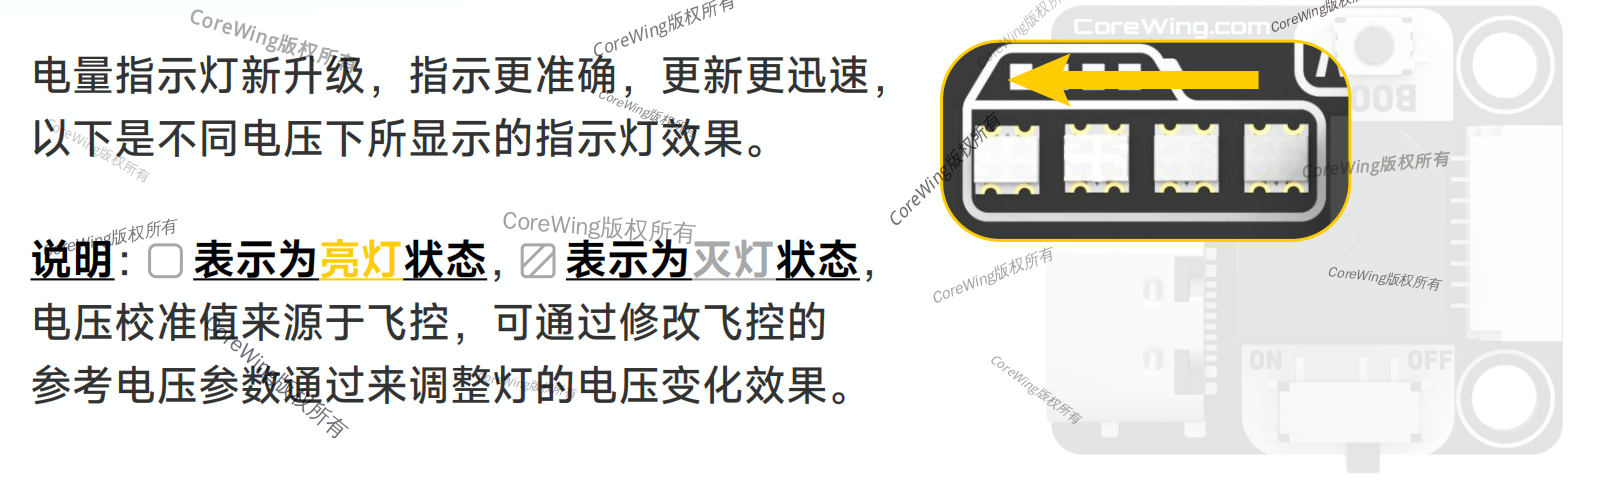
The voltage calibration reference values come from the flight controller, and the battery indicator display can be precisely adjusted by modifying the voltage-related parameters of the flight controller.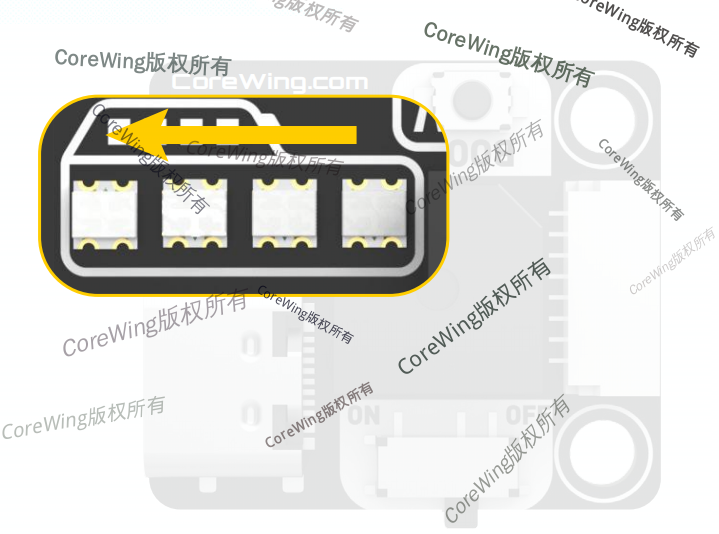
II. Device Preparation
1) Flight Controller: CoreWing F405 WING V2
2) Battery
III. Specific Operations
Important
INAV firmware supports high-voltage cell recognition, while ArduPilot firmware does not support high-voltage cell recognition.
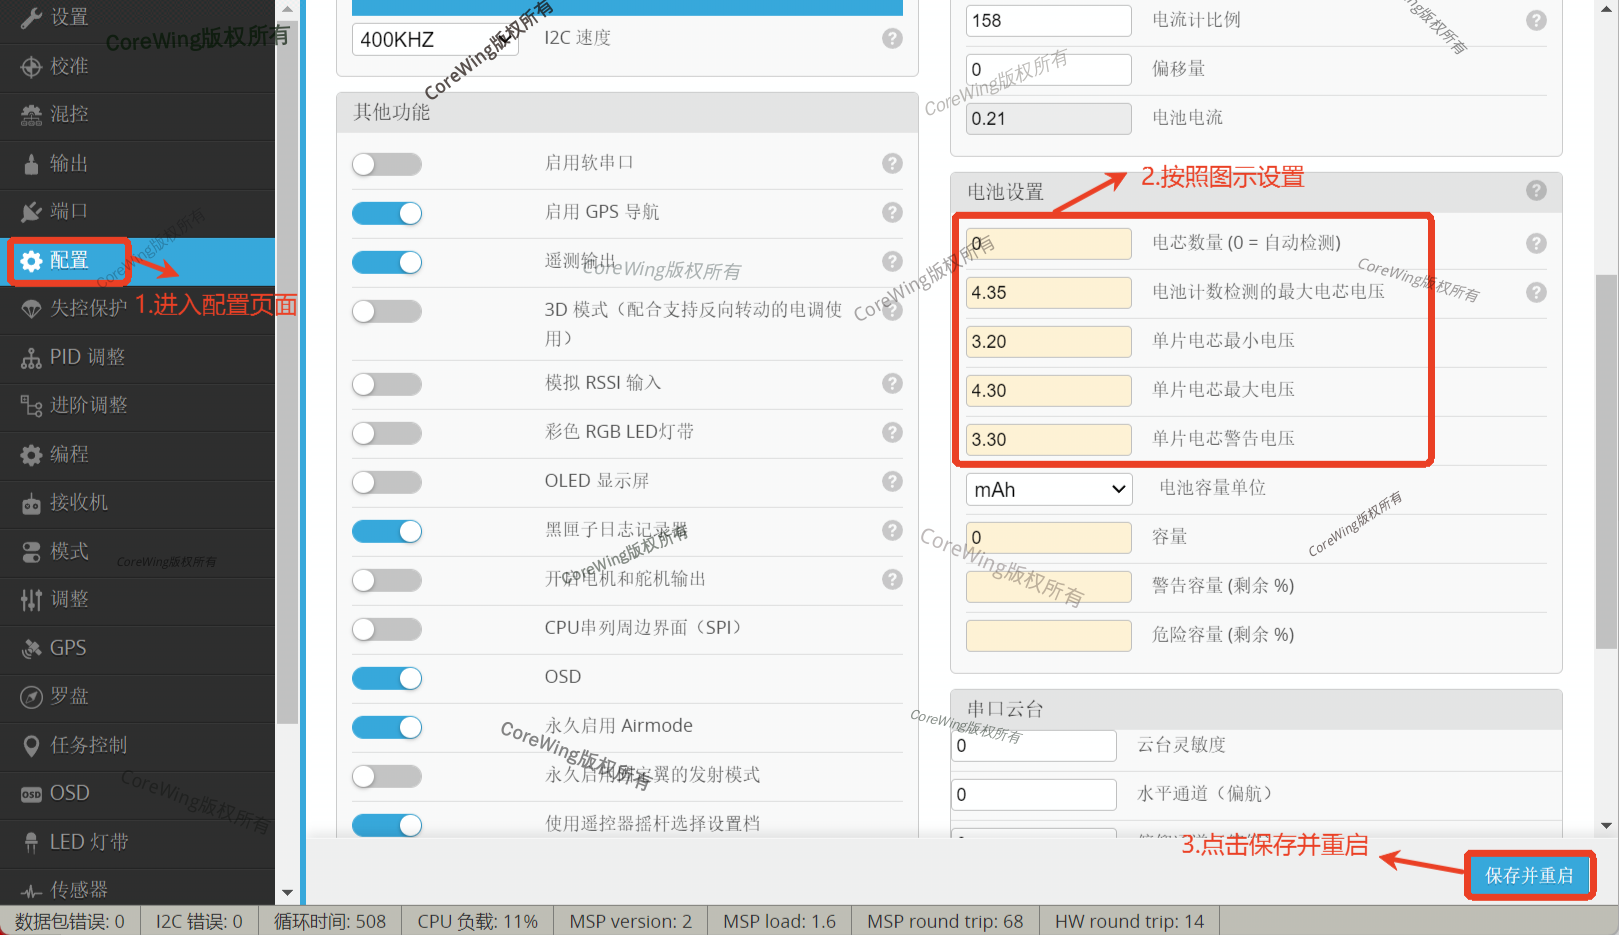
When using high-voltage cells to power the flight controller, the following parameters need to be set in the INAV ground control station (GCS):
- Connect the flight controller to the INAV ground control station
- Click to enter Configuration
- Configure according to the red box in the image below
- Click Save and Restart
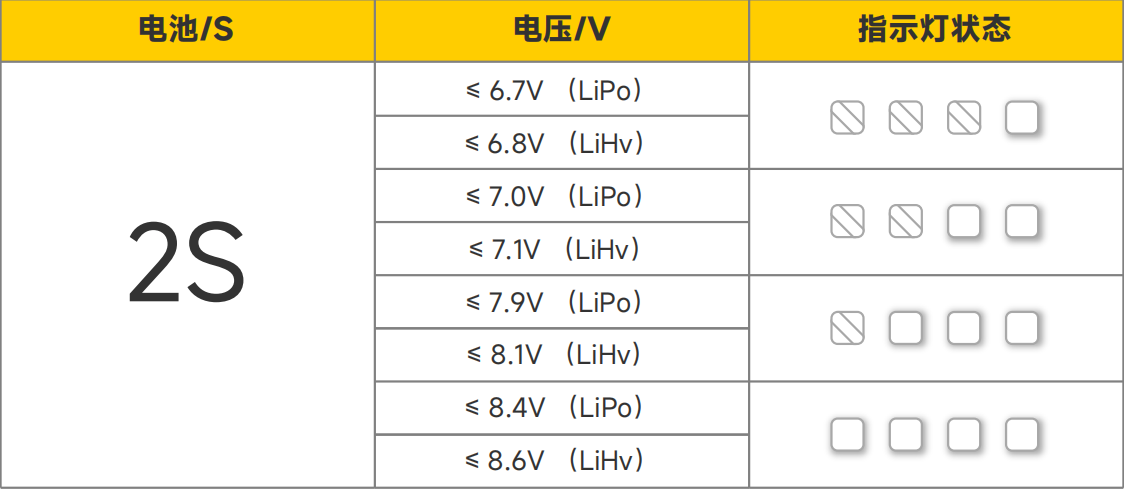
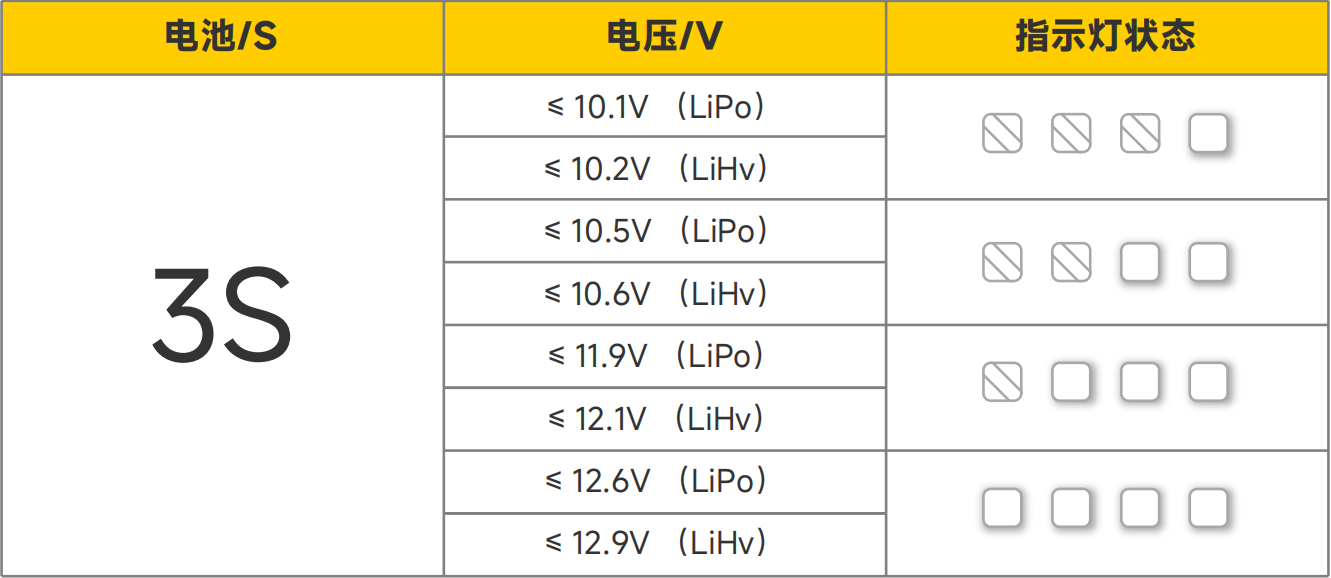
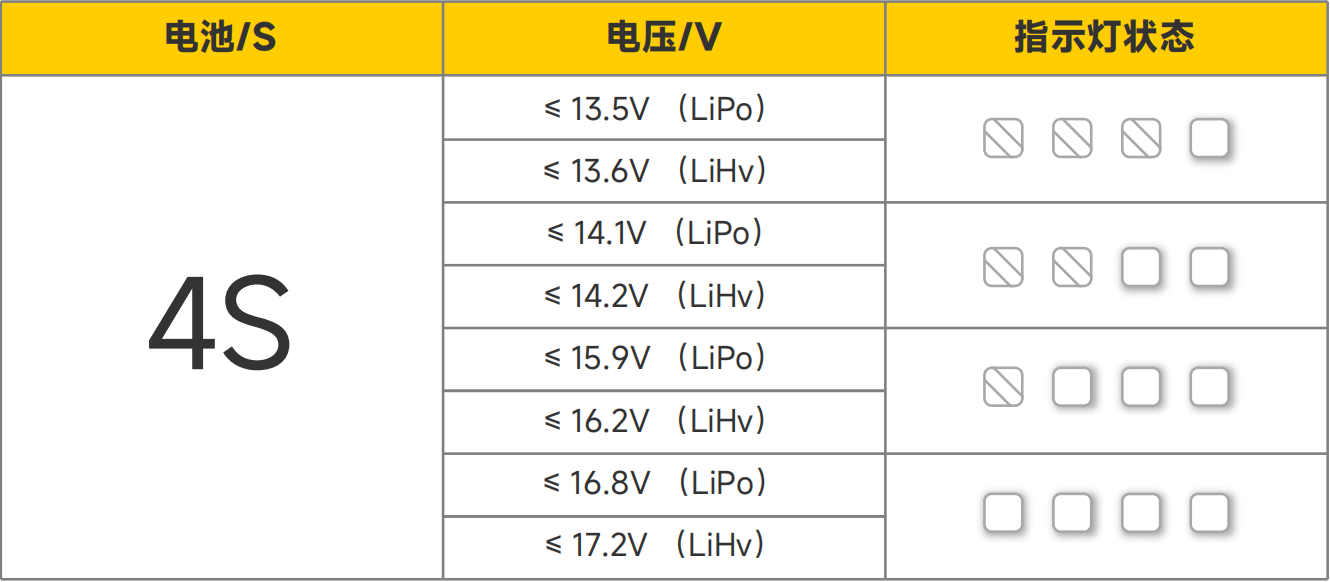
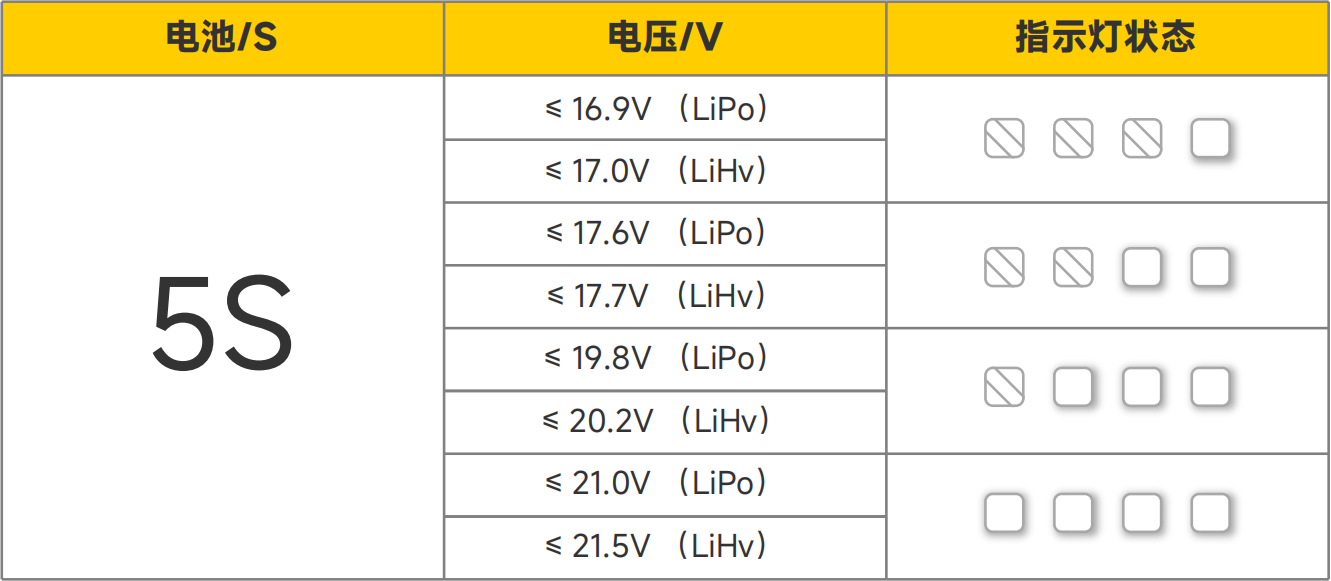
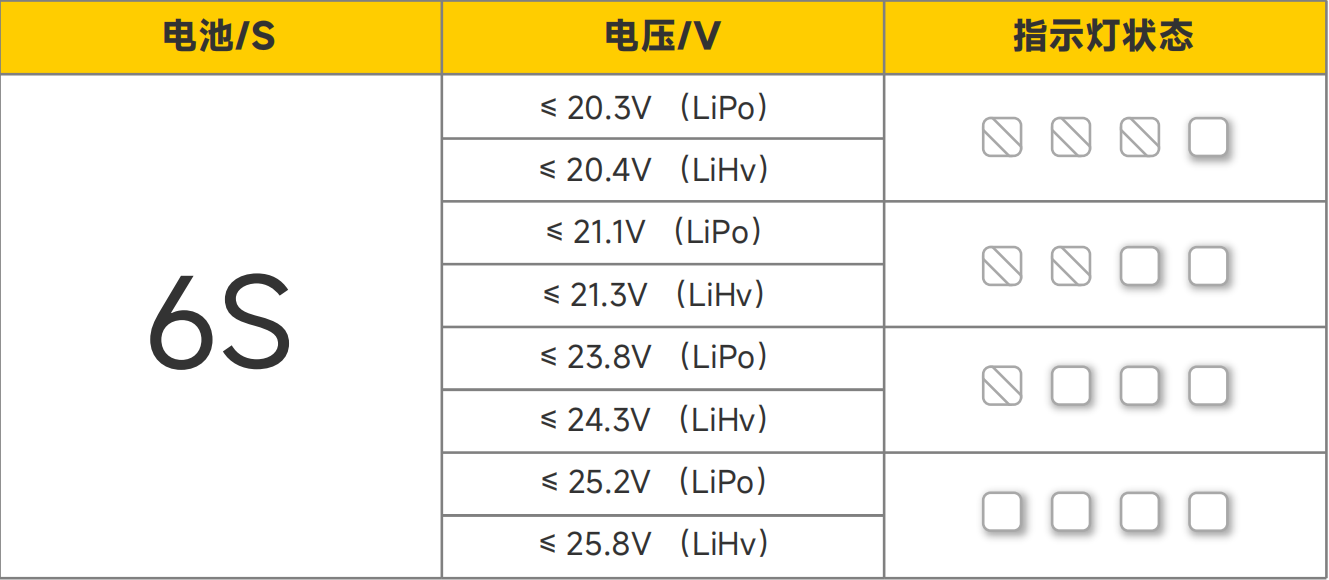
Other Battery Indicator States
Important
When the flight controller is not powered by a battery or the battery level is too low, the battery indicator light will continue to flash.

Important
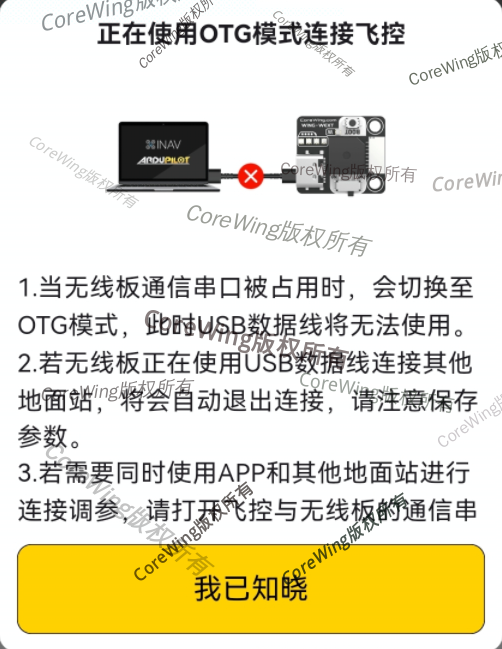
If the communication serial port between the flight controller and the wireless board is occupied by other peripherals, the battery indicator light on the wireless board will continuously display in a flowing light pattern. You can try connecting to the wireless board using the SpeedyBee APP and switch to OTG mode, at which point the battery indicator light will return to normal display showing the current battery status.
IV. Q&A
