
ELRS MAVLink Telemetry Mode - ArduPilot Firmware
I. MAVLink Mode Working Principle
1.1 Data Link Architecture
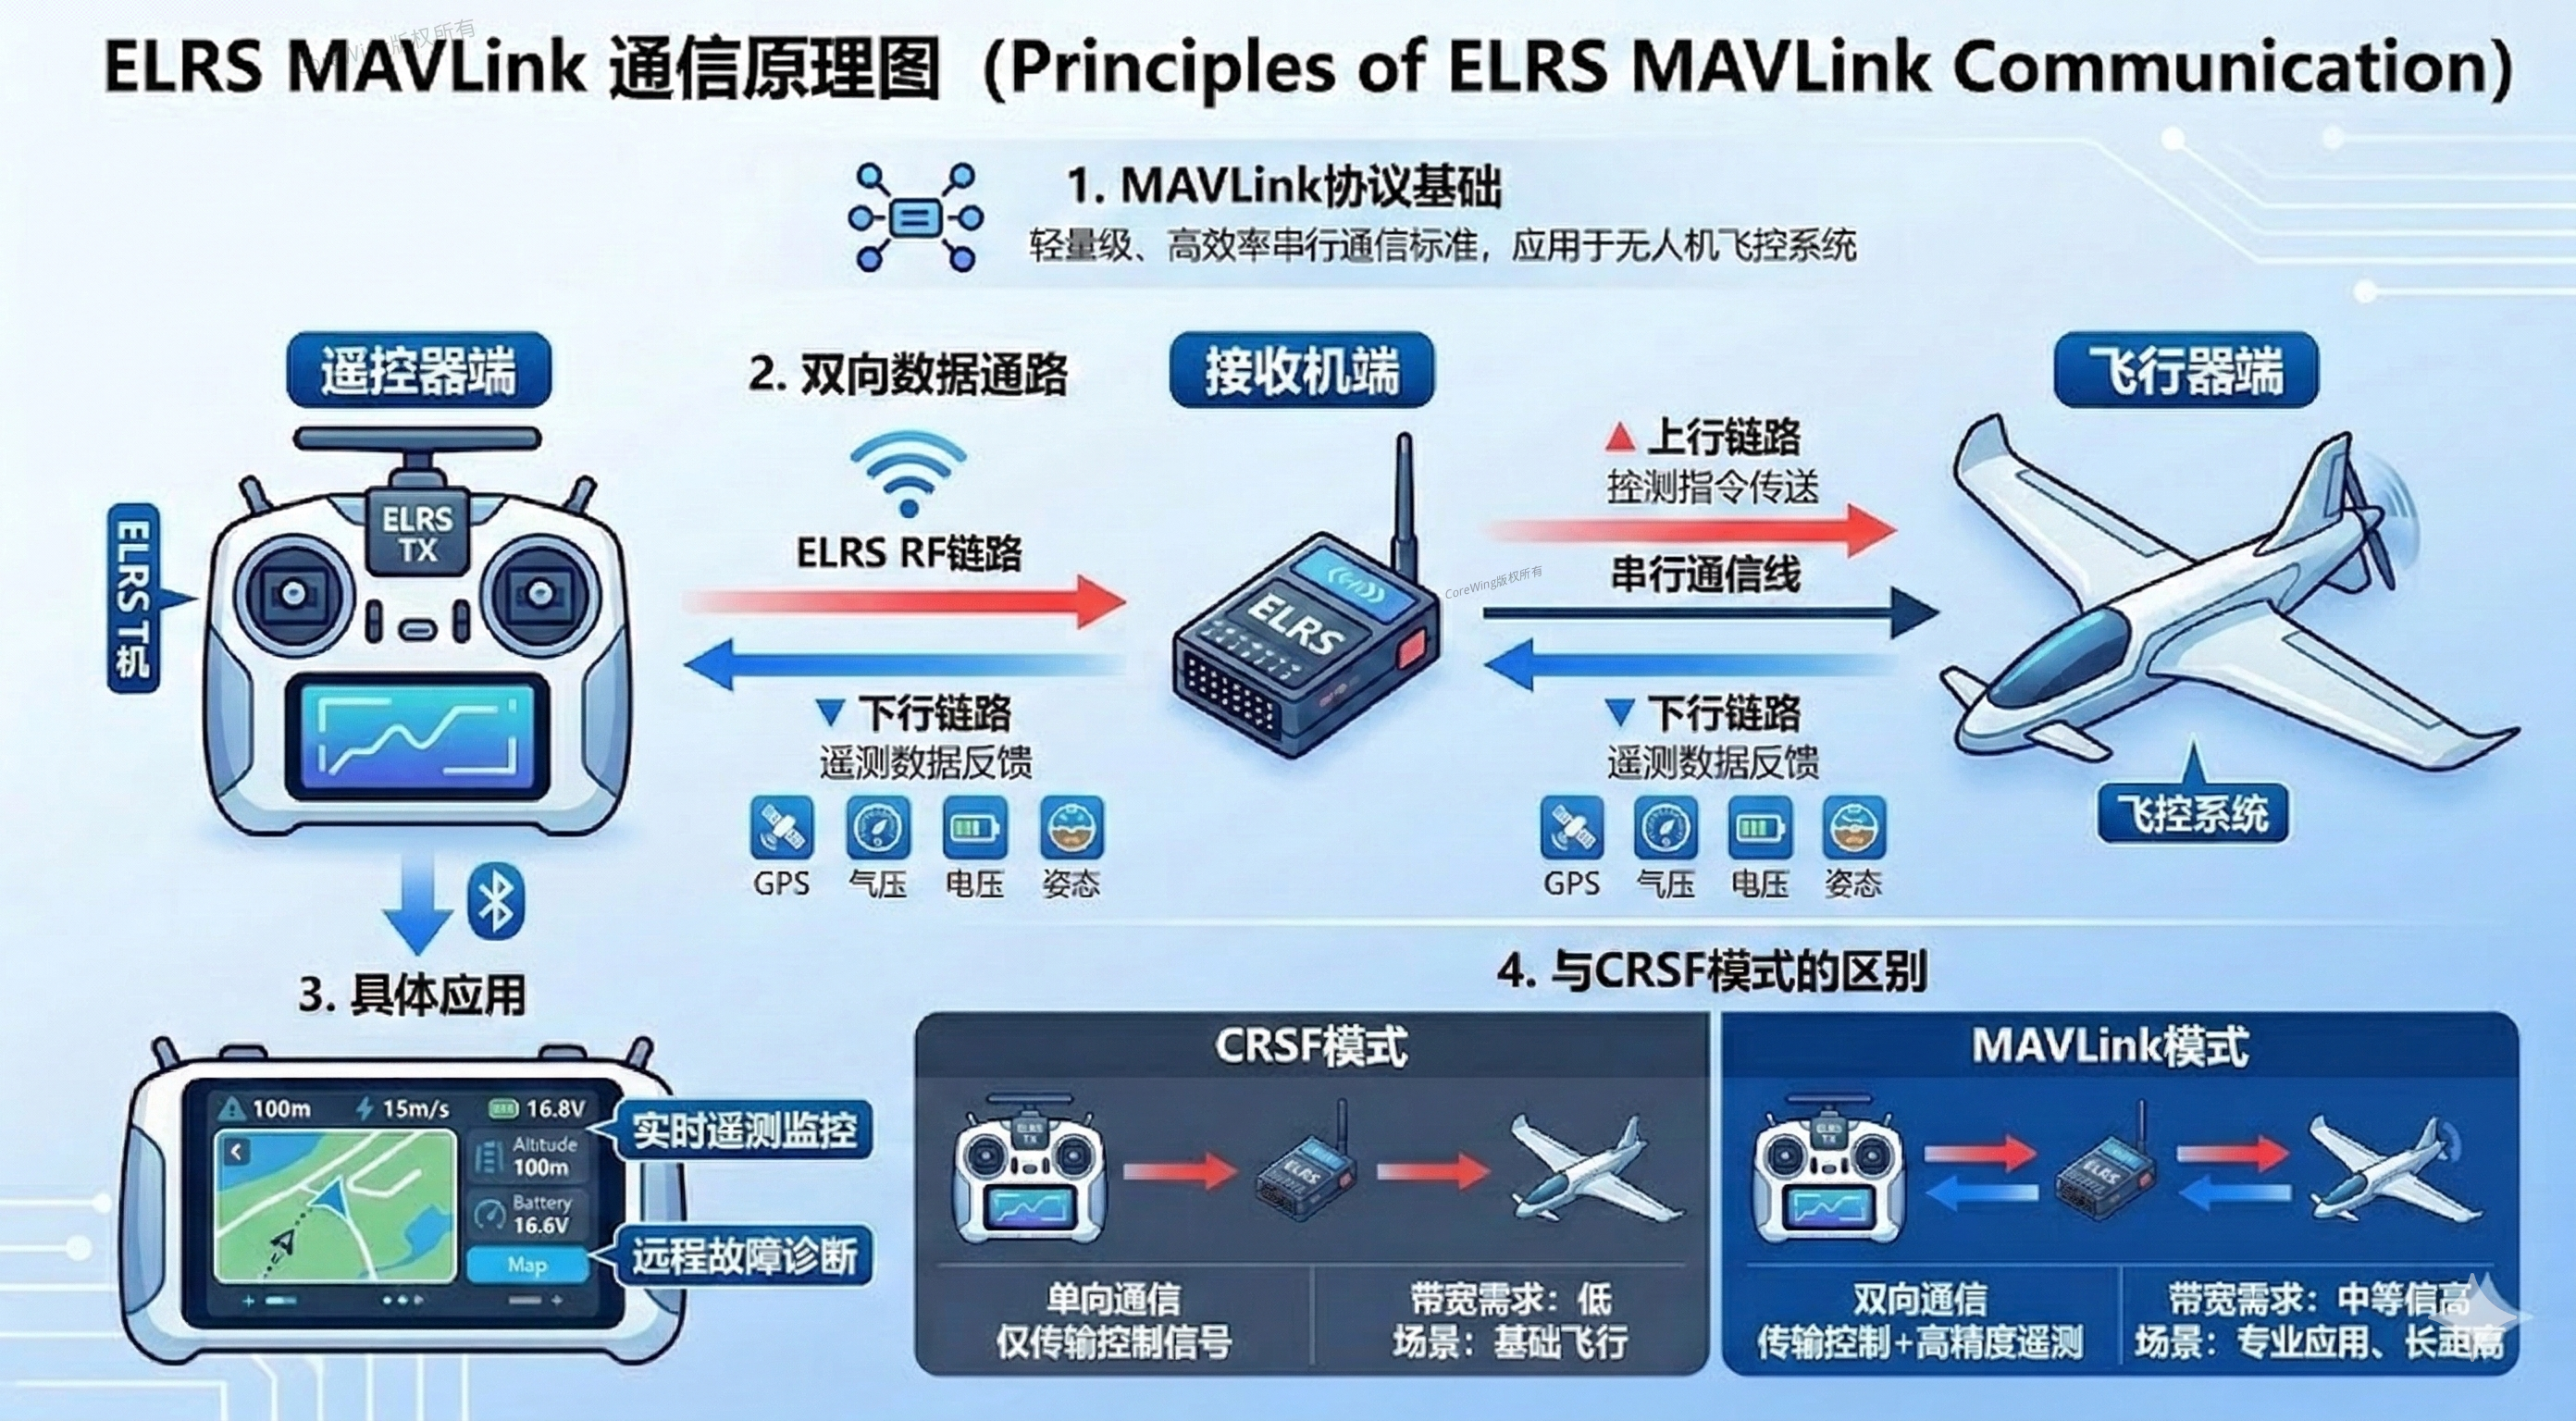
After enabling MAVLink functionality, the system establishes a complete bidirectional communication link:
Downlink (Telemetry): The aircraft sends data such as GPS position, barometric altitude, battery voltage, and attitude angles back to the RC transmitter through the receiver.
Uplink (Control): The RC transmitter's channel commands are sent to the aircraft through the receiver.
1.2 MAVLink vs CRSF Mode Comparison
| Feature | CRSF Mode | MAVLink Mode |
|---|---|---|
| Communication Direction | Unidirectional (Transmitter → Aircraft) | Bidirectional (Transmitter ↔ Aircraft) |
| Transmission Content | Control signals + limited telemetry | Control signals + telemetry data |
| Bandwidth Requirements | Low | Medium to High |
| Typical Applications | Basic flight control | Long-range flight, mission planning, real-time monitoring |
1.3 Practical Application Scenarios
- Real-time Monitoring: RC transmitter screen displays aircraft position, altitude, battery level, speed, and other key data
- Remote Diagnostics: Analyze aircraft status through telemetry data to quickly locate faults
- Ground Station Connection: Use with ground control stations (GCS) like MissionPlanner for mission planning and flight monitoring
II. Equipment List
2.1 Flight Controller
- CoreWing F405 WING V2
2.2 Wireless Communication Modules
- Transmitter: Sirius 2.4G ELRS
- Receiver: SkyGuy Nano 2G4 RX
2.3 RC Transmitter
- Recommended: RadioMaster TX16S
- Compatible: Other RC transmitters supporting the CRSF protocol
III. Basic Transmitter Settings
3.1 Enable External Transmitter
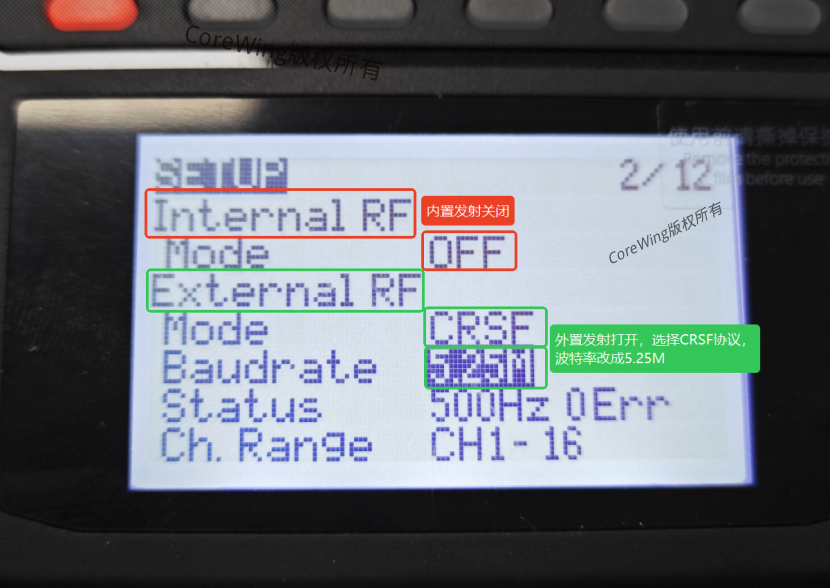
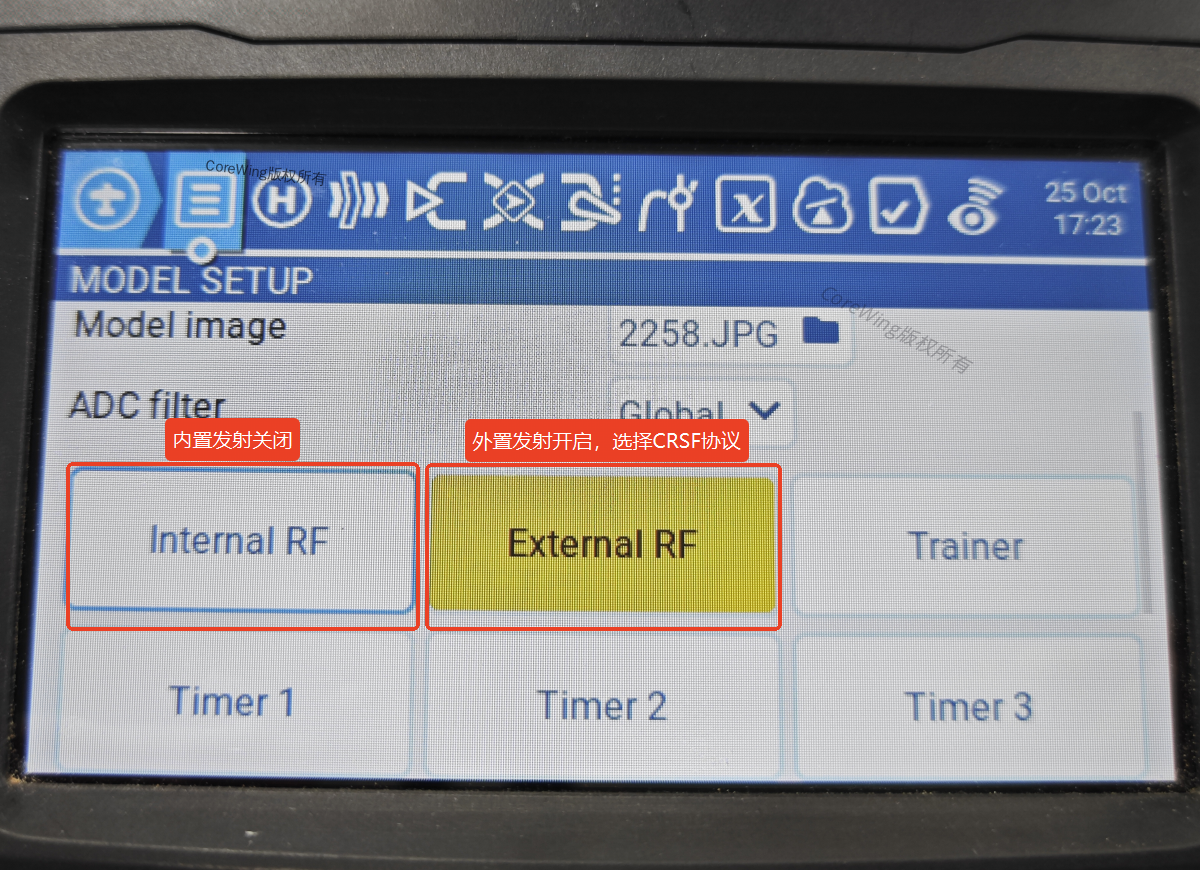
- Enter the model settings menu and find the "SETUP" page
- Turn off "Internal RF Mode"
- Turn on "External RF Mode"
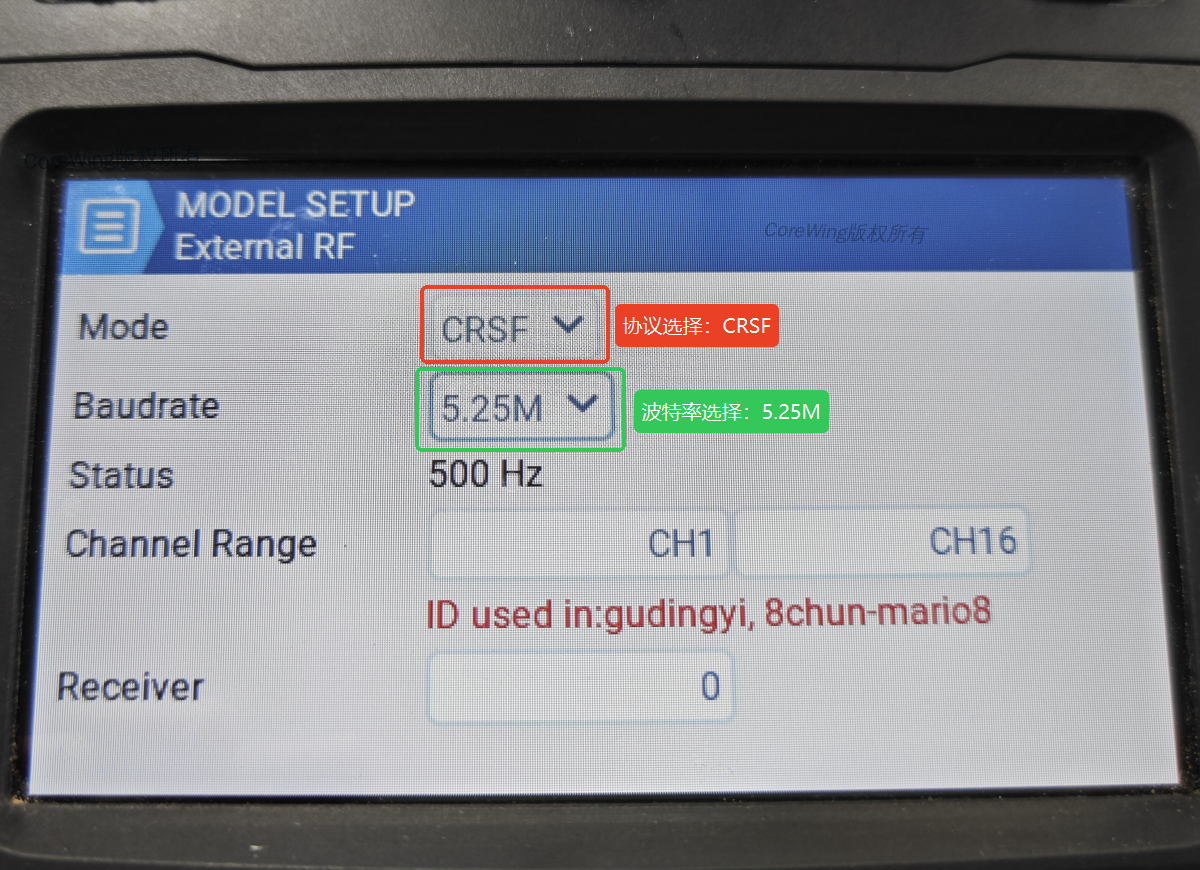
- Set "Mode" to
CRSFand "Baudrate" to1.87M
3.2 Settings Reference
Black and White Screen Transmitter:
Color Screen Transmitter:
3.3 Transmitter and Receiver Binding
Important
For transmitter and receiver binding tutorials, refer to: How to bind ELRS Transmitter/Transmitter with Receiver
IV. Firmware Upgrade
Important Note
Before using MAVLink mode, the following firmware must be upgraded to the specified versions:
Transmitter Firmware: ≥ 3.5.6 (factory default)
Receiver Firmware: ≥ 3.5.6 (factory default)
Backpack Firmware: ≥ CW 1.5.4 (CoreWing customized version)
All firmware can be upgraded through the CoreWing APP.
For information on how to update the ELRS firmware for the Sirius transmitter and SkyGuy receiver using the CoreWing APP, please refer to the following article:
V. MAVLink Mode Parameter Configuration
Note
When configuring transmitter parameters, ensure the receiver is powered off to avoid configuration issues.
5.1 Transmitter Parameter Settings
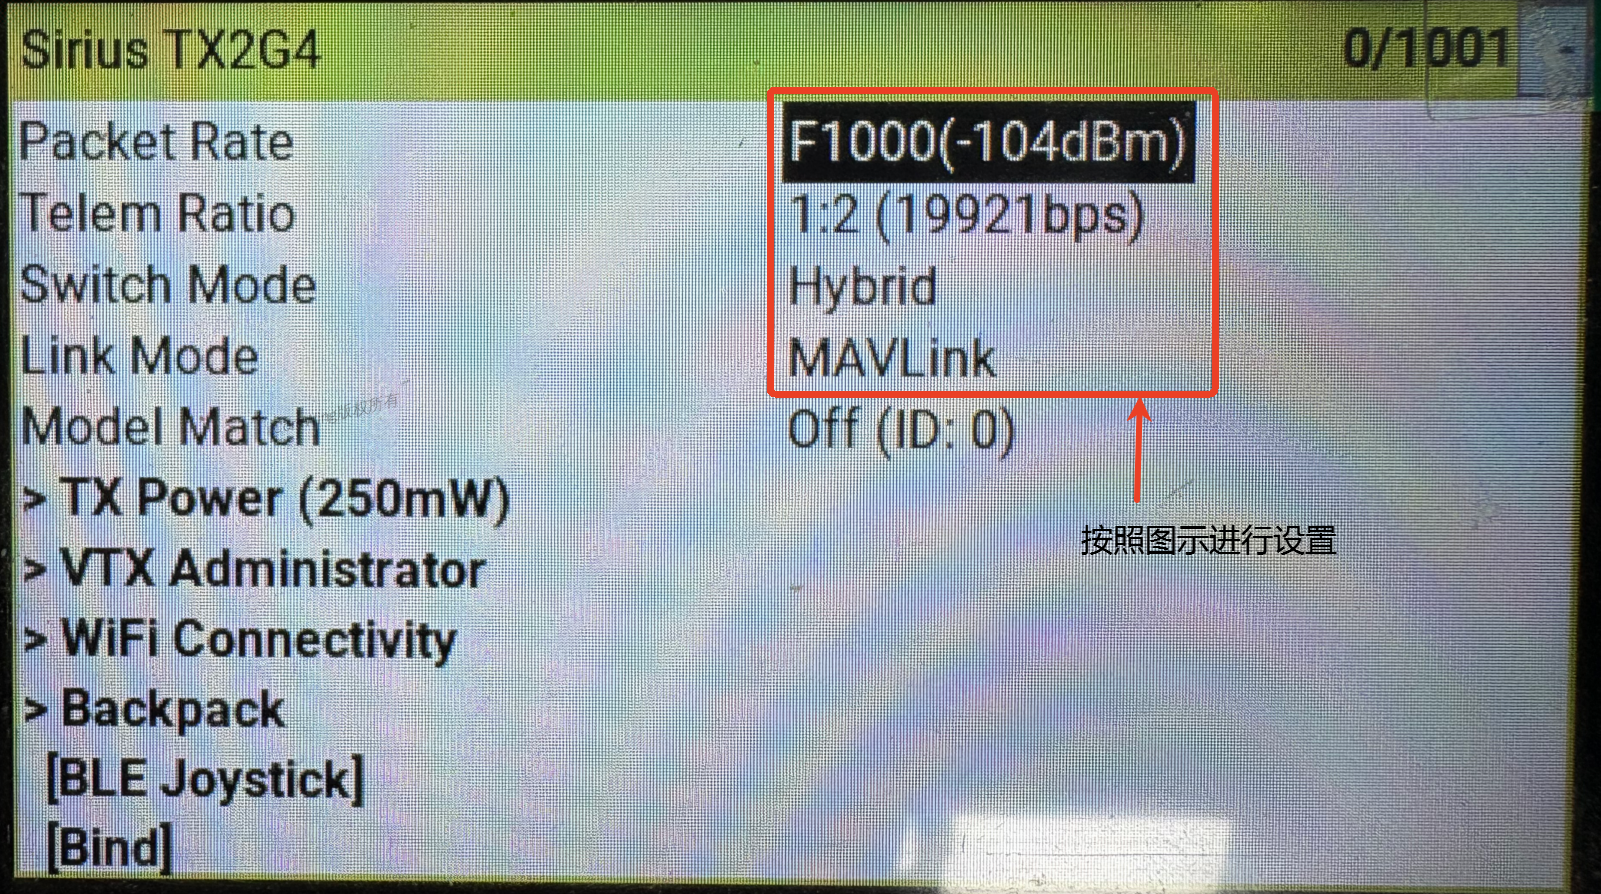
In the RC transmitter's ExpressLRS script page, configure according to the following table:
| Configuration Item | Setting Value | Description |
|---|---|---|
| Data Rate | F1000 | Frequency 1000Hz, sensitivity -104dBm |
| Telemetry Ratio | 1:2 | Ratio mode, rate 19921bps |
| Mode Switch | Hybrid | Hybrid mode |
| Link Mode | MAVLink | Telemetry protocol |
5.2 Receiver Parameter Settings
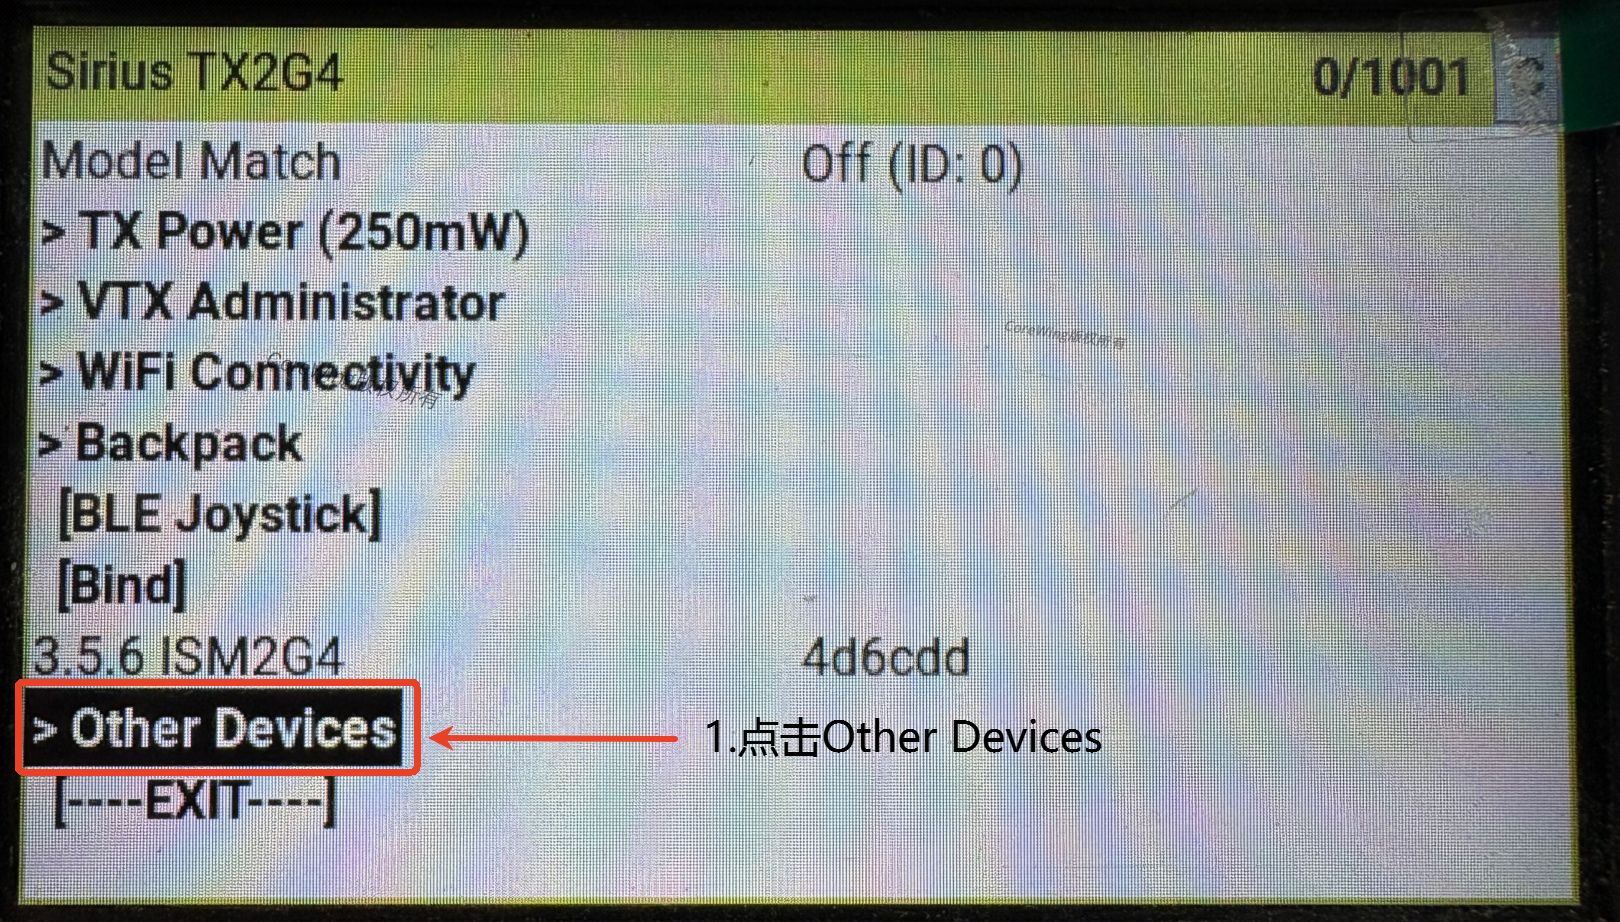
- Enter the ExpressLRS script on the RC transmitter → Select Other Devices
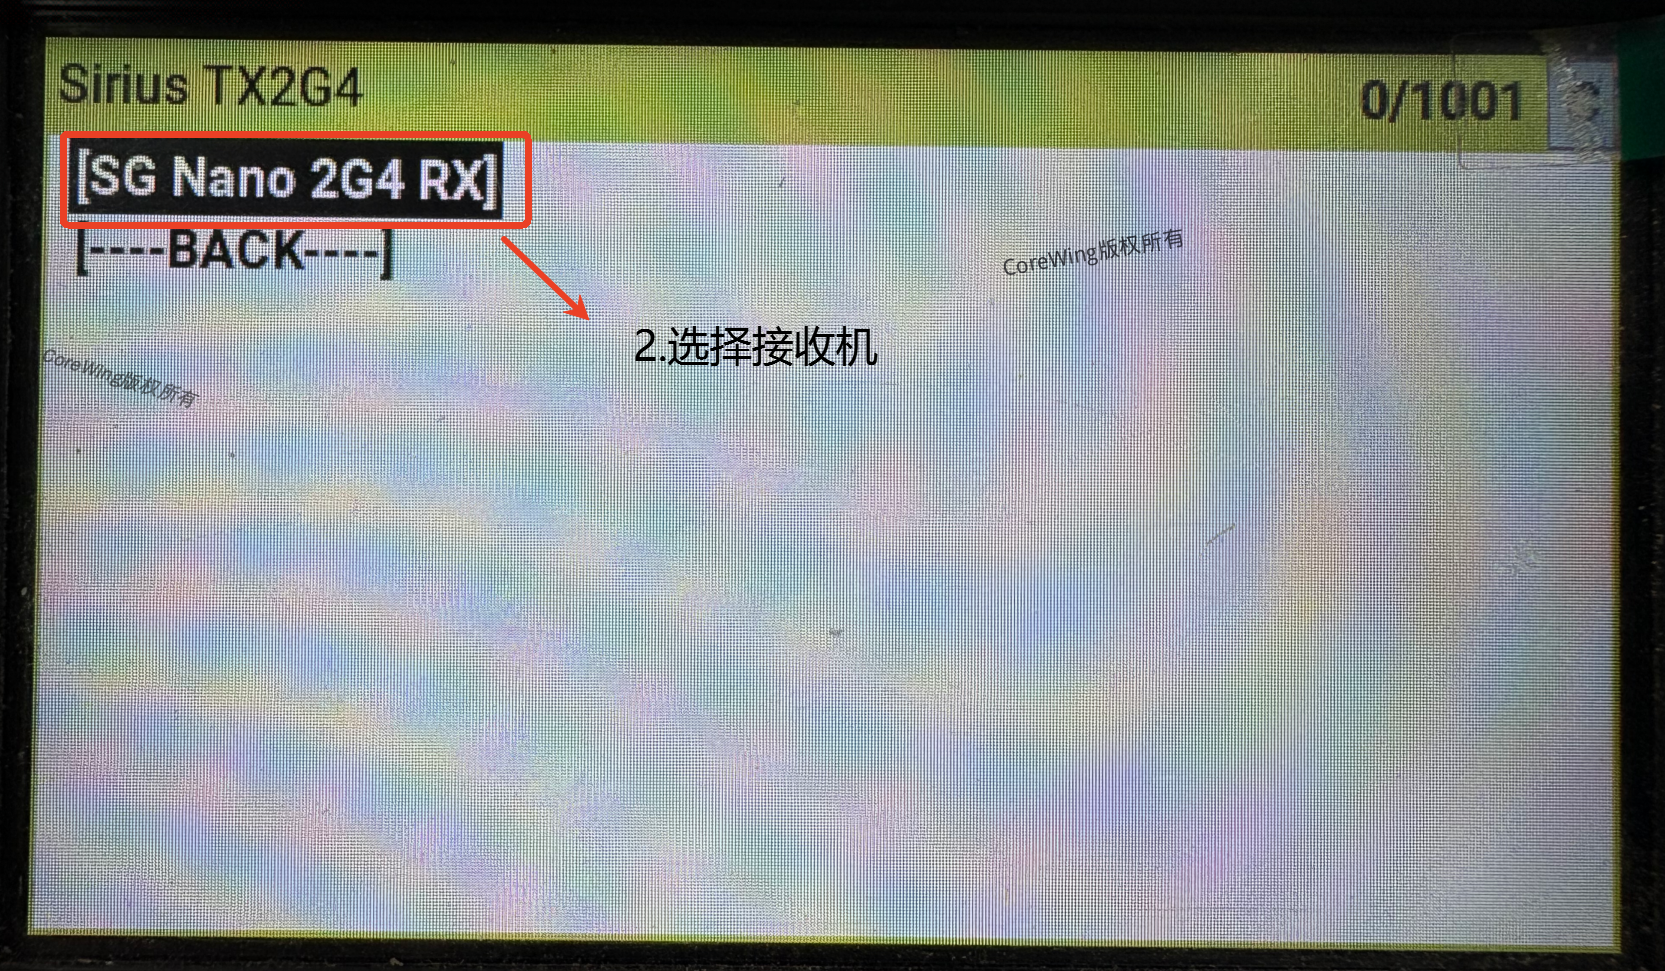
- Select the SG Nano 2G4 RX receiver
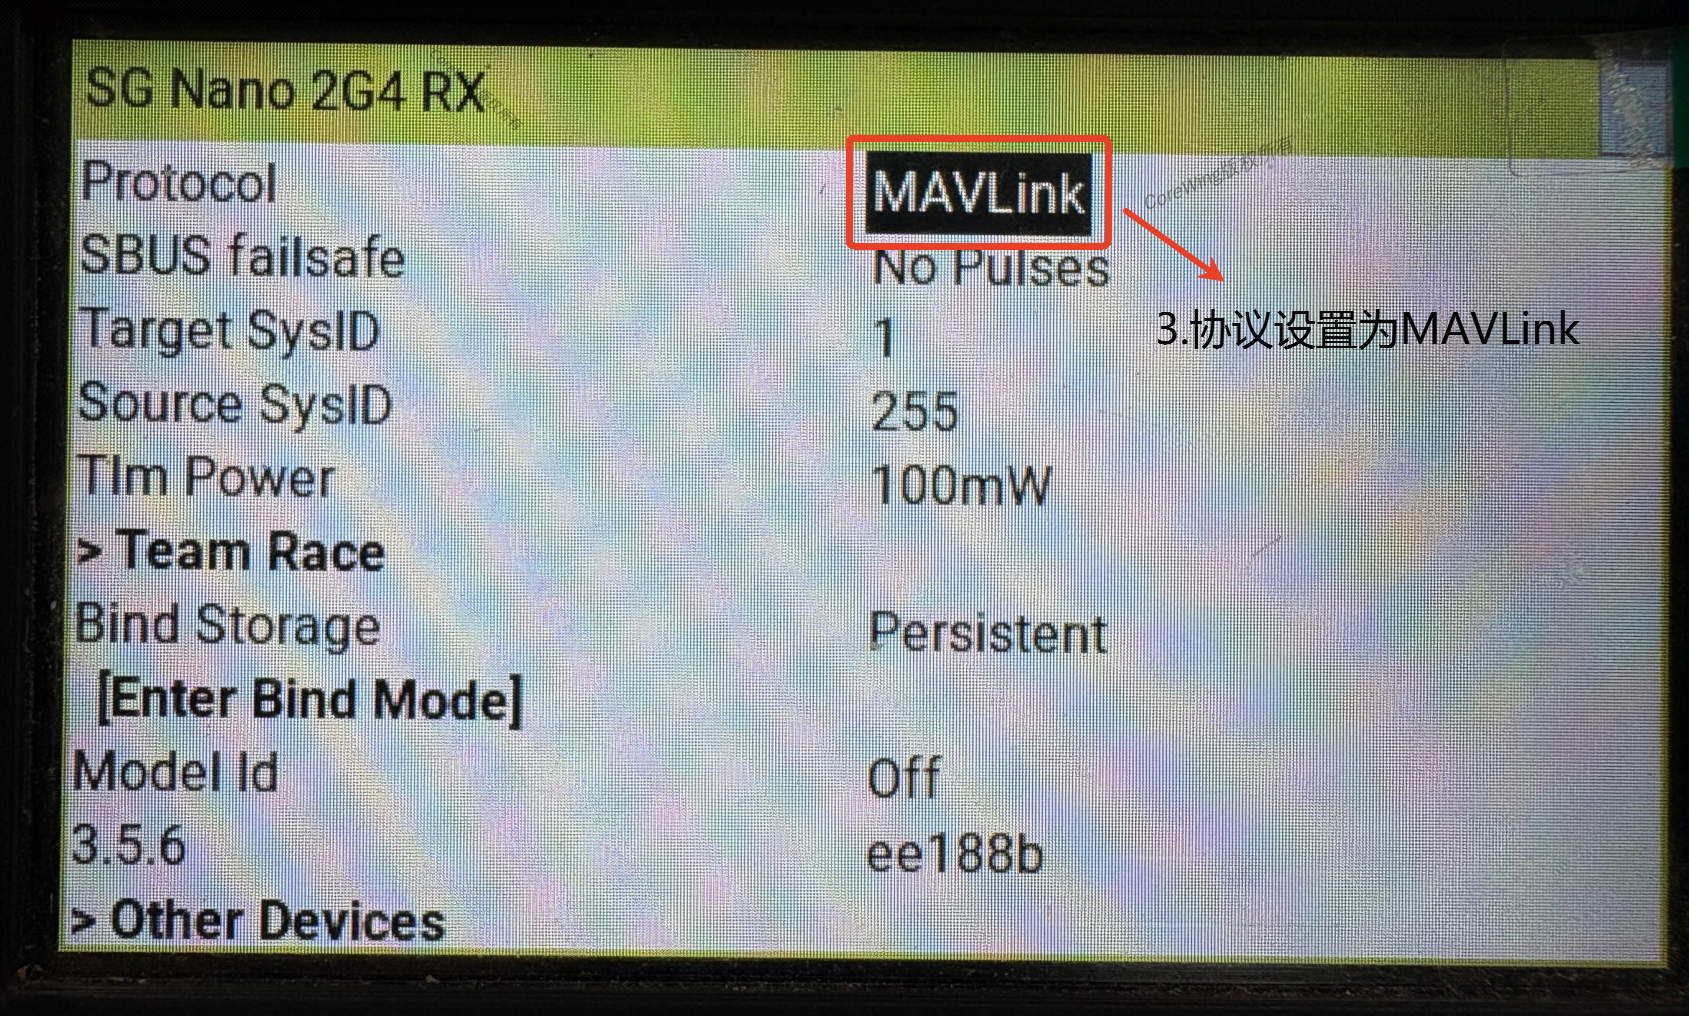
- Set the receiver protocol to
MAVLINK, keep other parameters default
VI. Flight Controller Configuration
6.1 Hardware Connection
UART Selection Note
CoreWing Flight Controller Receiver Connection:
Must be connected to UART6
Reason: UART6 has built-in DMA support and can stably run at 460800bps high baud rate
⚠️ Note: Other UARTs (like UART4) are hardware compatible but lack DMA support, so MAVLink communication will not work properly.
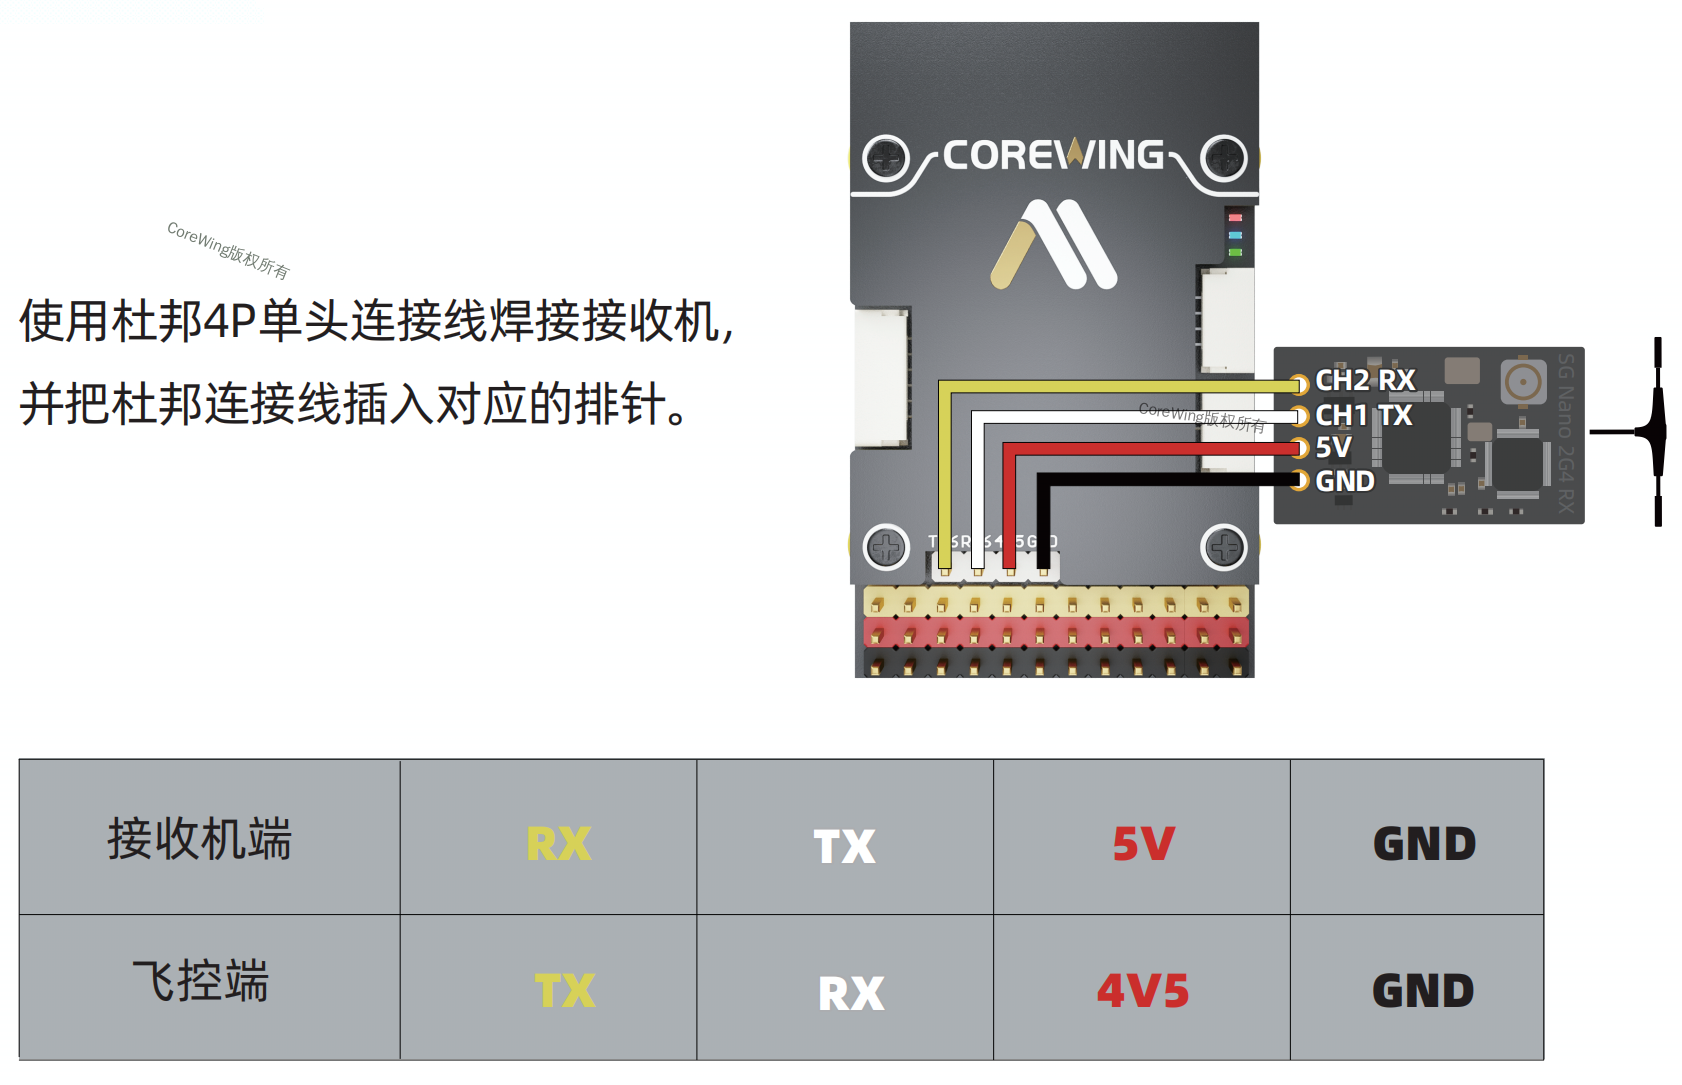
6.2 Flight Controller Parameter Settings
Method 1: One-Click Configuration (Recommended)
- Open CoreWing APP → Connect to flight controller → Enter the RC Transmitter Calibration page
- Click Receiver
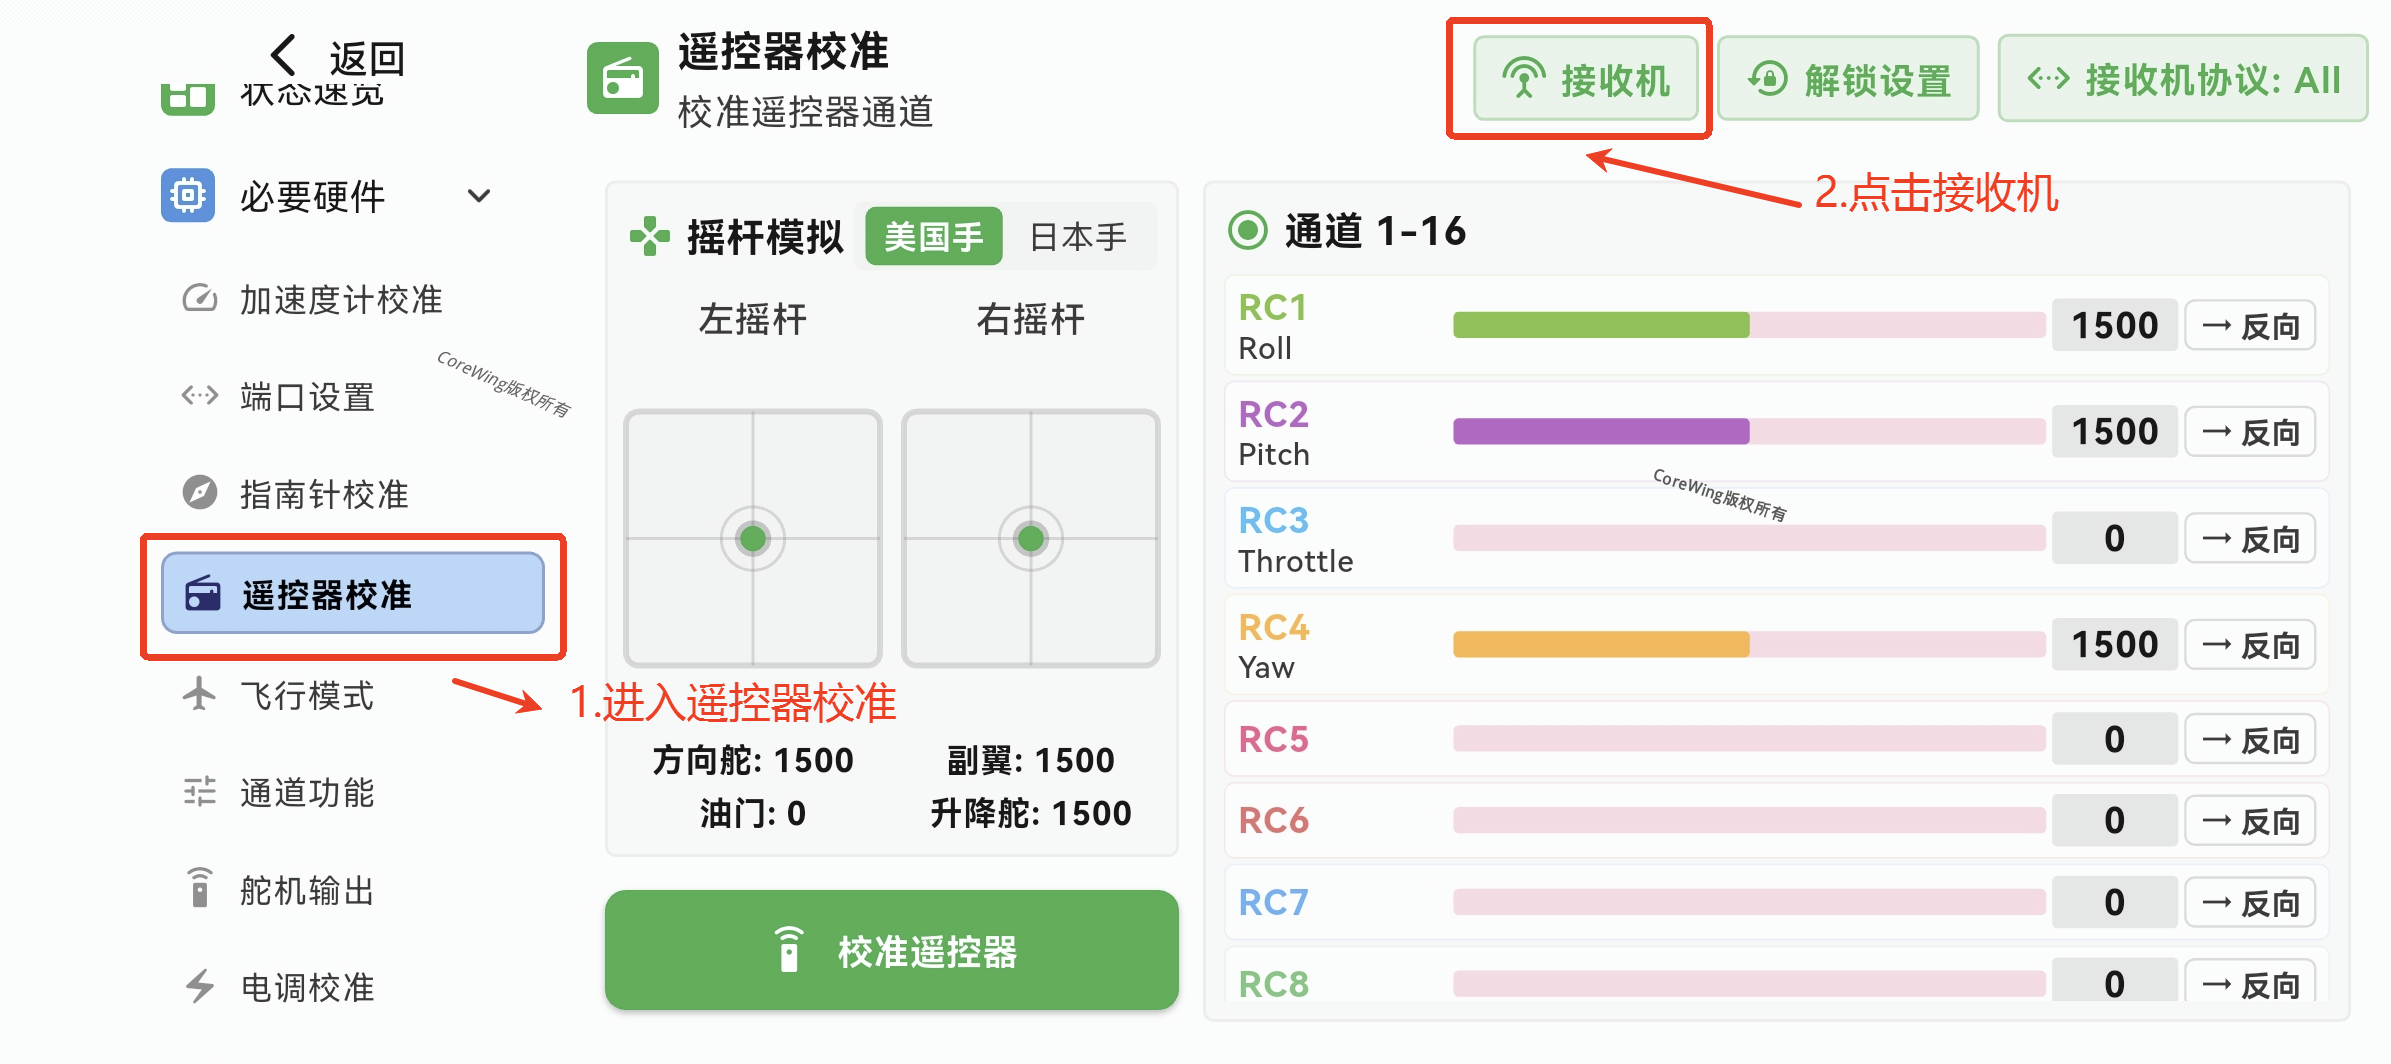
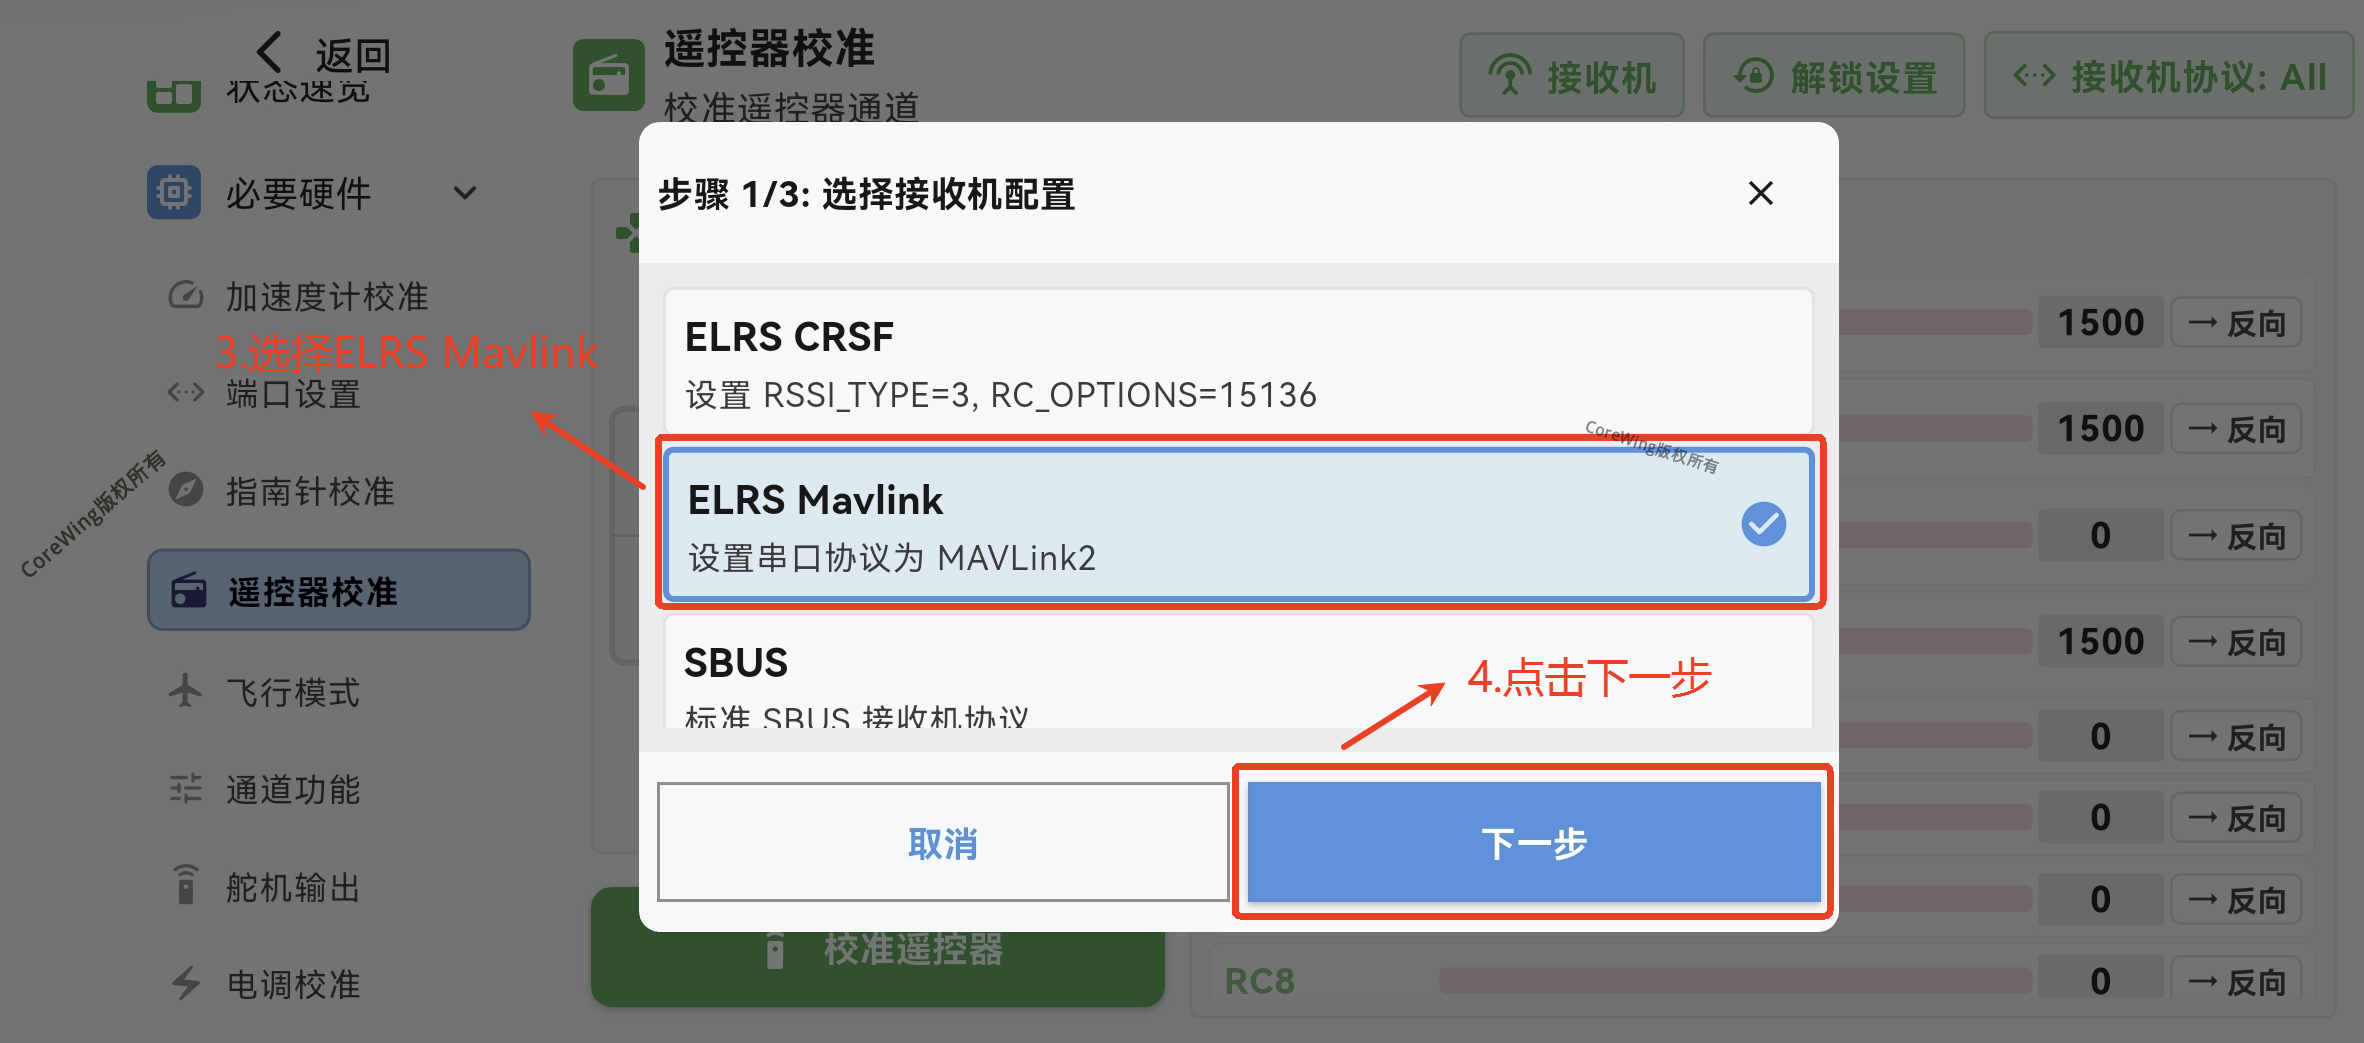
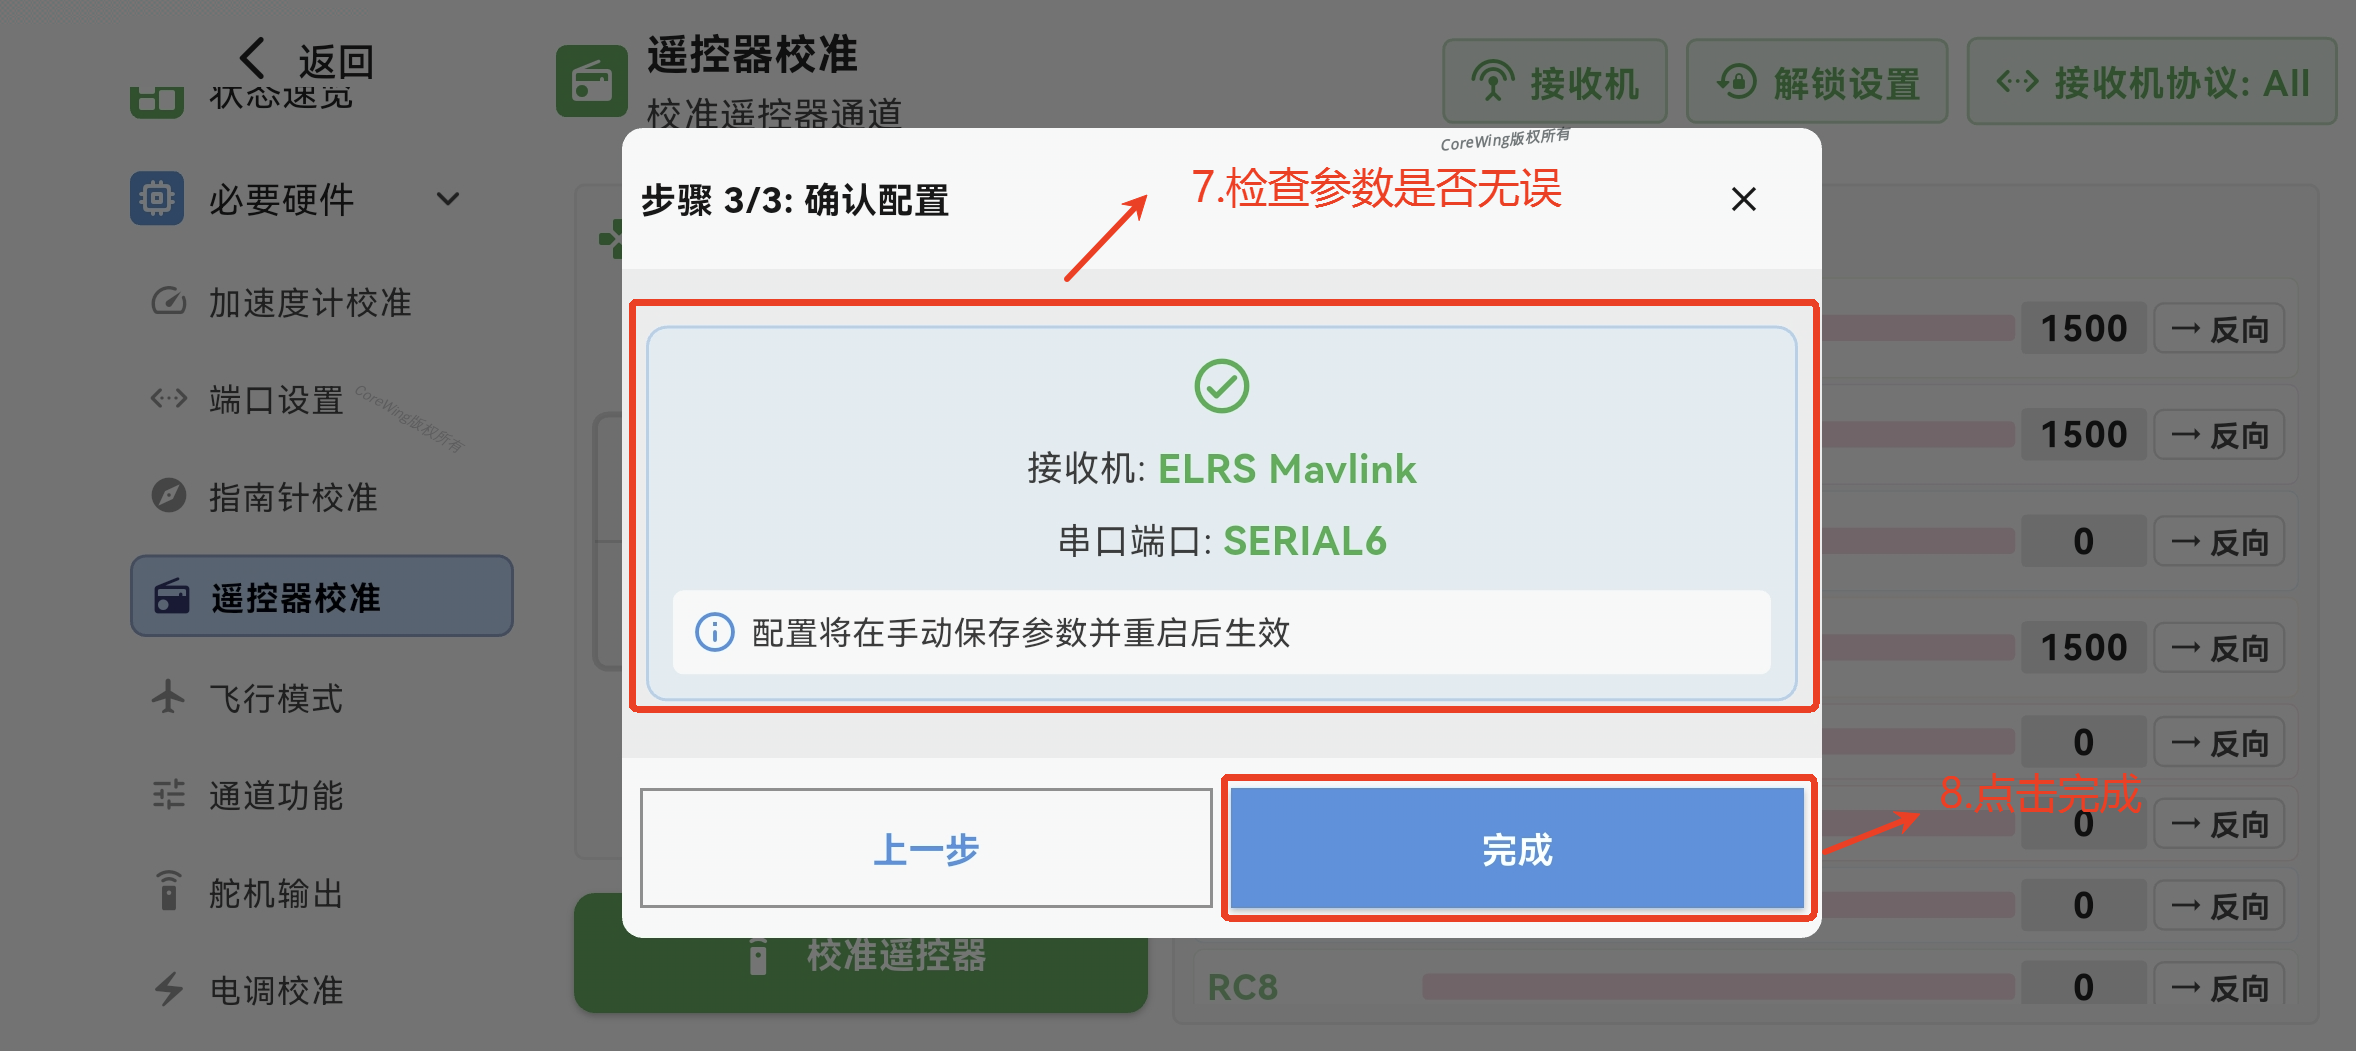
- Select ELRS MAVLink → Click Next
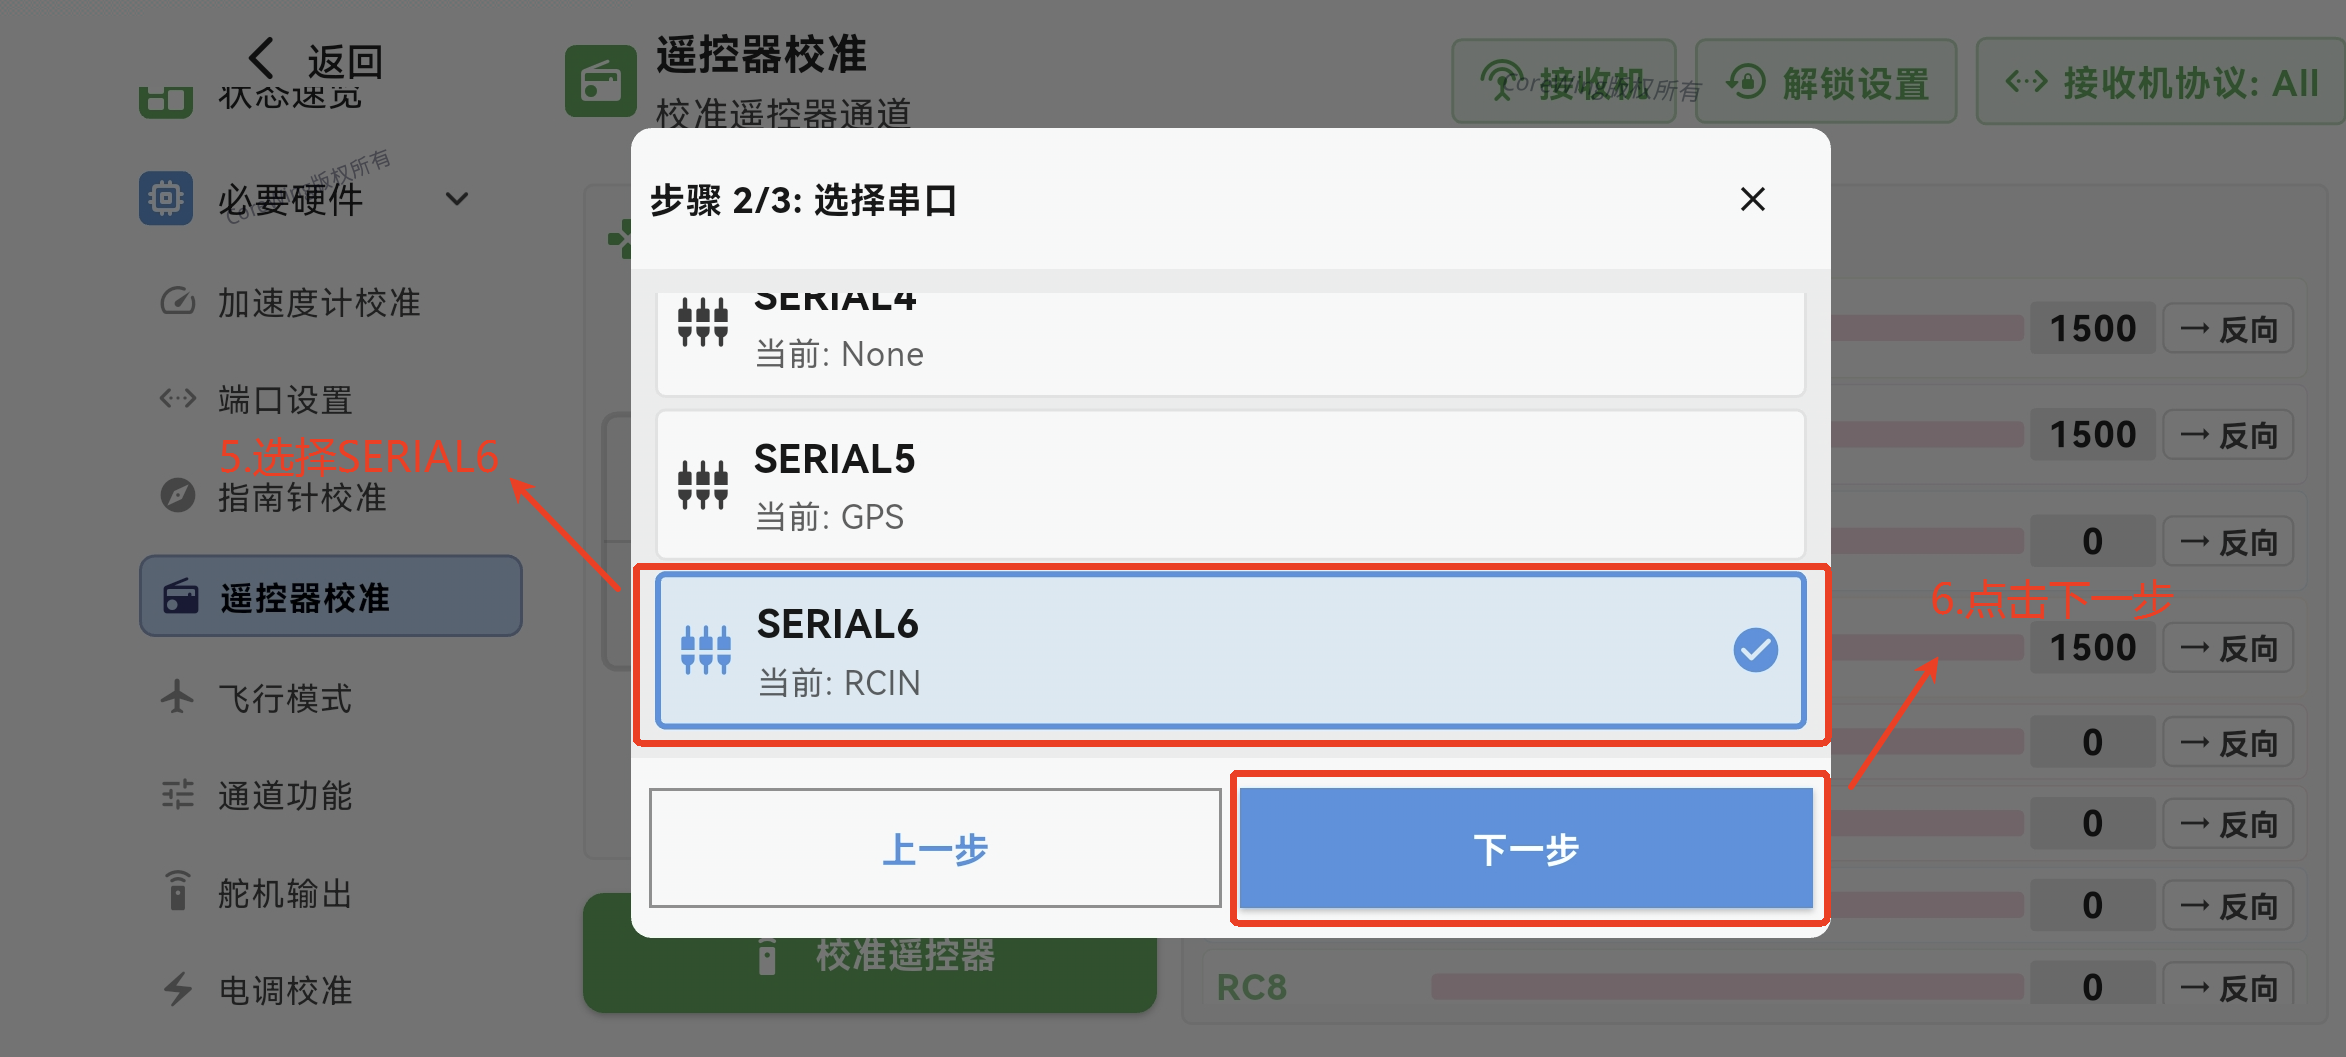
- Select UART6 → Click Next
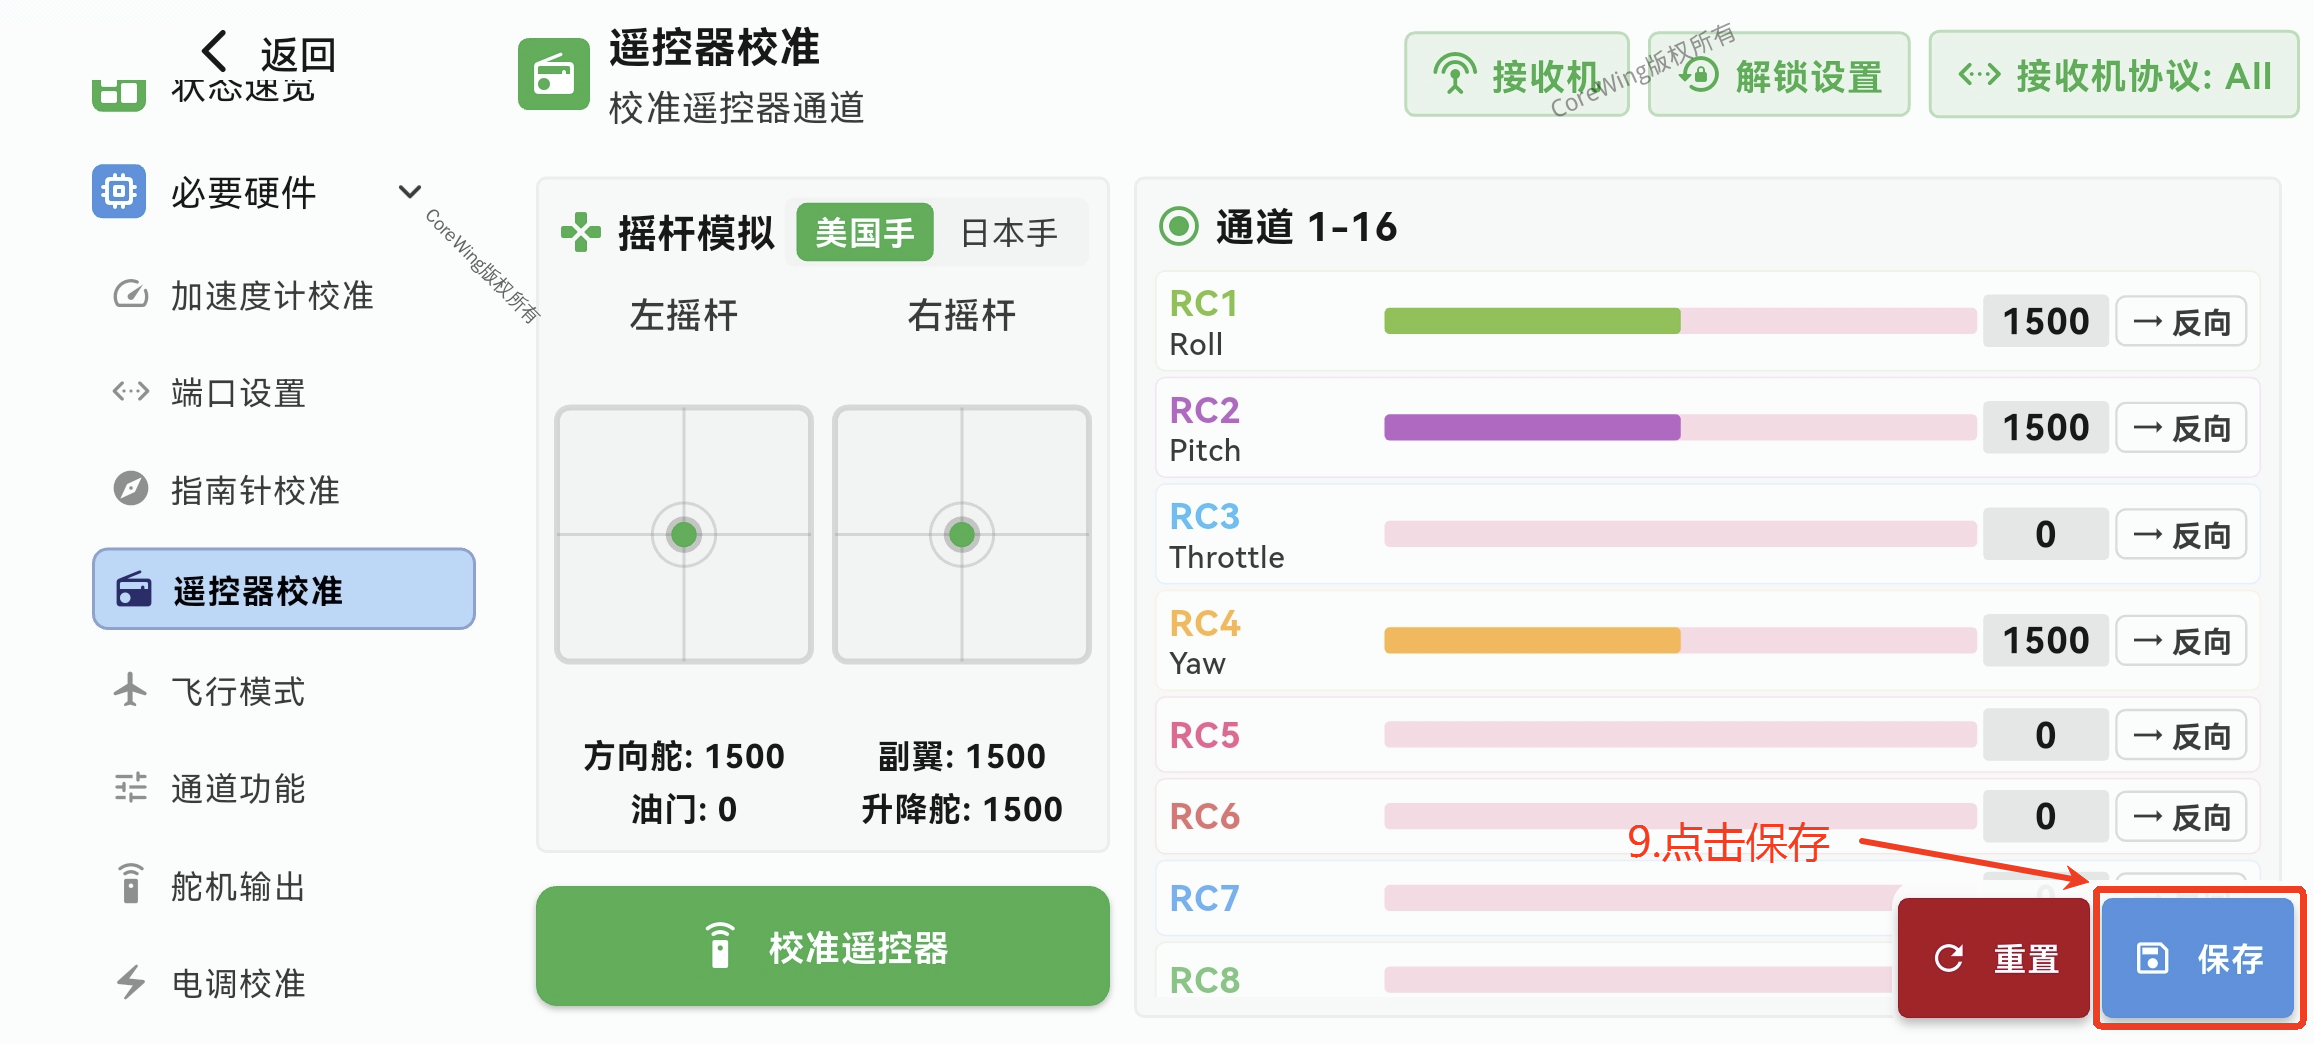
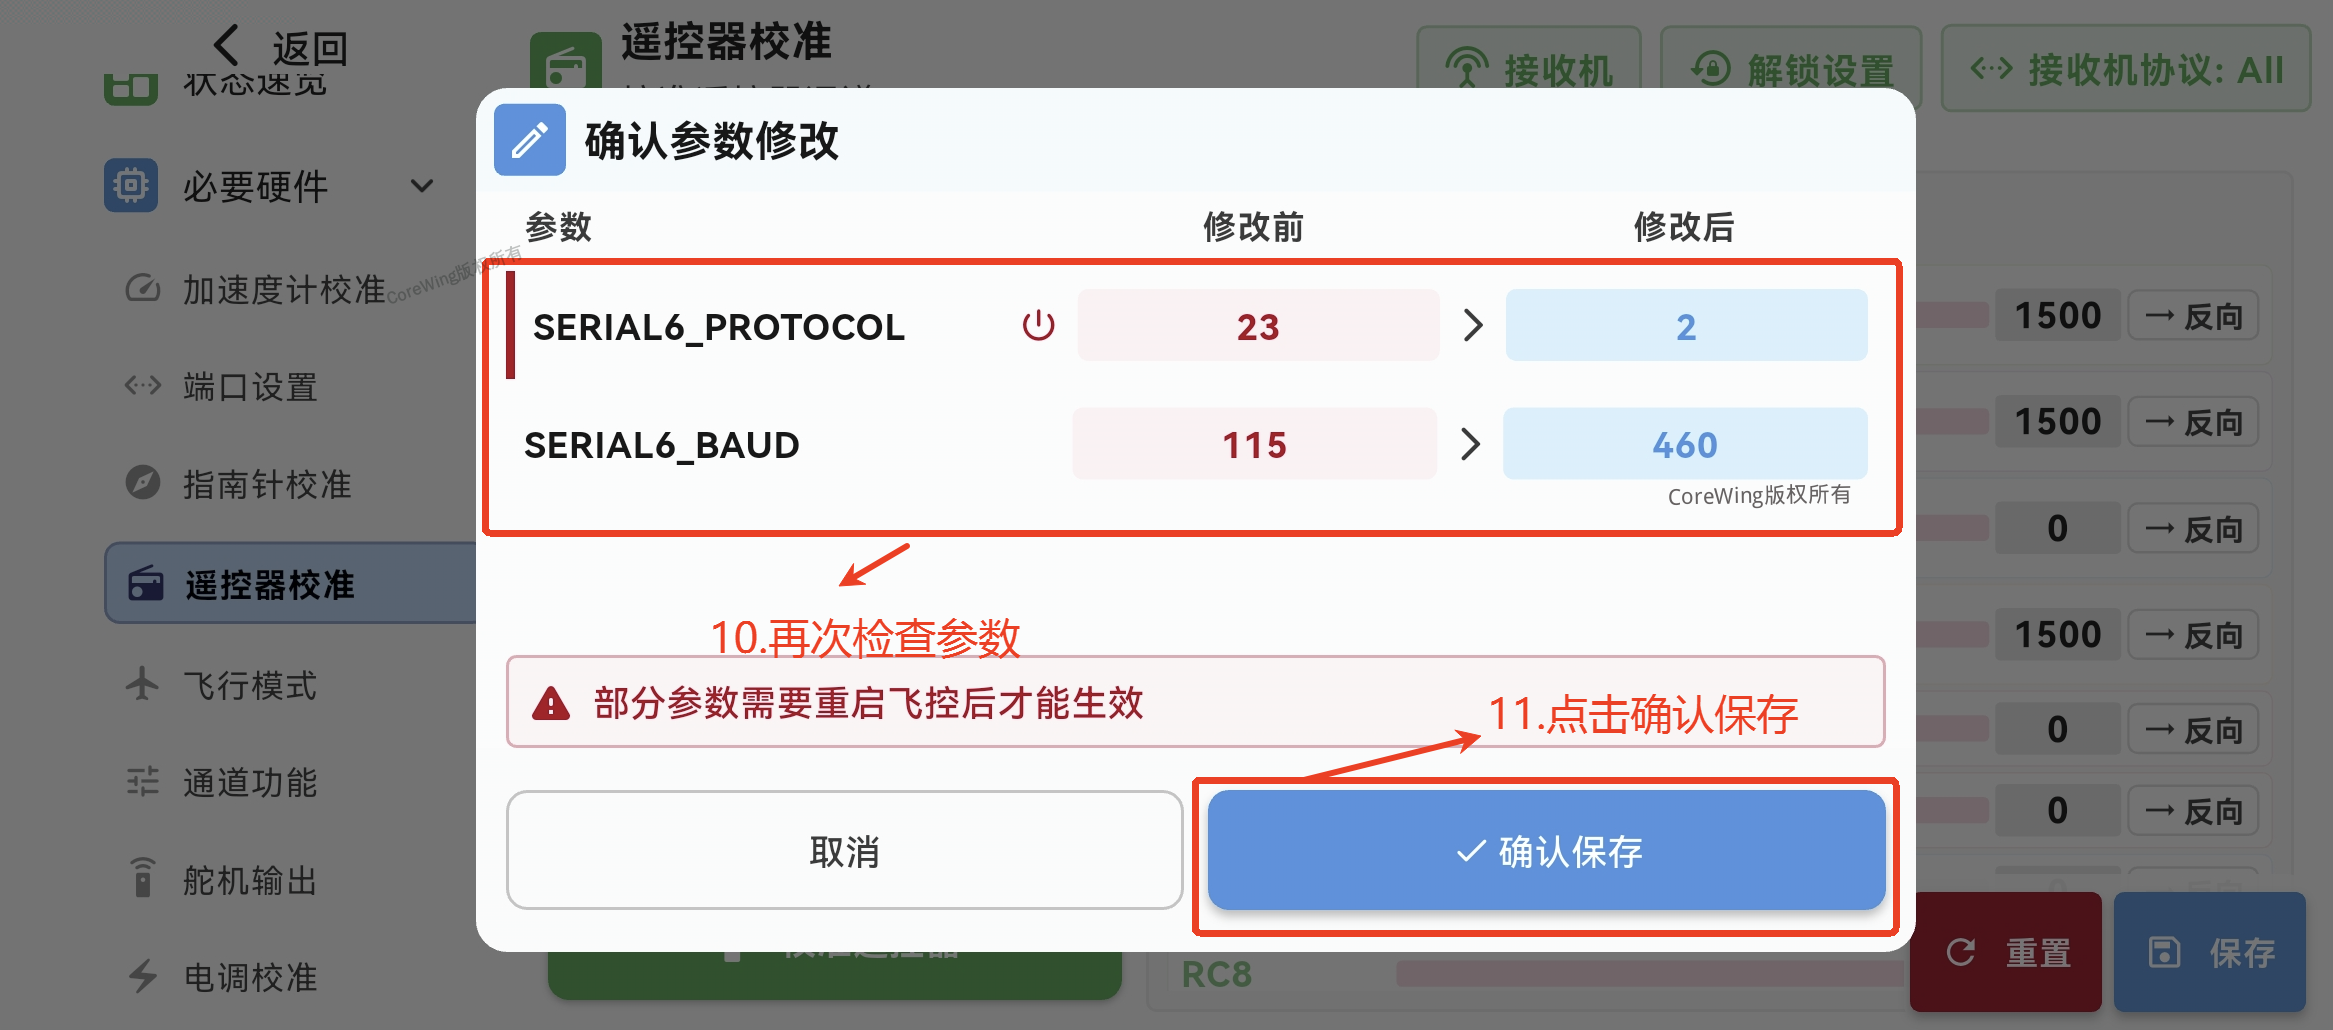
- Click Finish, the flight controller will automatically restart
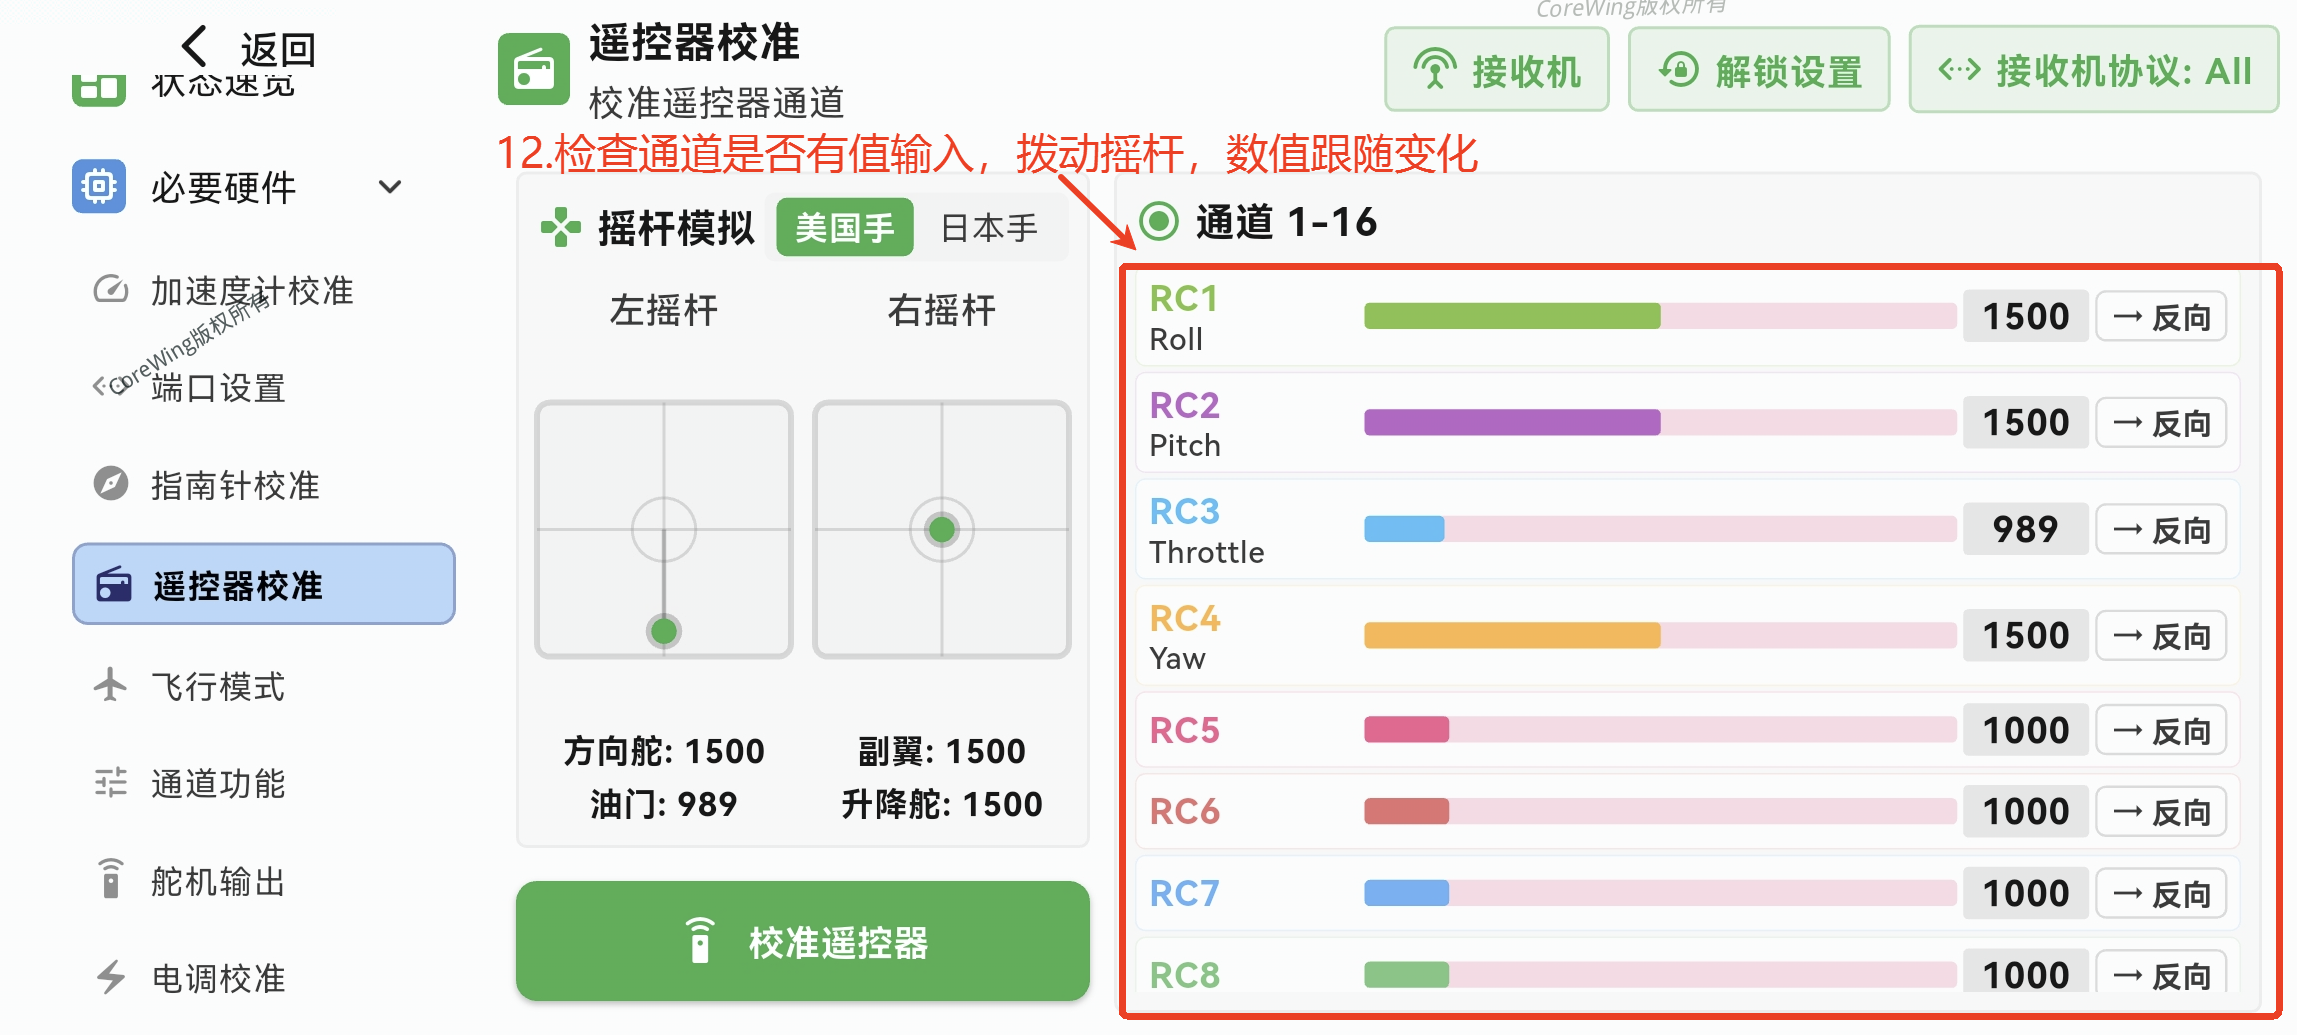
- Verify Connection: Return to the RC transmitter calibration page and check if channel values change with stick movement
Method 2: Manual Parameter Configuration
Open CoreWing APP → Enter the All Parameters page
Search for
SERIAL6Set the following parameters:
SERIAL6_PROTOCOL= 2 (MAVLink)SERIAL6_BAUD=460(460800)
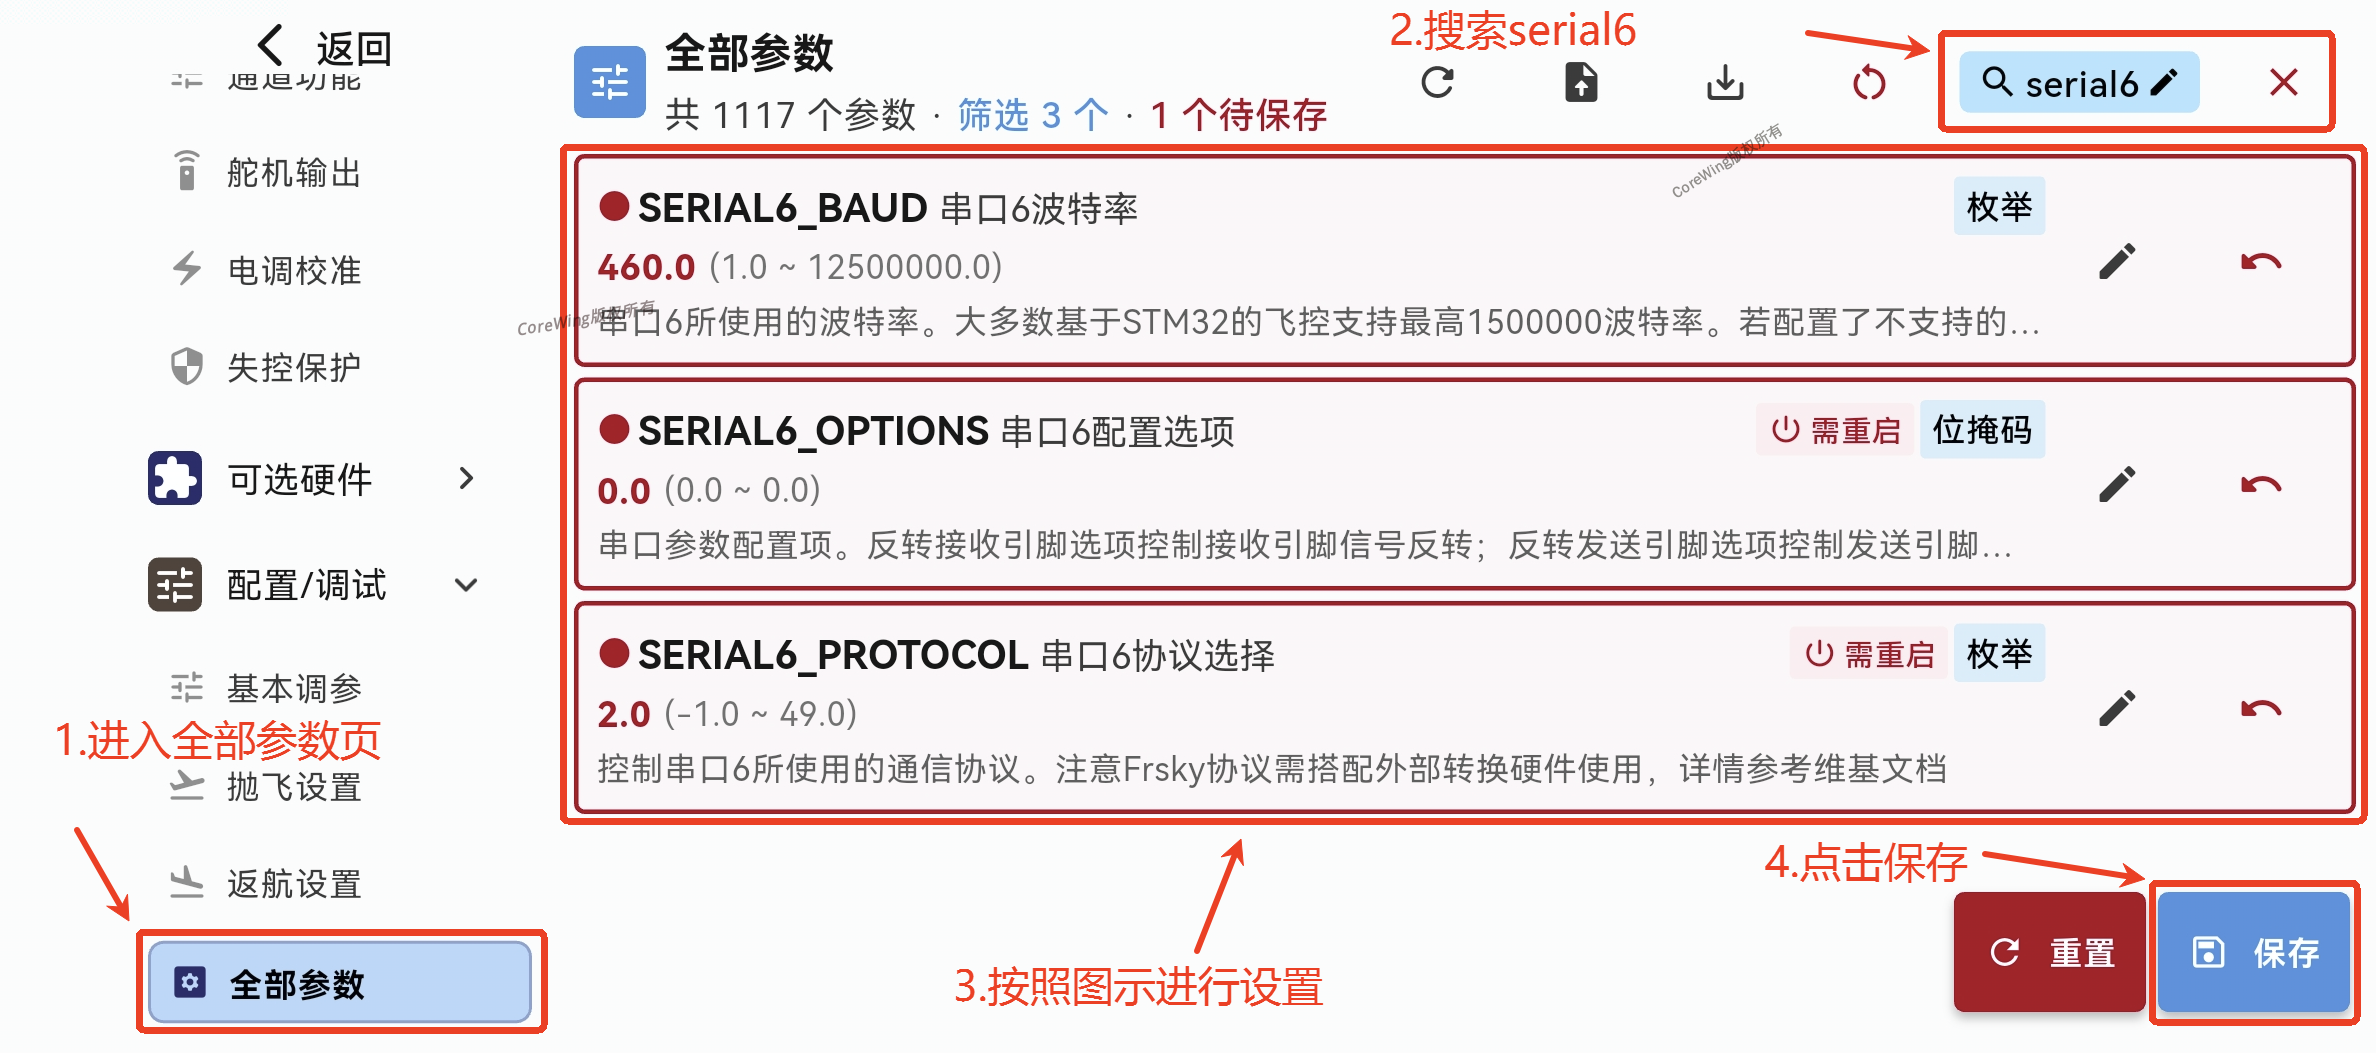
- Click save and restart the flight controller
- Verify connection: Check if channel values on the RC transmitter calibration page are normal

VII. Ground Station Connection
7.1 CoreWing APP - Bluetooth Connection
Step 1: Configure Backpack
- RC transmitter enters ExpressLRS script → Click Backpack settings
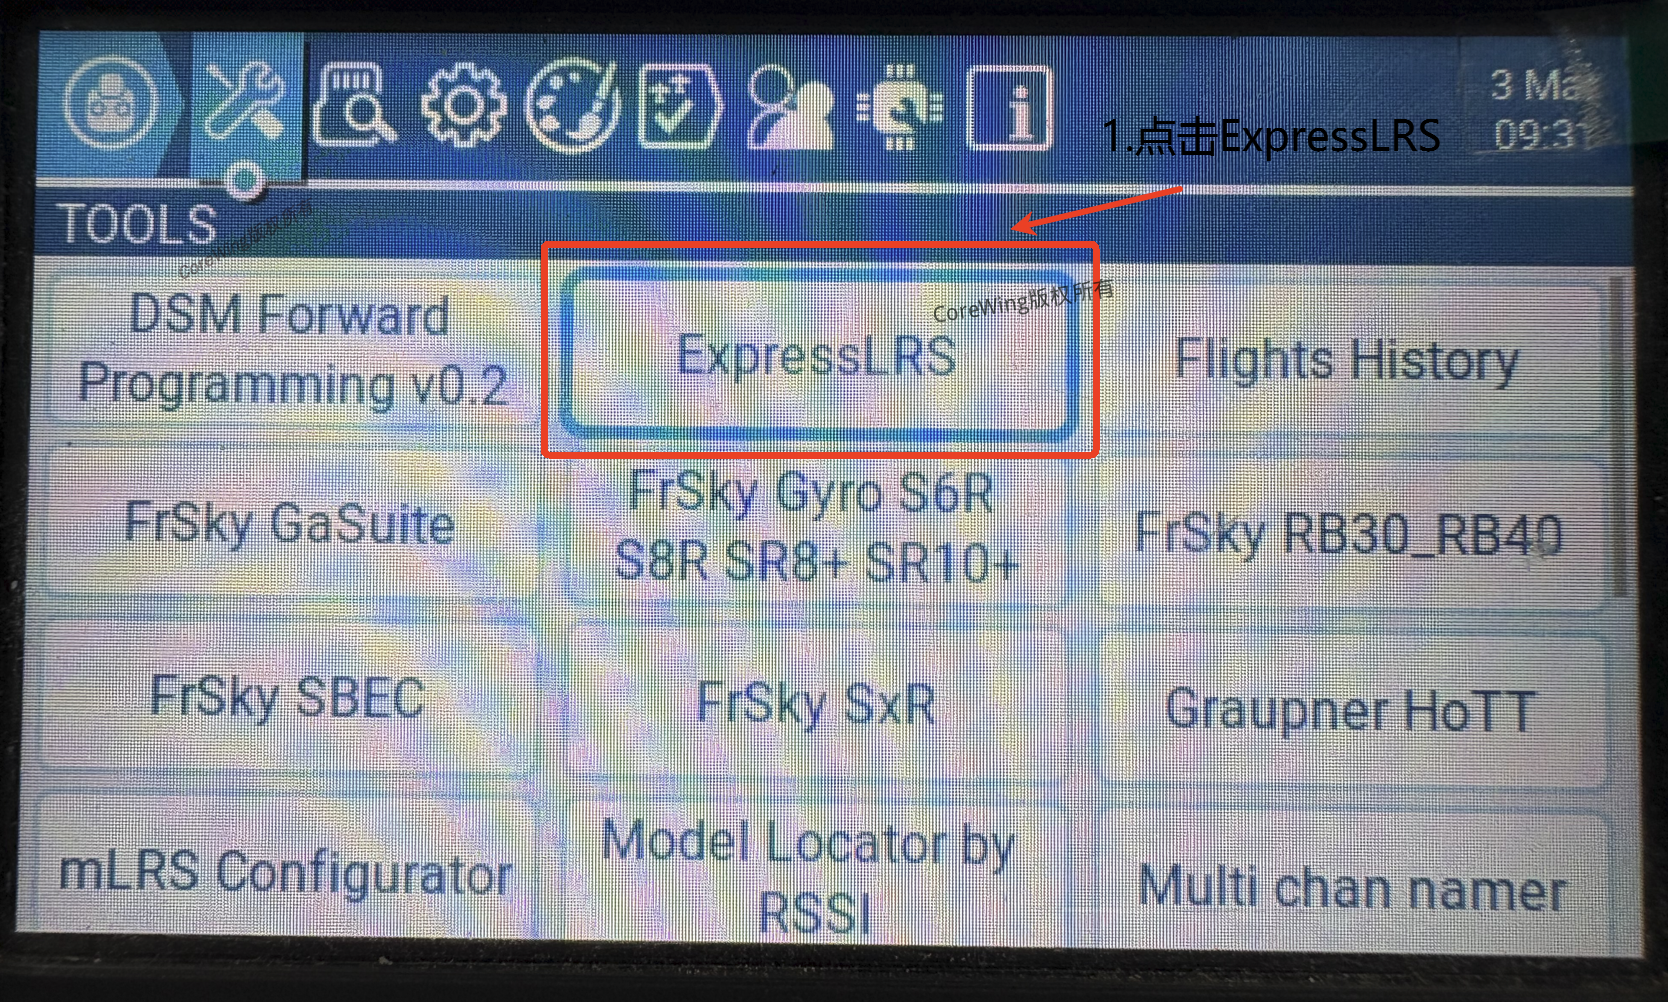
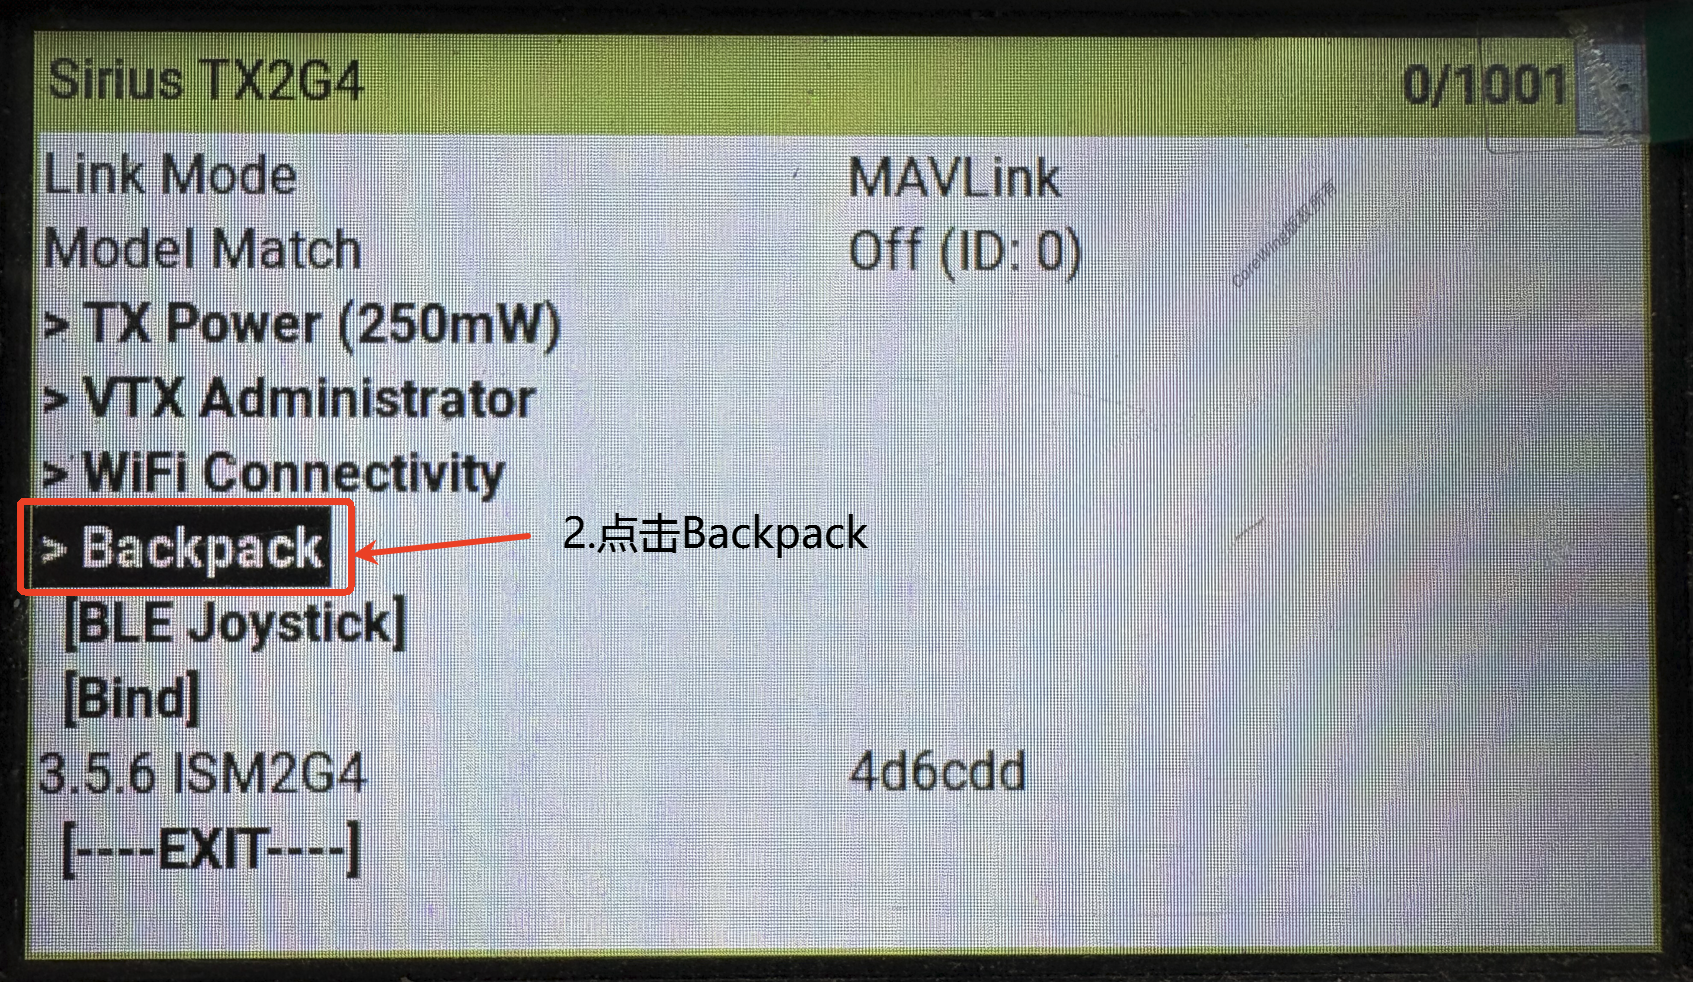
- Set Backpack to On
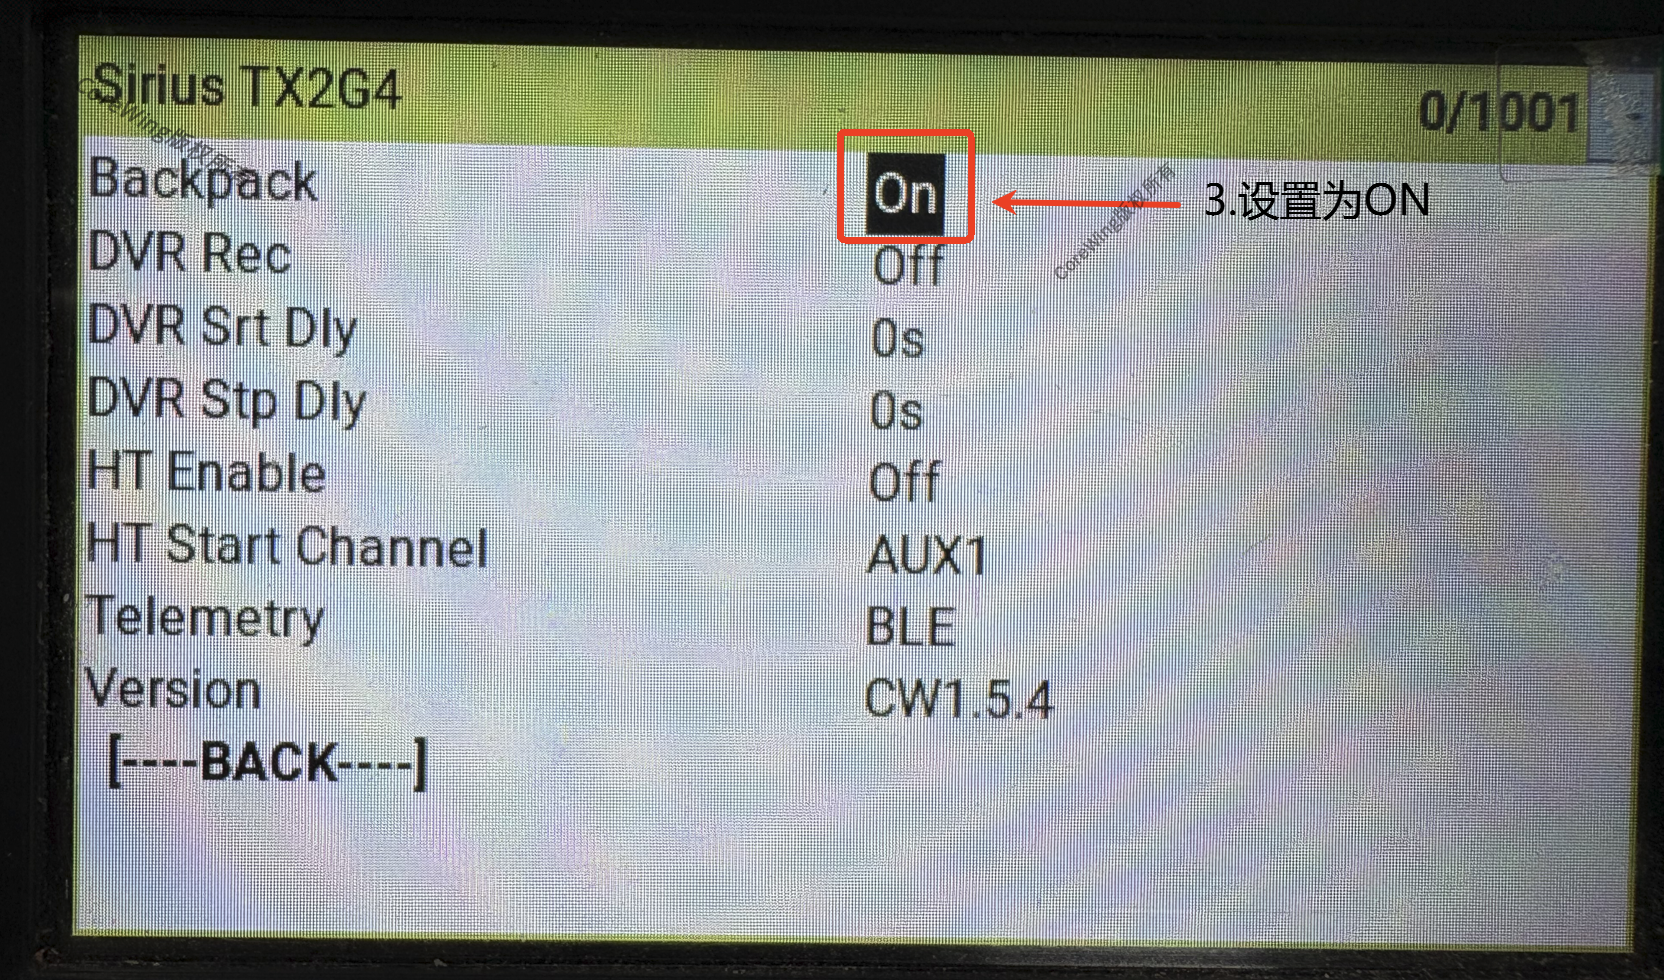
- Set Telemetry to
BLE(Bluetooth)
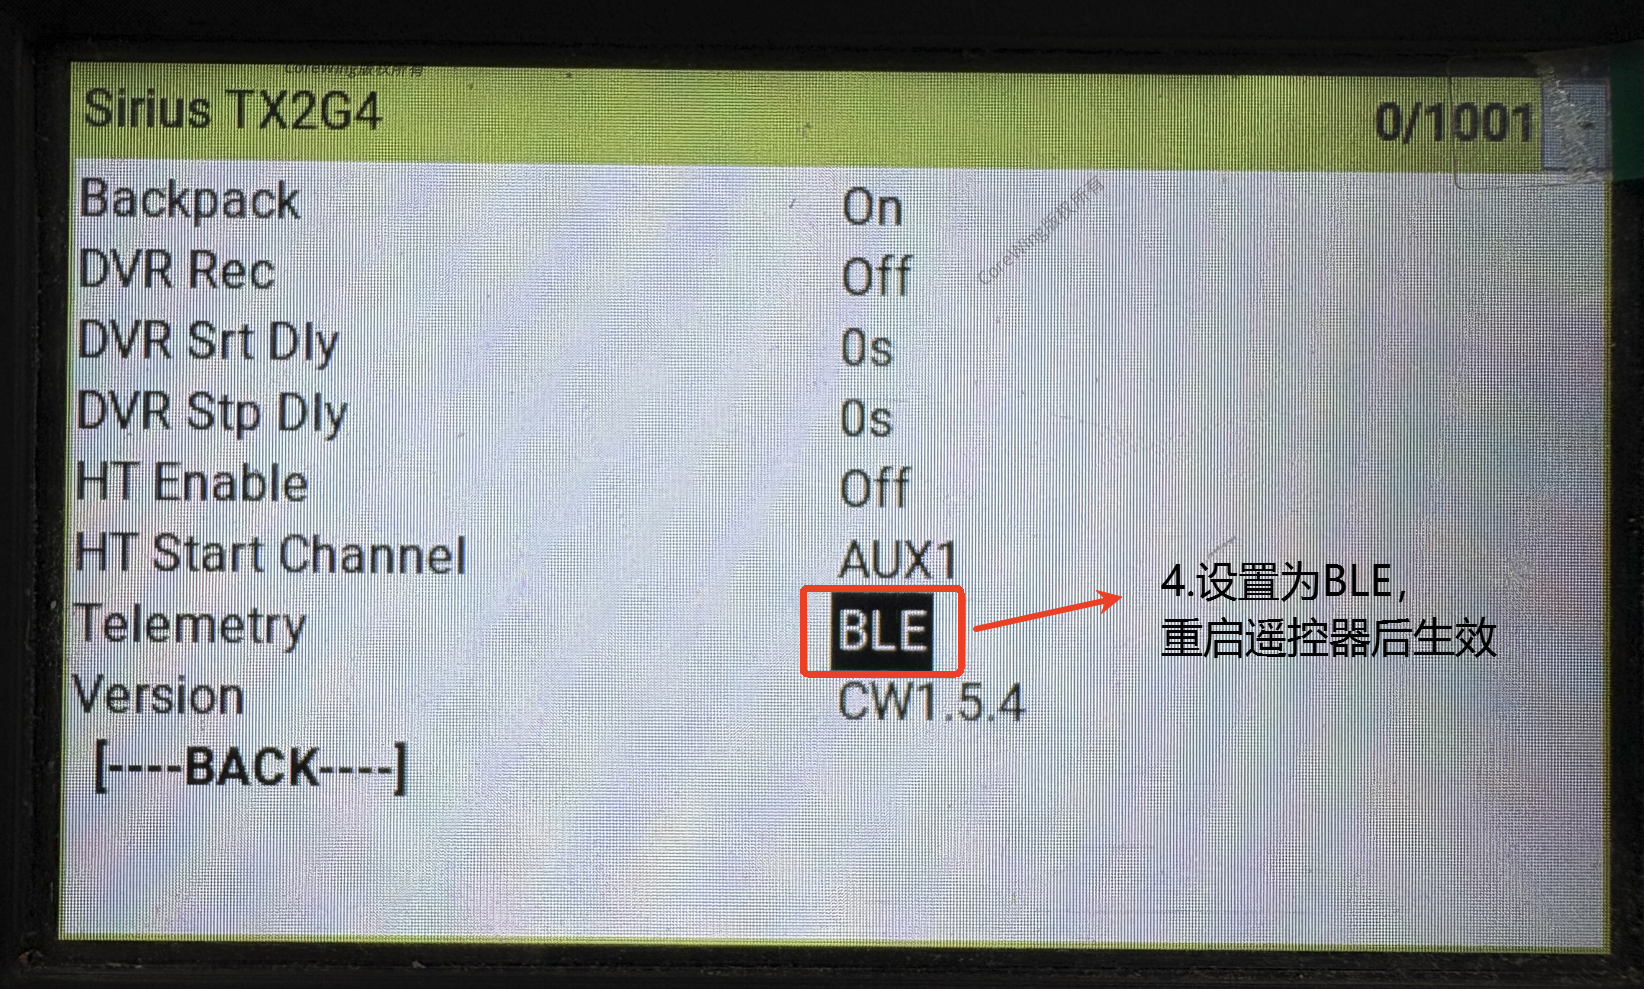
- Restart the RC transmitter to apply settings
Step 2: APP Connection
- Open CoreWing APP → Click "+" → Select Bluetooth connection
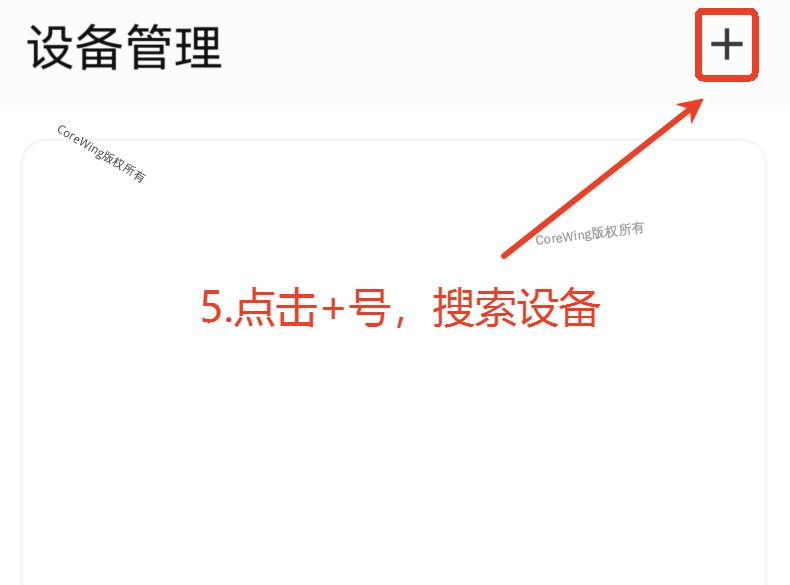
- Find the CoreWing Sirius-xxxx device and click to connect
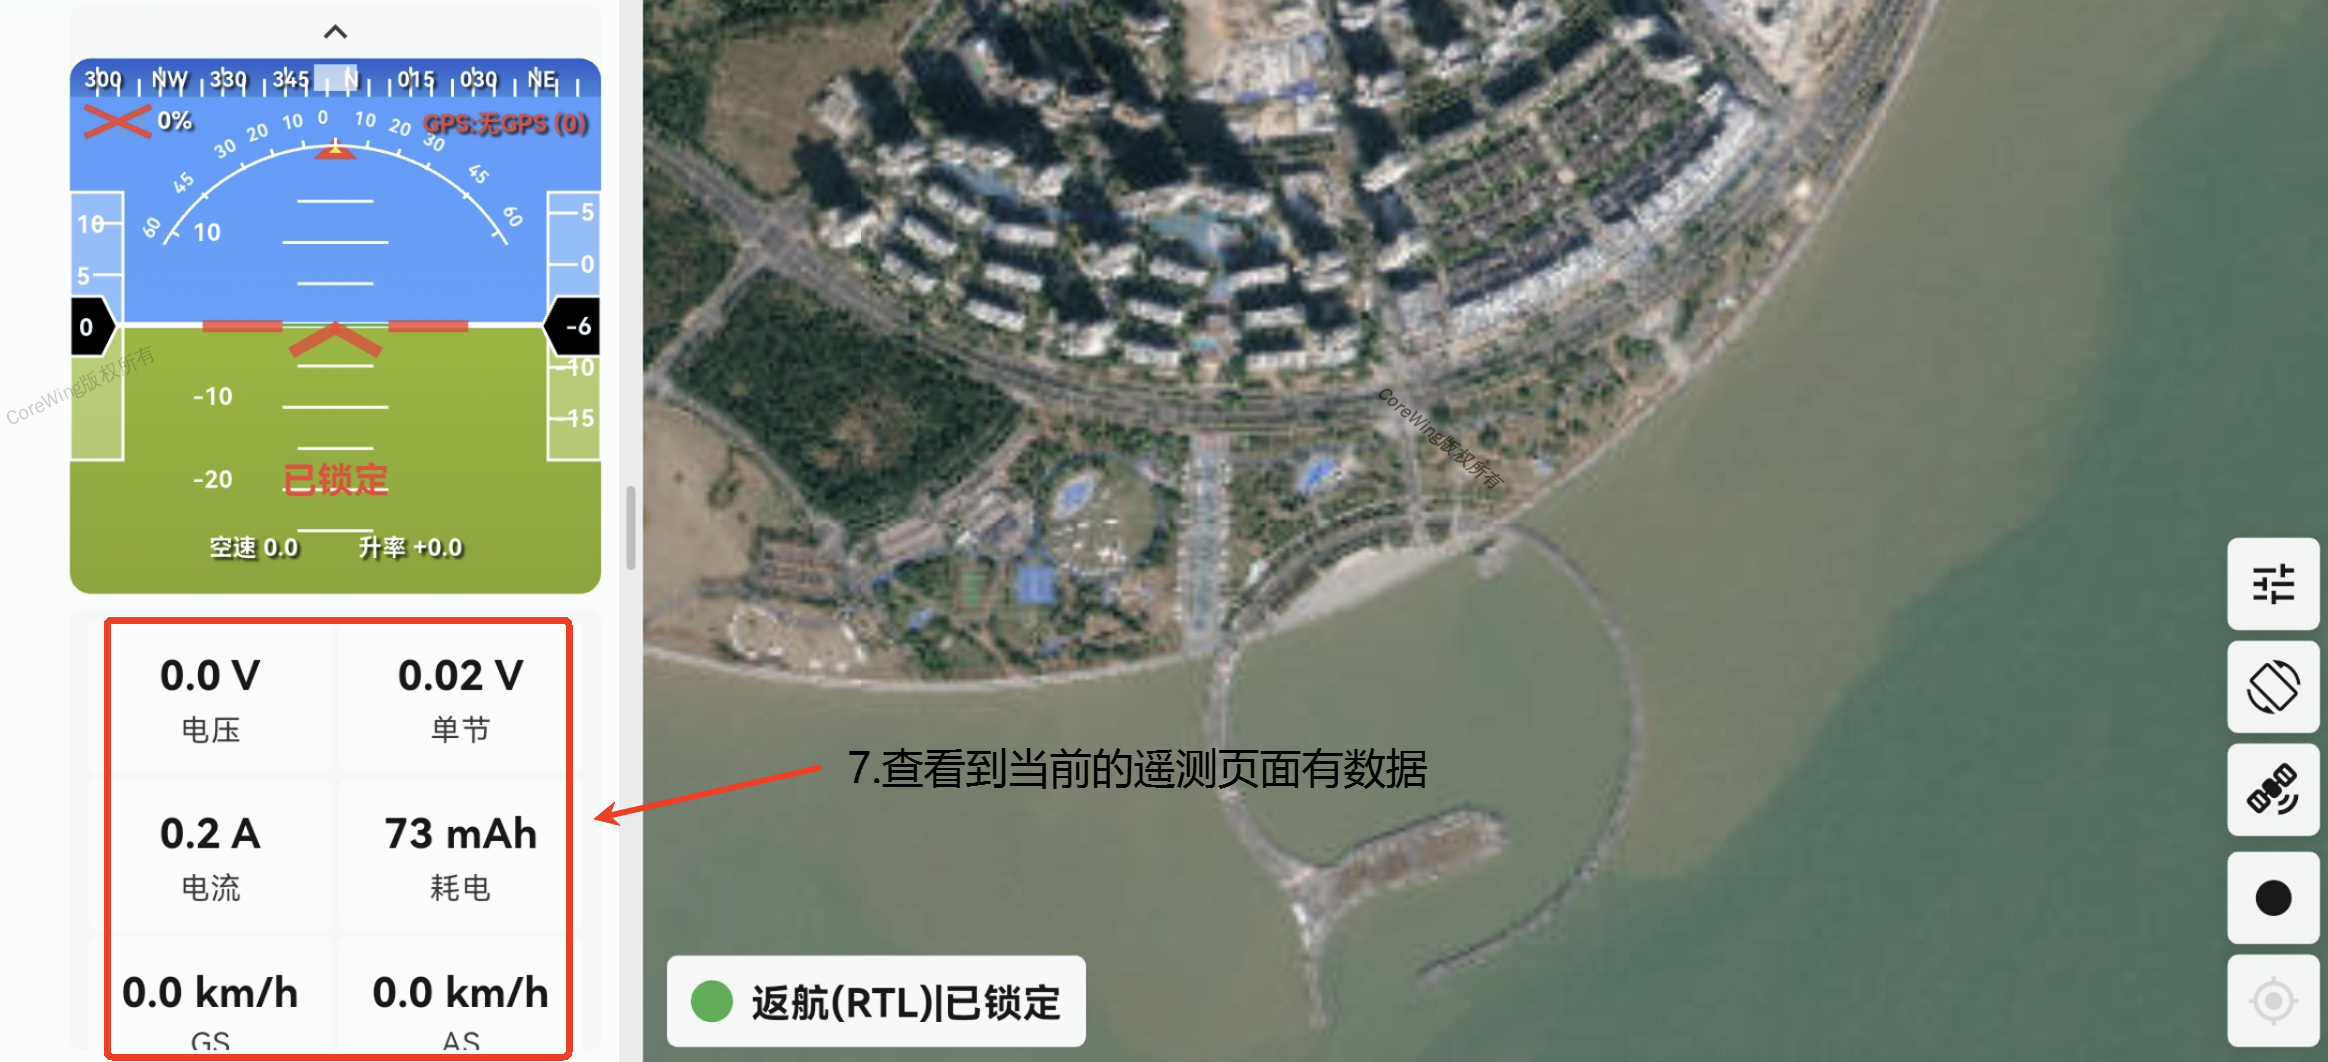
Step 3: View Telemetry
After successful connection, enter the telemetry viewing page. The information bar will display aircraft data transmitted back by the antenna:
7.2 CoreWing APP - WiFi Connection
Step 1: Configure Backpack
Enter Backpack settings
Set Telemetry to WiFi
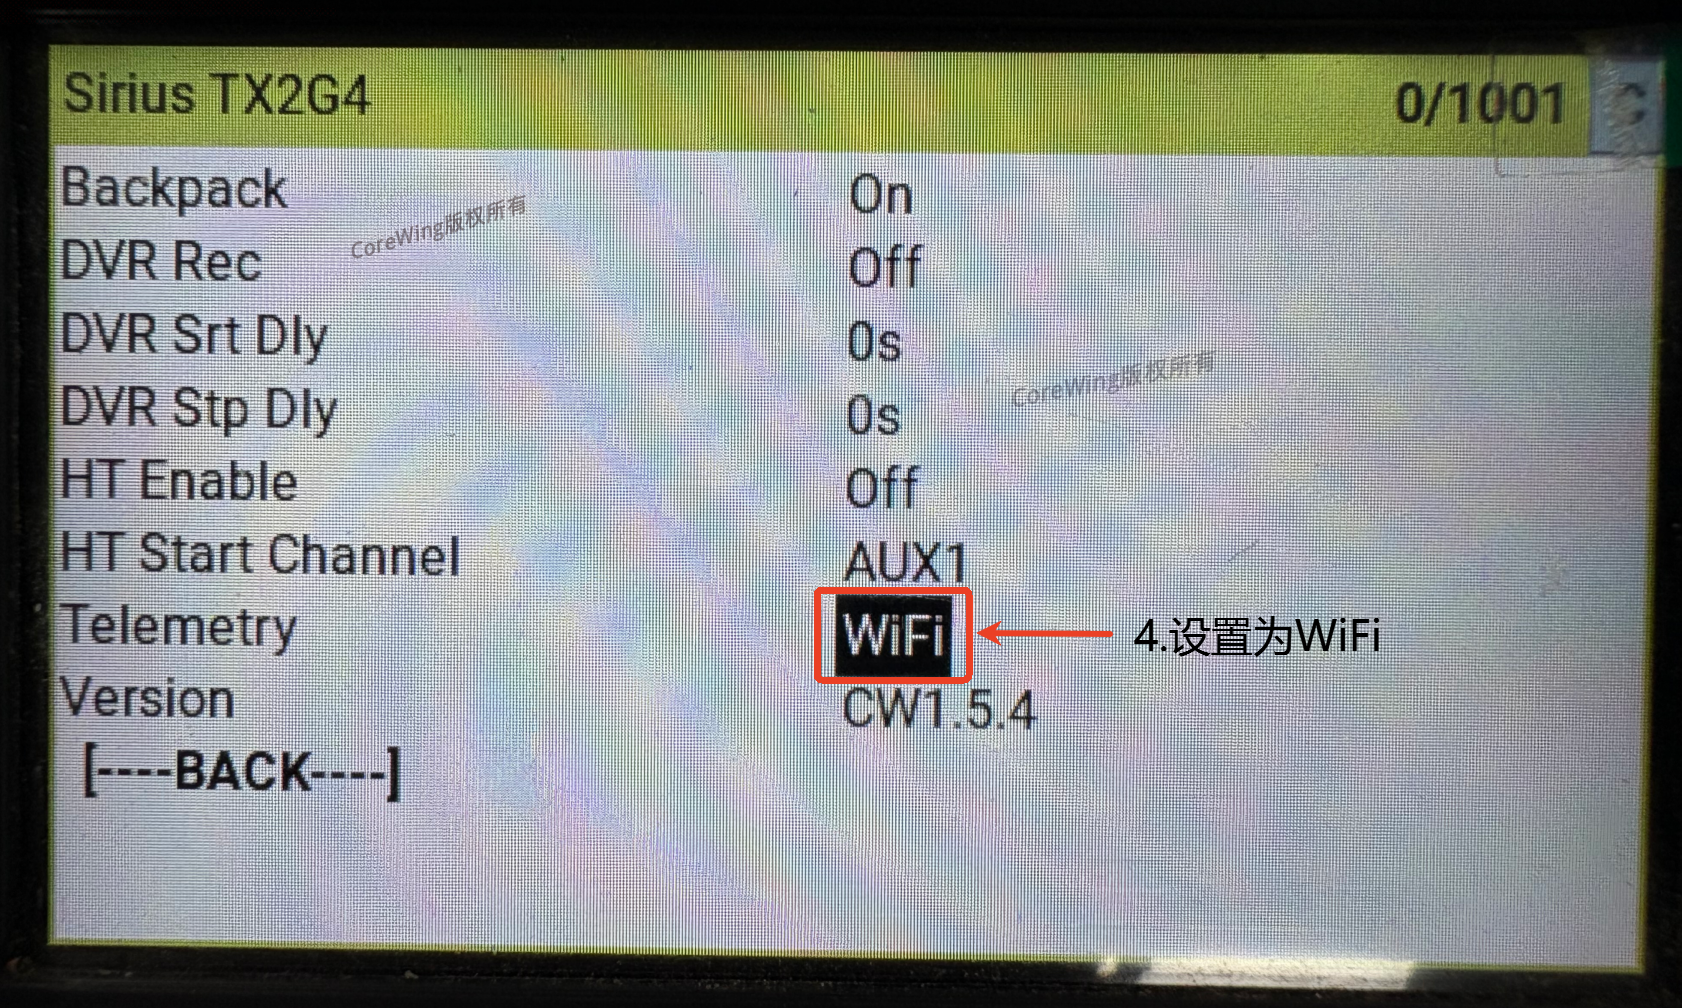
- Restart the RC transmitter to apply settings
Step 2: Phone WiFi Connection
Find the ExpressLRS TX Backpack 000000 WiFi and connect (password: expresslrs)
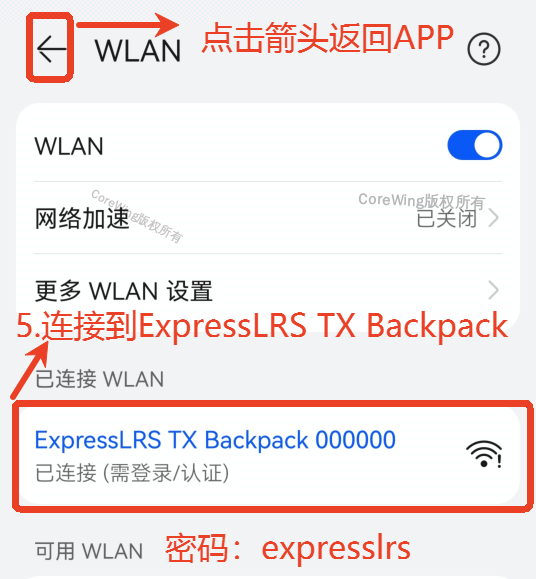
Step 3: APP Connection
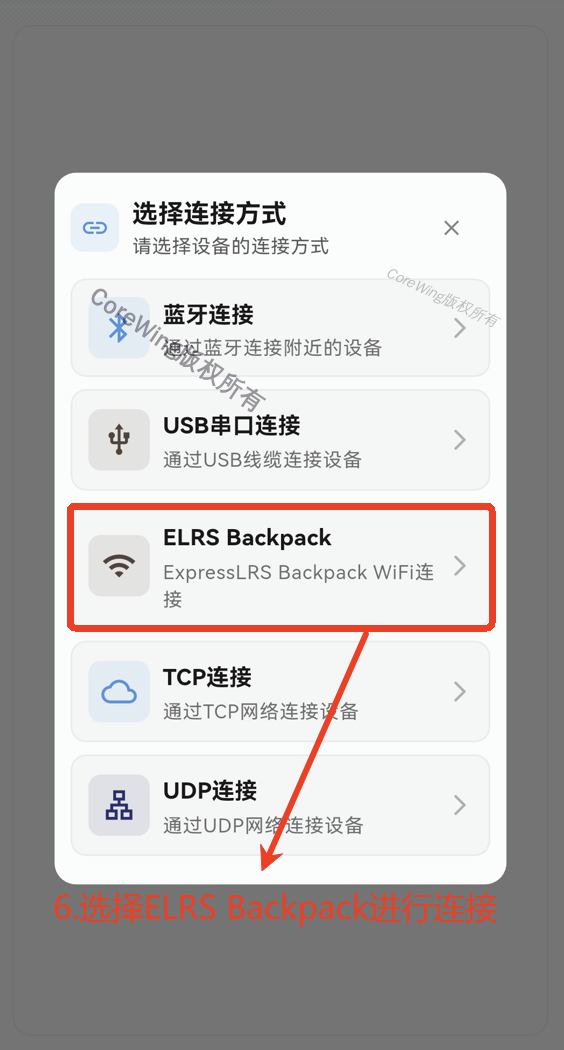
- Open CoreWing APP → Click "+" → Select ELRS Backpack connection
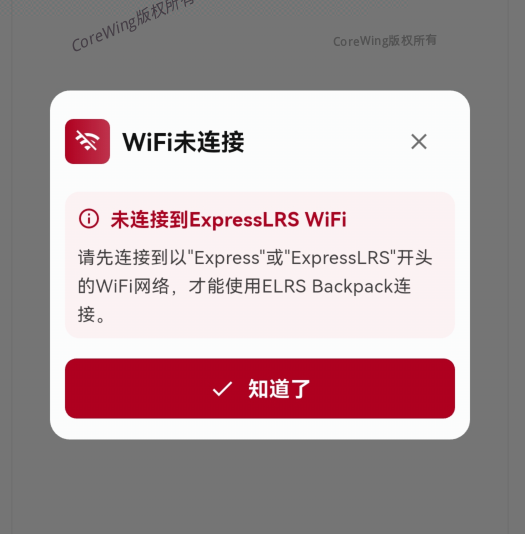
WiFi Connection Tip
If the phone WiFi is not connected to a network starting with ExpressLRS, the following prompt will be displayed:
Step 4: View Telemetry
After successful connection, the telemetry page displays aircraft data:
7.3 MissionPlanner Ground Station Connection
Step 1: Configure Backpack WiFi
Enter Backpack settings
Set Telemetry to WiFi
Restart the RC transmitter to apply settings
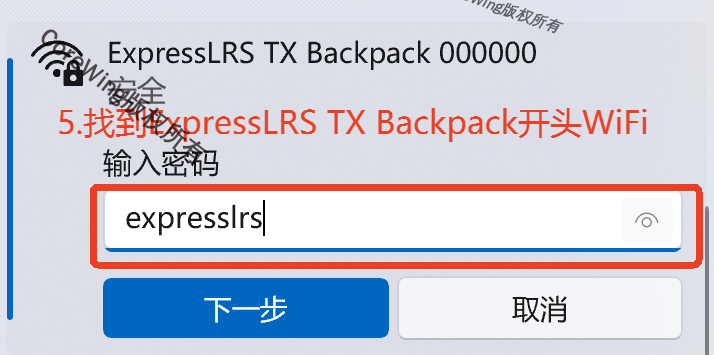
Step 2: Computer WiFi Connection
Find the ExpressLRS TX Backpack 000000 WiFi and connect (password: expresslrs)
Step 3: MissionPlanner Connection Configuration
Open MissionPlanner
Select UDP connection mode
Set baud rate to
115200Set port to
14550Click connect
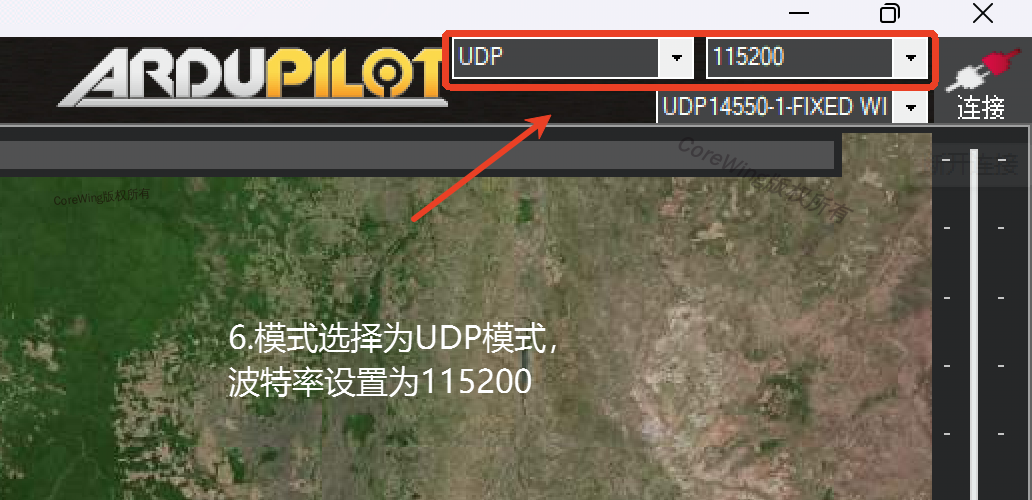
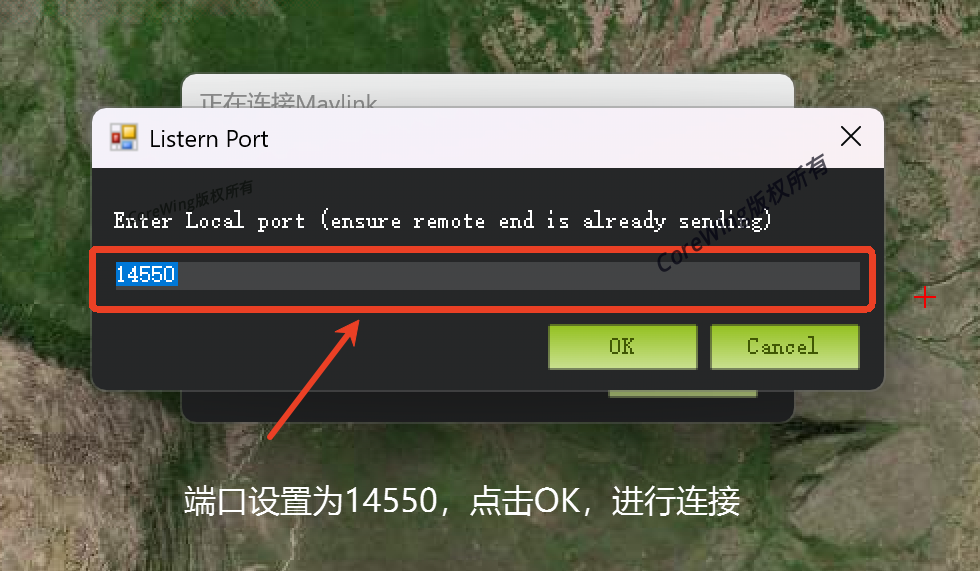
Step 4: Verify Connection
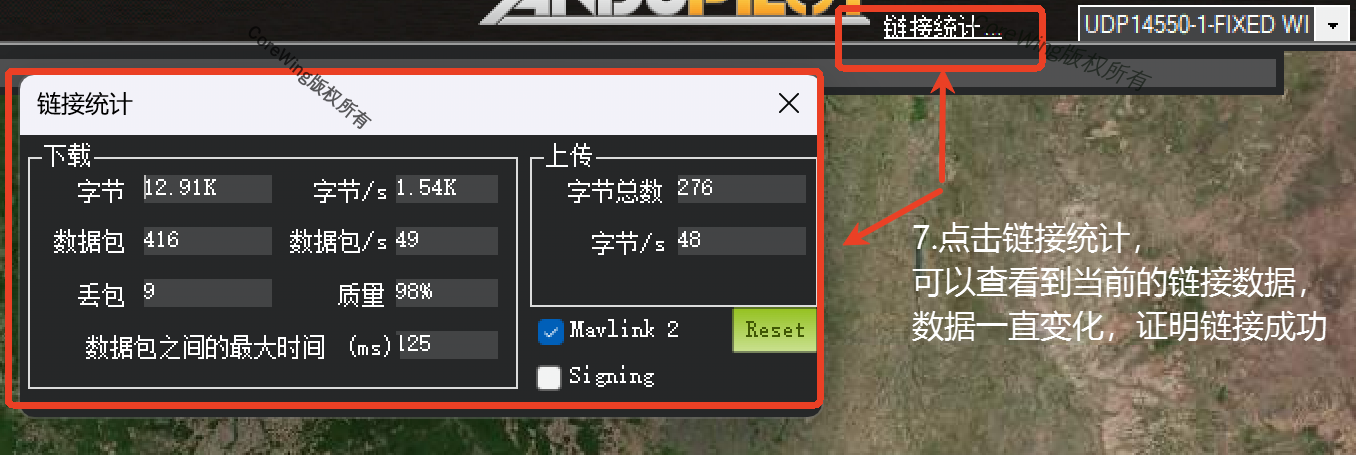
After successful connection, click Connection Statistics to view MAVLink telemetry link status:
Technical Support QR Code
If you have any questions, please scan the QR code below for technical support:
