
How to Configure the VTX Power Switch
1. Overview
To address the issue of high heat generation and automatic thermal shutdown of HD video transmitters during ground testing, we designed a VTX power switch function. Users can manually turn off the VTX power with a single switch during ground setup, eliminating the risk of overheating. Turn the VTX back on just before takeoff to ensure safe and stable operation.
2. Required Equipment
Flight Controller: This tutorial applies to both CoreWing F405 WING V2 and CoreWing F405 WING MINI V2.
HD Video Transmitter: DJI O4/O3, Caddx Vista, RunCam Link, Walksnail Avatar, HDZero, etc.
FPV Goggles: DJI Goggles 2, DJI V2, Avatar VRX, HDZero, etc.
Analog Video Transmitter: SpeedyBee TX 1600 VTX, etc.
Ground Station: CoreWing APP, INAV Configurator, Mission Planner.
Important
CoreWing APP Download: APP Download - CoreWing Technology Co., Ltd.
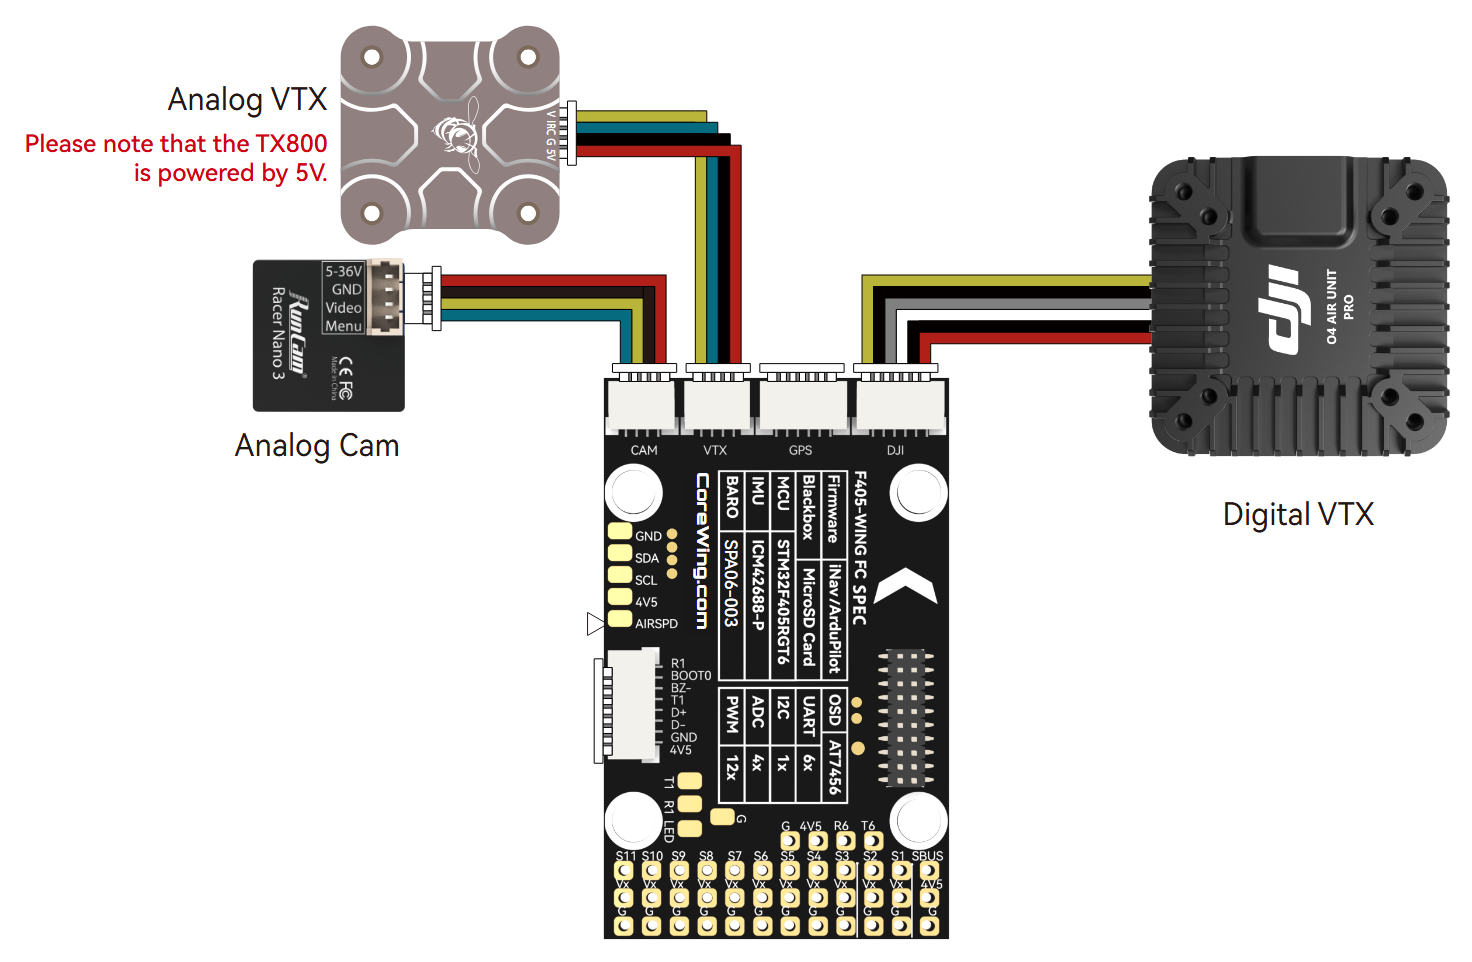
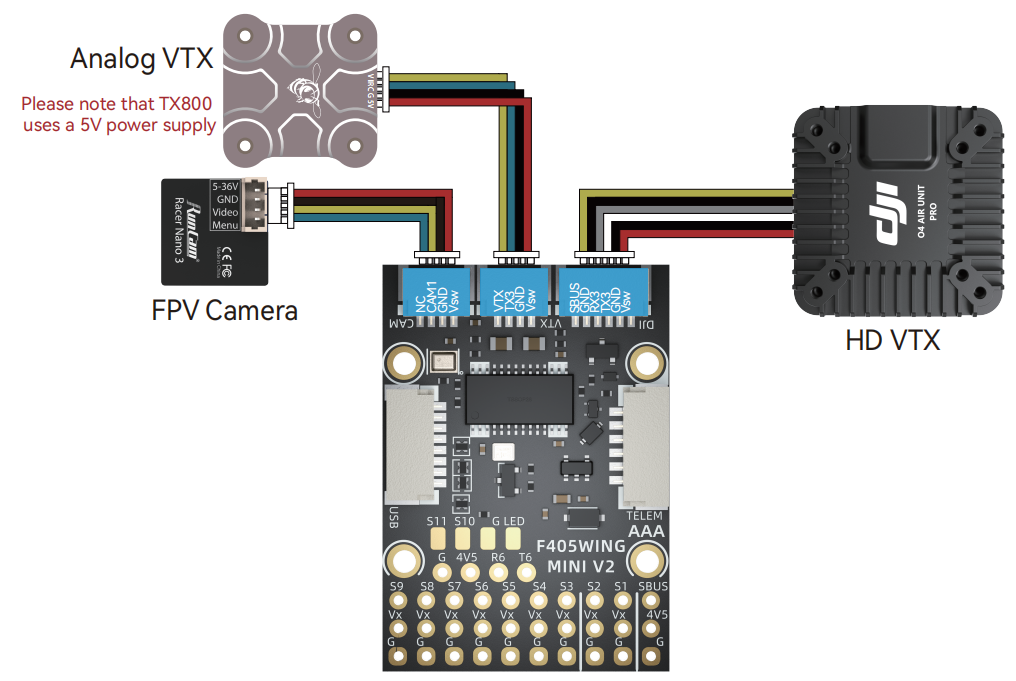
Connect the VTX and camera as shown below:
CoreWing F405 WING V2:
CoreWing F405 WING MINI V2:
3. Parameter Configuration
3.1 INAV Firmware Configuration
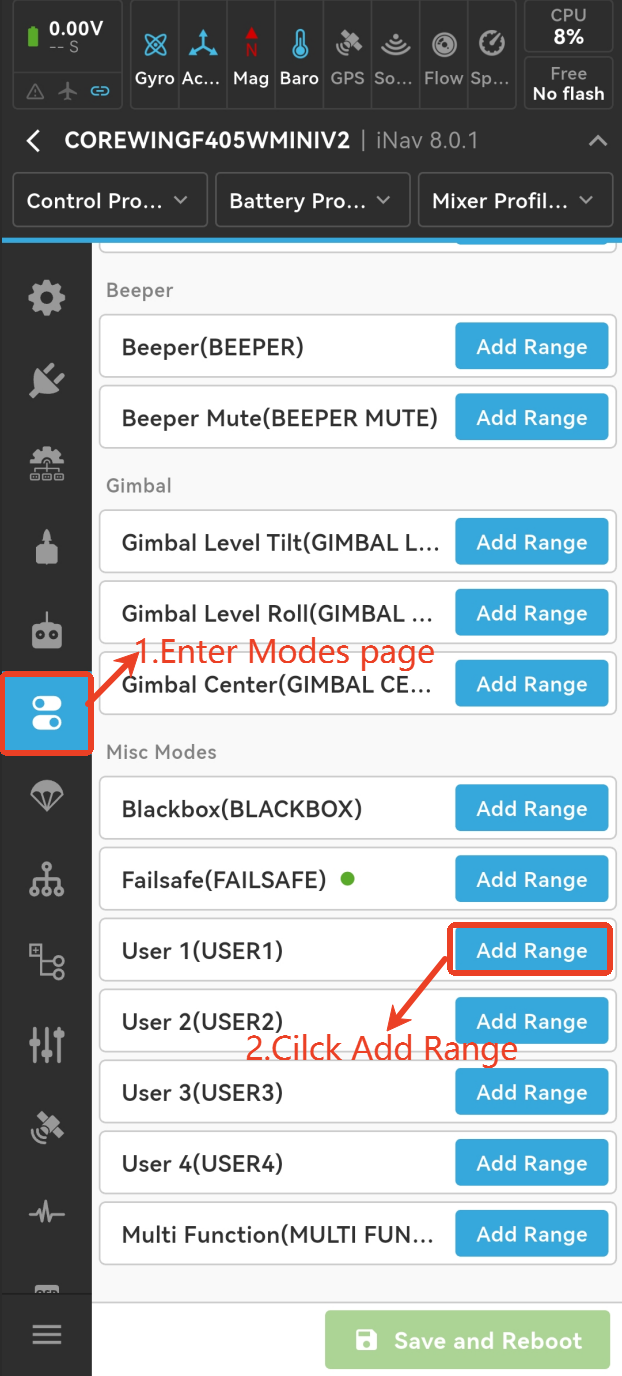
- Connect the flight controller to the CoreWing APP, enter the Modes page, scroll down to USER1, and tap Add Range.
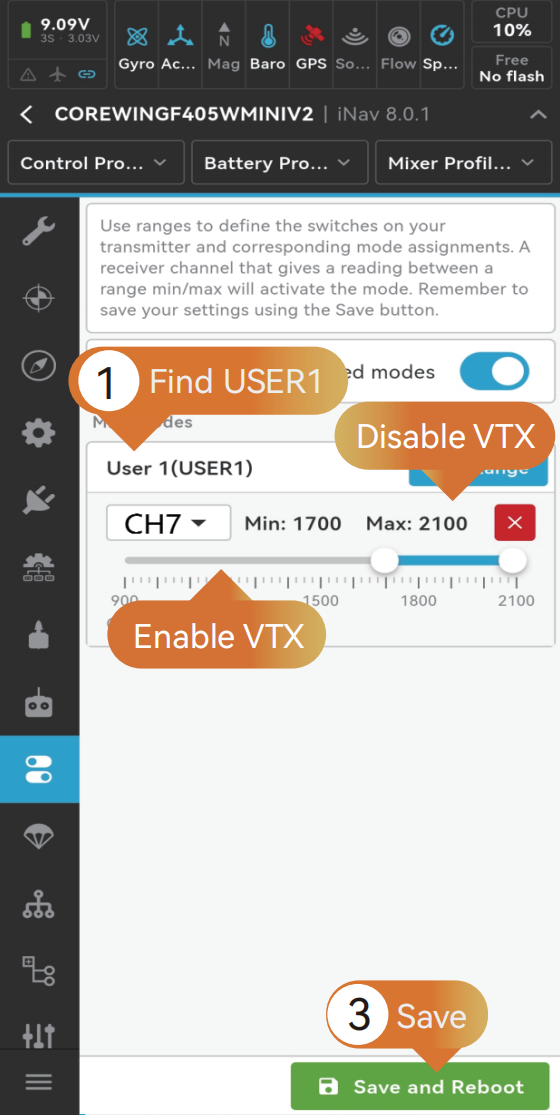
- Select the channel used to control VTX power, drag the blue slider to set the active range, and tap Save.
(The gray/white range indicates VTX ON, and the blue range indicates VTX OFF.)
3.2 ArduPilot Firmware Configuration
- Open the Full Parameter List in the CoreWing APP, configure the following parameters, and restart the flight controller.
(VTX ON when PWM is below 1200; VTX OFF when PWM is above 1800.)
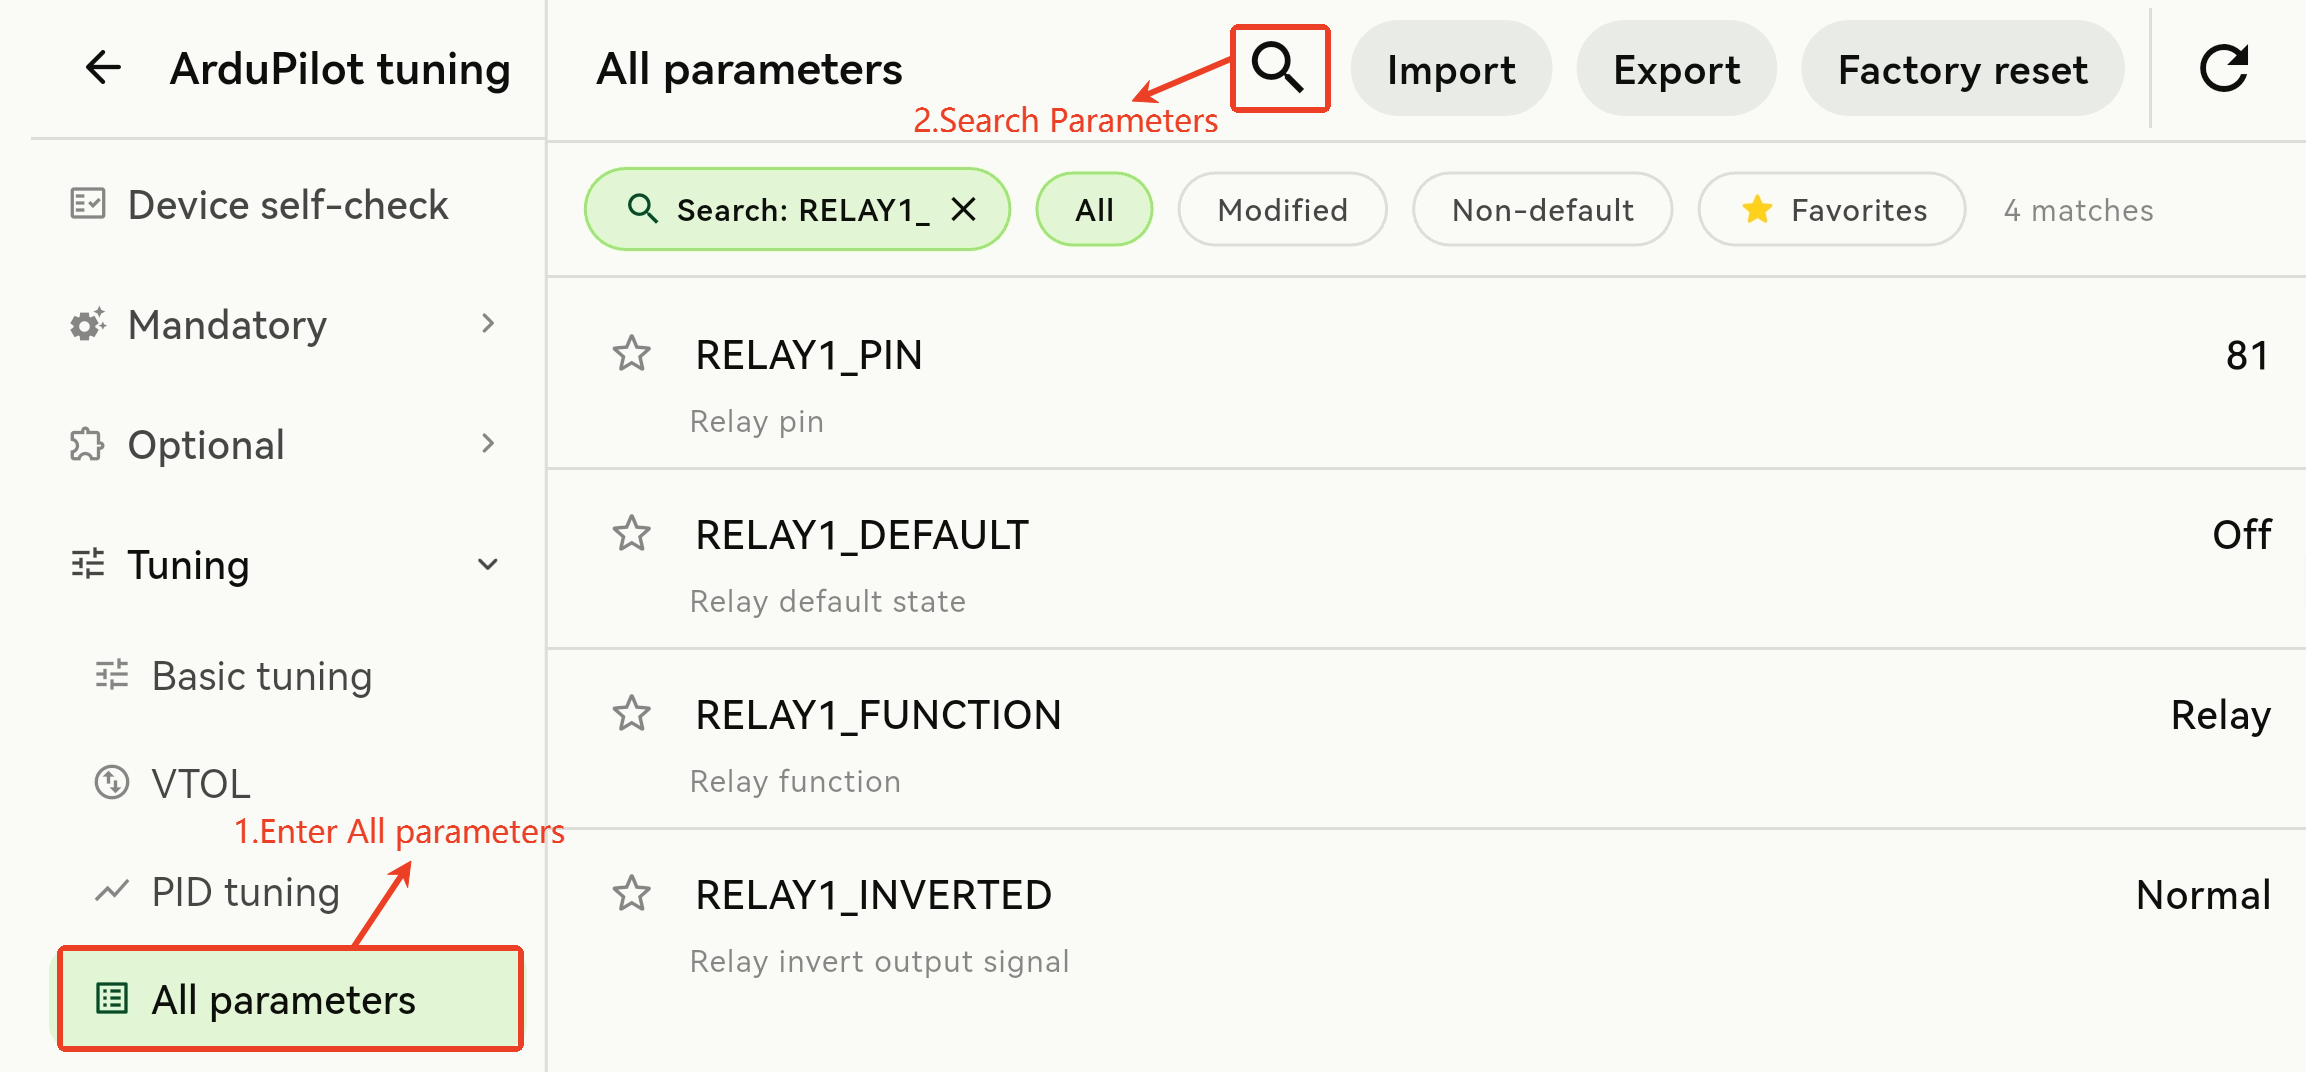
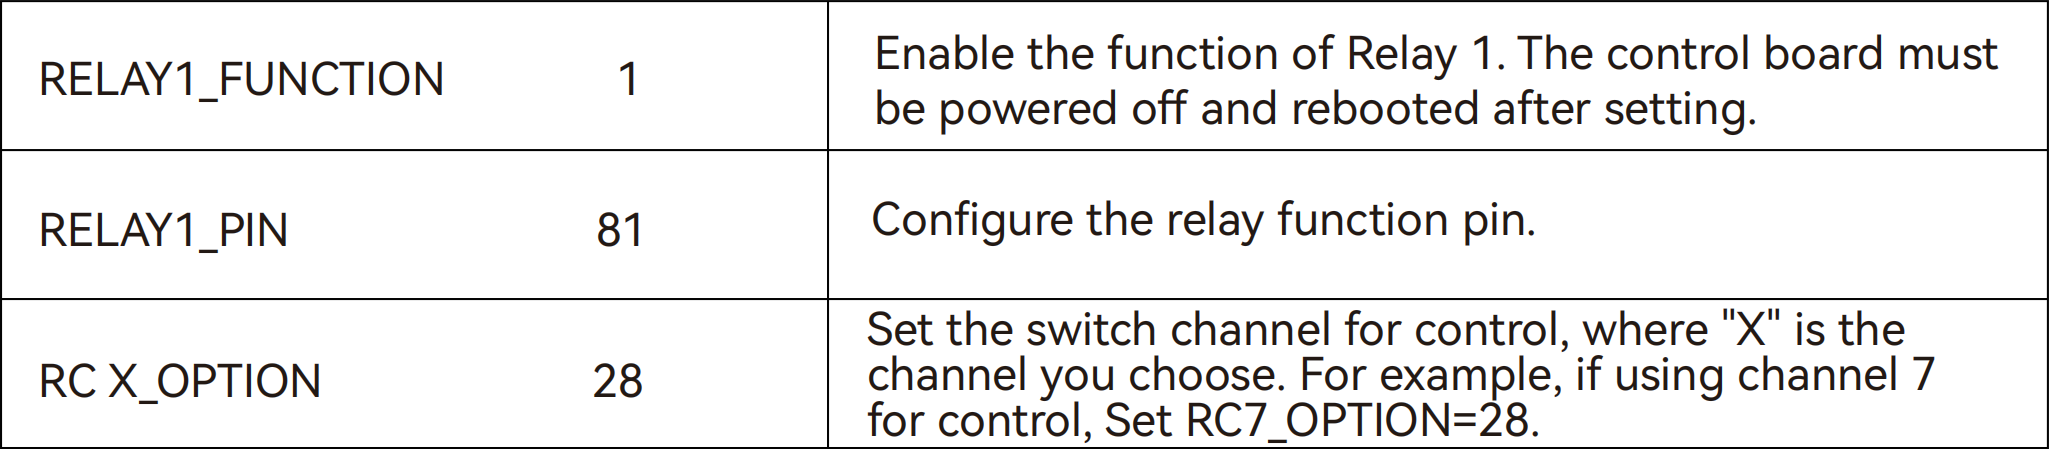
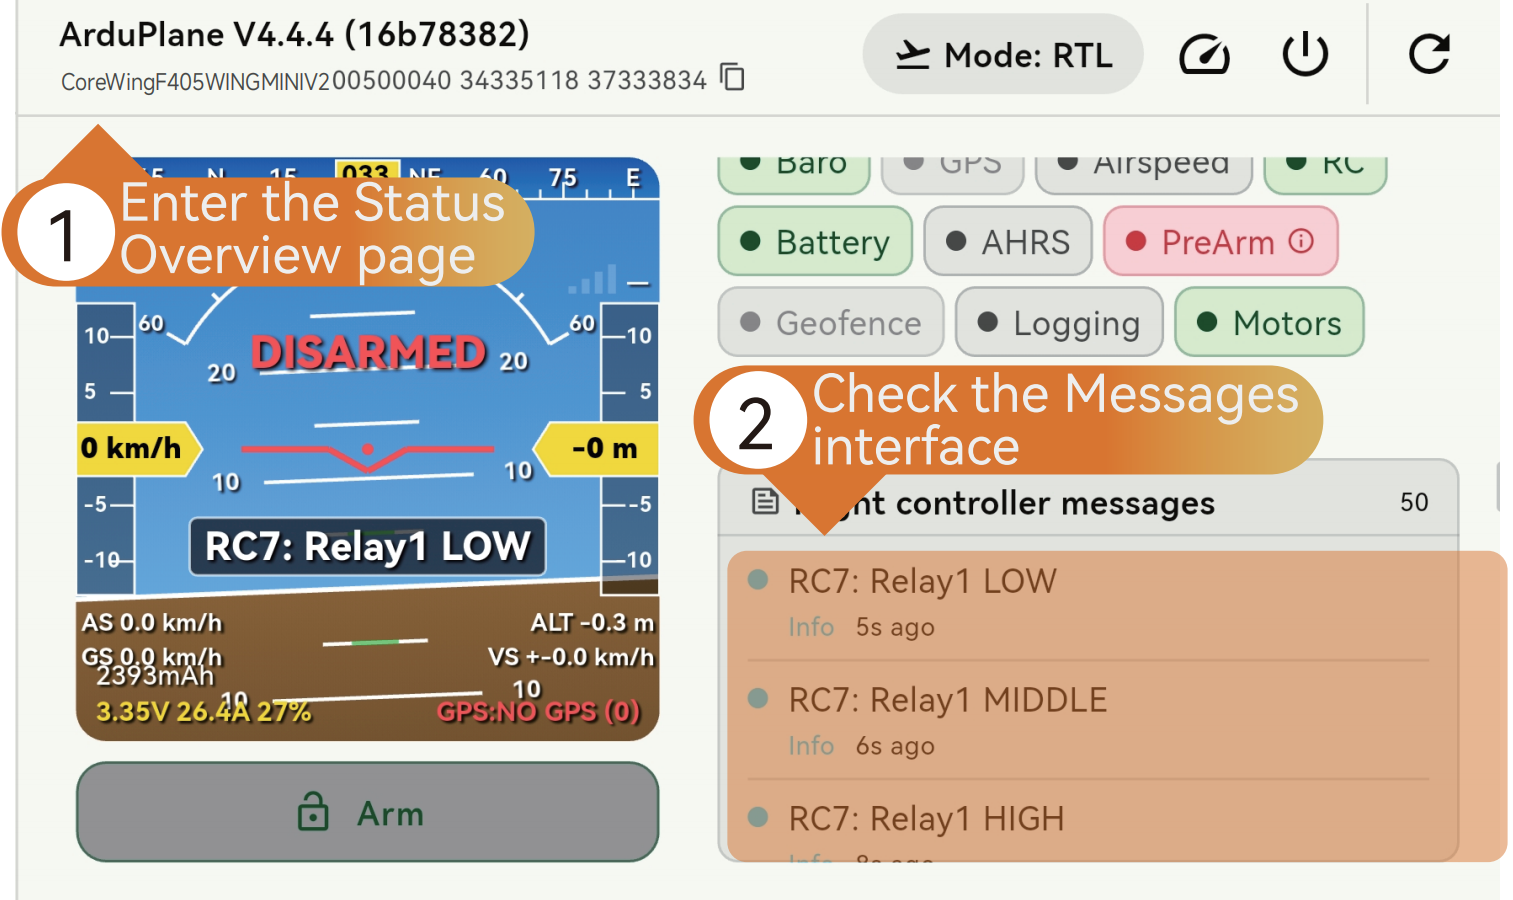
- After the configuration is complete, toggle the assigned channel switch. The following messages will appear in the Messages tab of the Mission Planner Flight Data page.
Important
This message is displayed in ArduPilot 4.4.x firmware but not in ArduPilot 4.5.x. It is recommended to verify the configuration by checking whether the VTX power can be switched successfully.
Technical Support QR Code
