
RF Module and Receiver Frequency Alignment (mLRS Firmware)
Important
To learn about Sirius transmitter and receiver binding (ELRS firmware), see:
ELRS Firmware Binding Tutorial
I. Principle
mLRS is an open-source telemetry and control protocol that integrates remote control and telemetry functions into a single link. Binding is the critical step to ensure the transmitter and receiver can communicate properly.
II. Device Preparation
2.1 Hardware List
- Flight Controller: CoreWing F405 WING V2
- RC Transmitter: RadioMaster TX16S or other transmitters supporting external modules
- Transmitter: Sirius 2.4G ELRS (with mLRS firmware)
- Receiver: SkyGuy Nano 2G4 RX (with mLRS firmware)
2.2 Firmware Requirements
Before binding, ensure both the transmitter and receiver have been flashed with mLRS firmware:
For upgrading to mLRS firmware, refer to:
Sirius Transmitter Firmware Switch Guide: ELRS → mLRS
Tips
mLRS firmware has good version compatibility, and different minor versions can typically bind successfully.
III. Transmitter Settings
mLRS only supports 400k baud rate. Before binding, ensure the transmitter parameters are set correctly:
3.1 External RF Parameter Settings
- Enter the transmitter
MODEL SETUP - Disable
Internal RF - Enable
External RF - Set
ModetoCRSF - Set
Baudrateto400k
Important
mLRS only supports 400k baud rate! If using 1.87M/3.75M/5.25M baud rate, you will not be able to enter mLRS Lua or binding will fail.


3.2 Import mLRS Lua Script
mLRS Lua Script Import Tutorial
mLRS Lua Script Download:
IV. Binding Methods
mLRS provides multiple binding methods. Choose according to your situation:
4.1 Method 1: Receiver Button + Transmitter Lua Script
Step 1: Enter Binding Mode on Receiver
Long press the receiver's BAT key for 5 seconds. The receiver indicator light will flash blue, indicating it has entered binding mode.
Step 2: Enter Binding Mode on Transmitter
Enter the transmitter's mLRS Lua script and select binding mode.
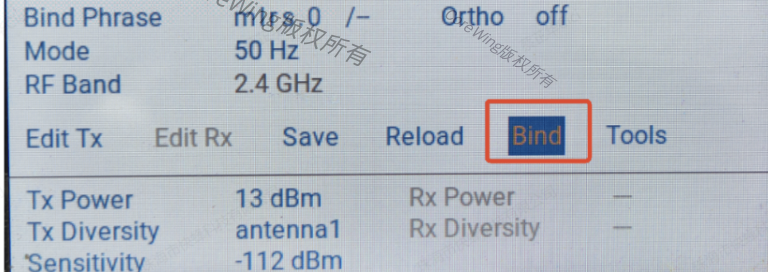

Step 3: Wait for Binding Success
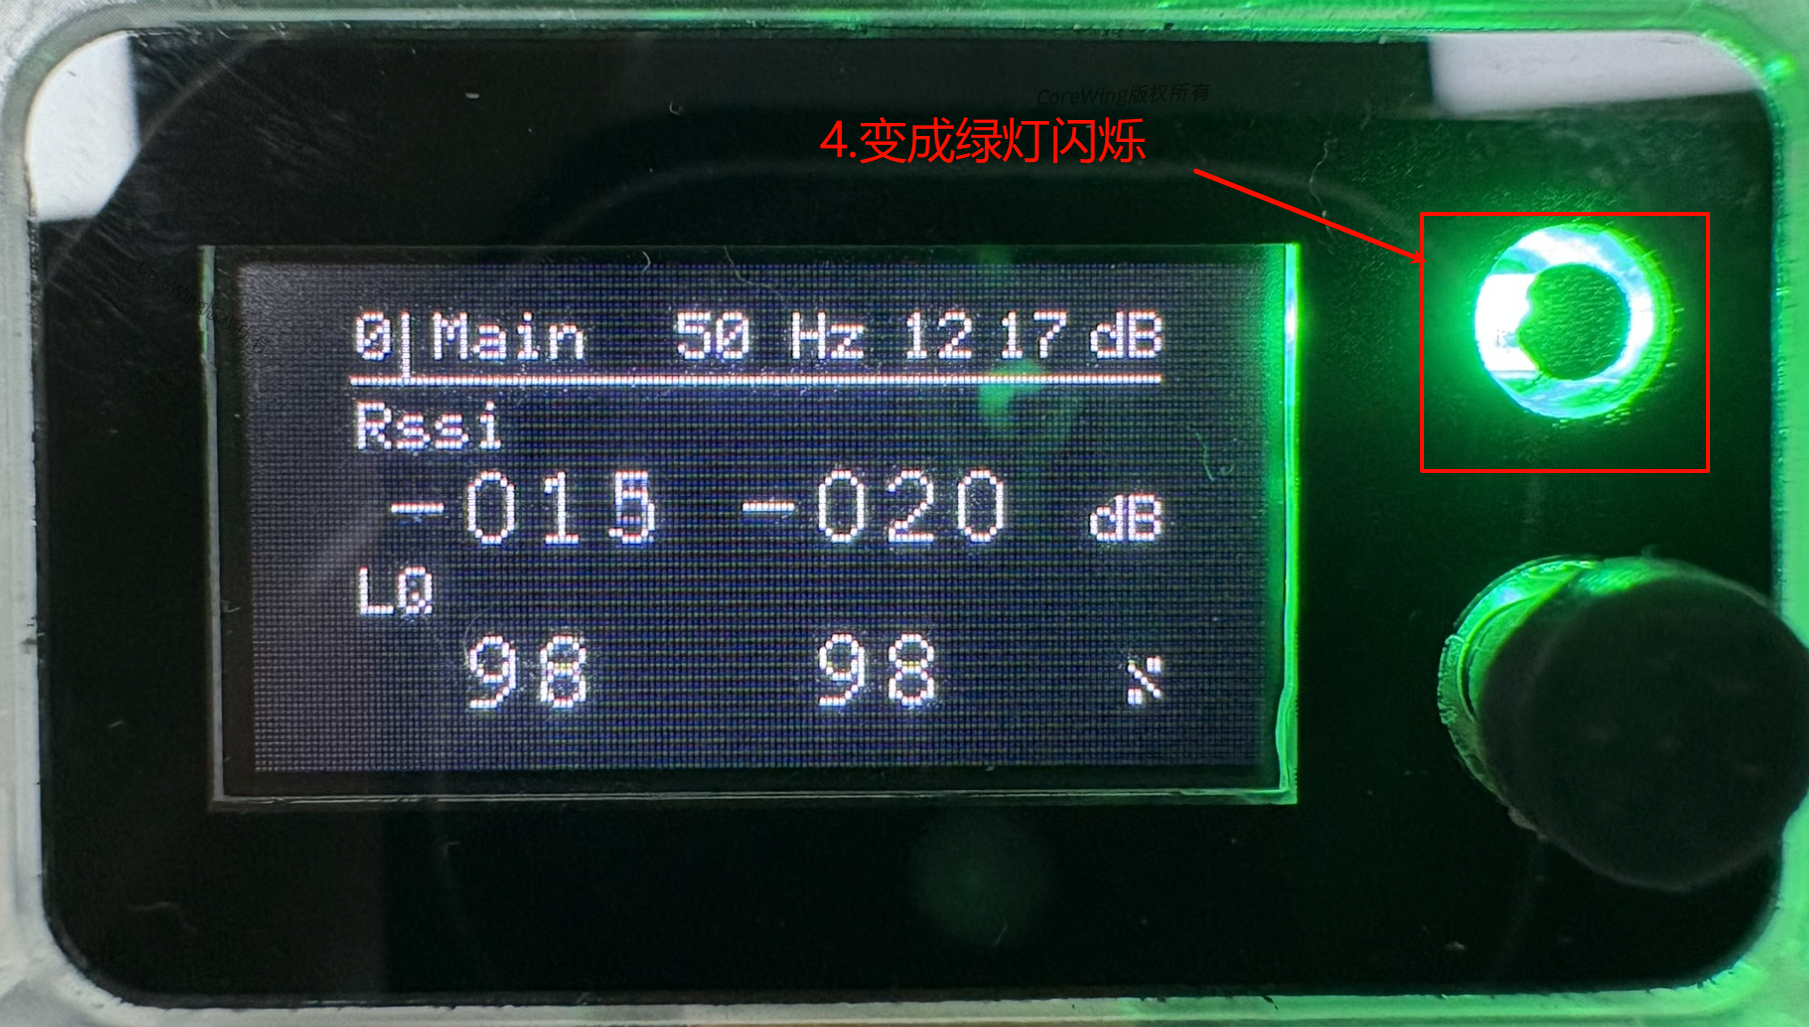
After a few seconds, the receiver indicator light will change to slow green flashing, indicating successful binding.
4.2 Method 2: Receiver Button + Transmitter LED Screen
Step 1: Enter Binding Mode on Receiver
Long press the receiver's BAT key for 5 seconds. The receiver indicator light will flash blue.
Step 2: Enter Binding Mode on Transmitter
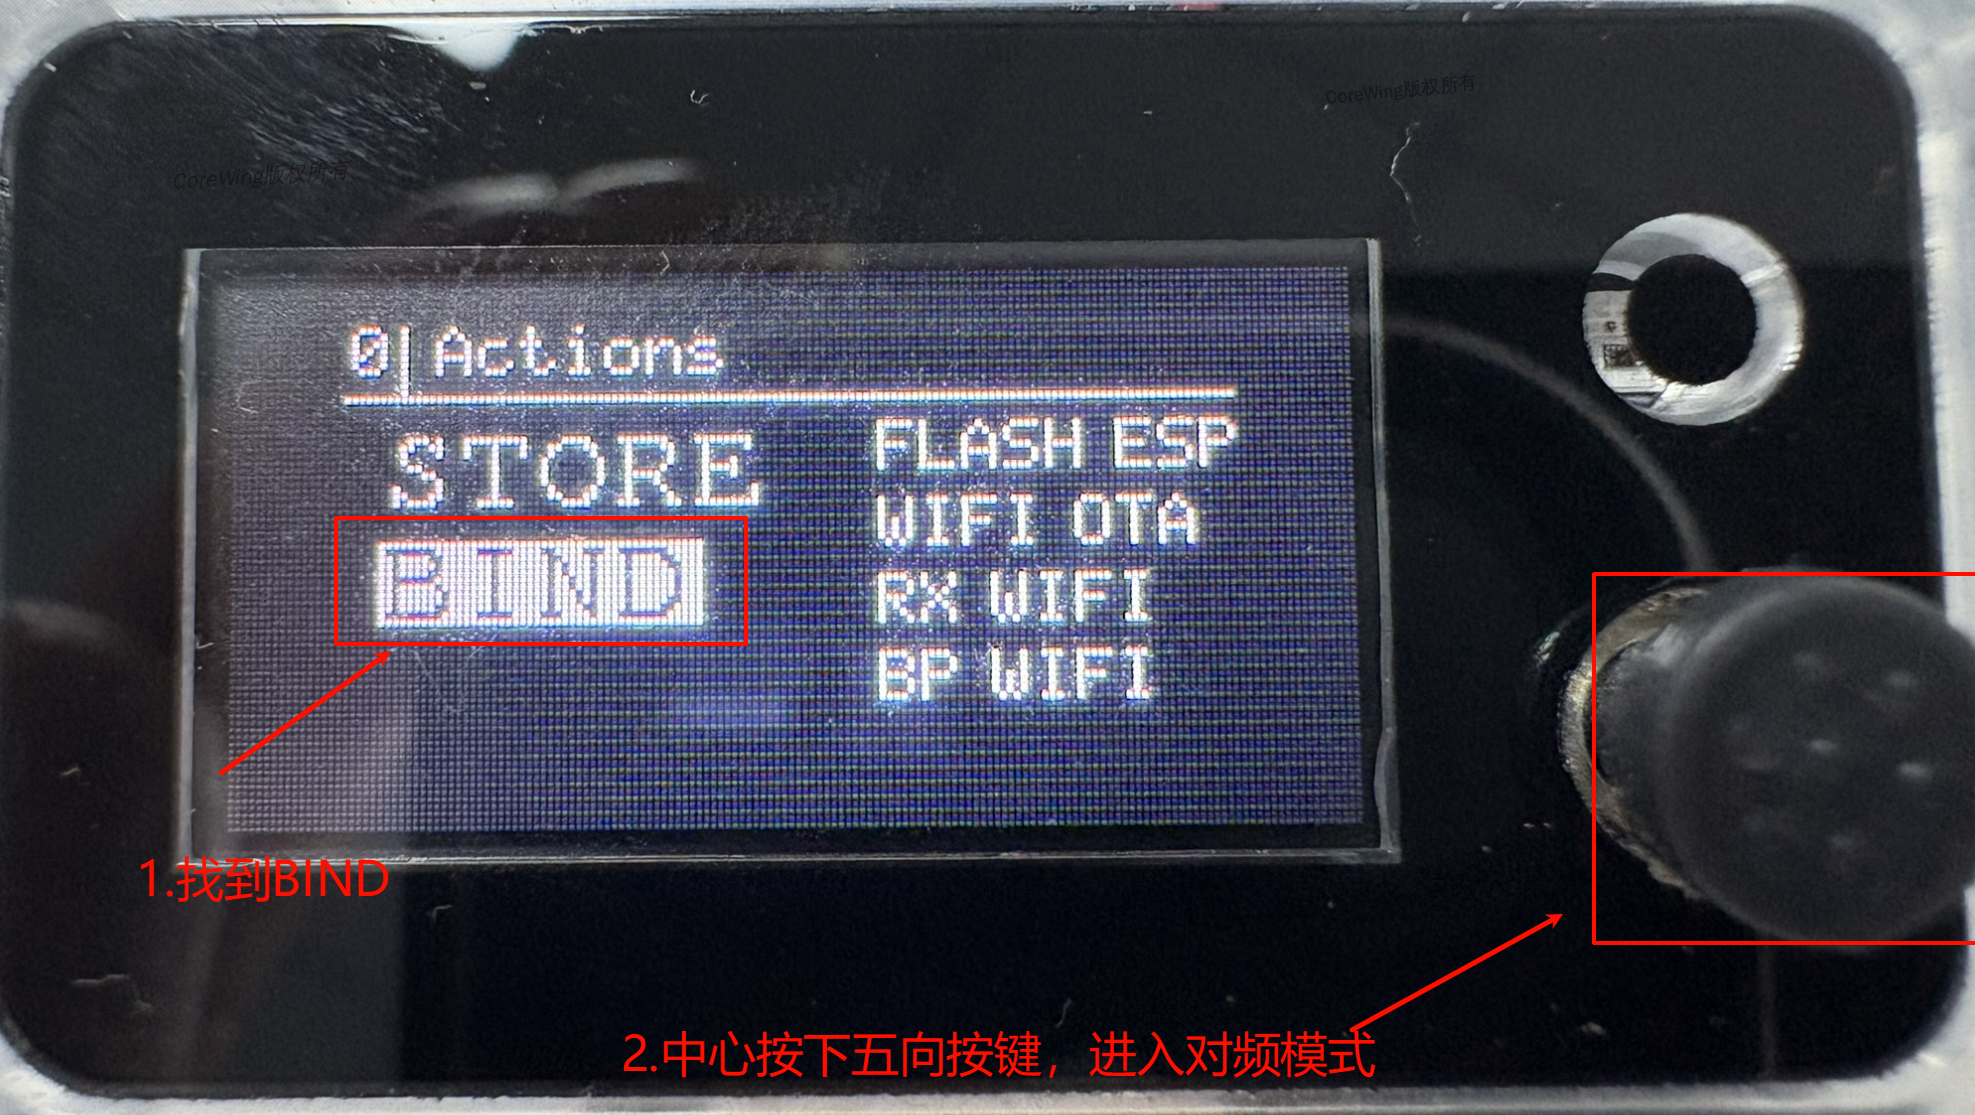
Check the transmitter's LED screen:
Enter the Actions page
Find the Bind option
Press the center of the 5-way button to enter binding mode
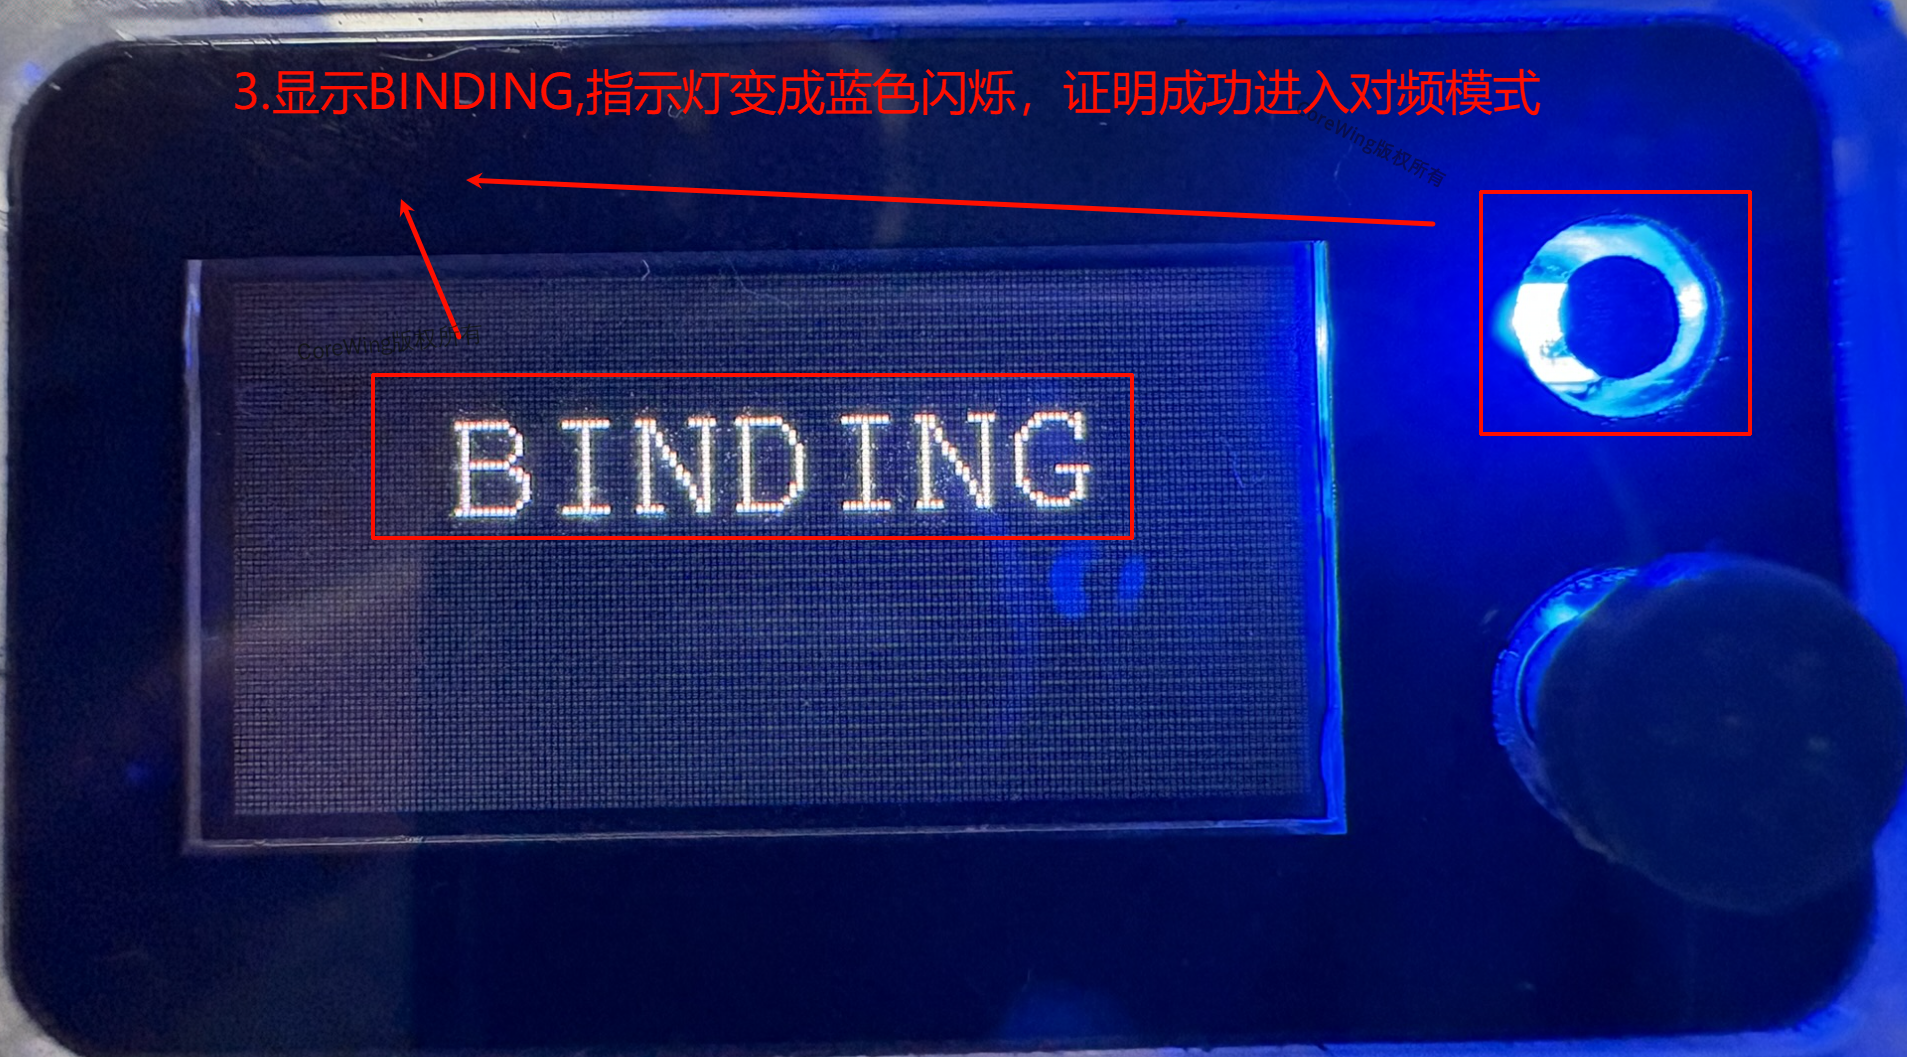
Step 3: Wait for Binding Success
The receiver indicator light will change to slow green flashing, indicating successful binding.
After successful binding, the status of each device is as follows:
| Device | Binding Status | Successful Binding Status |
|---|---|---|
| Receiver | Blue light flashing | Slow green flashing |
| Transmitter LED Screen | Displaying "Binding" | Slow green flashing, displaying connection info |
V. Troubleshooting
| Issue | Possible Cause | Solution |
|---|---|---|
| Cannot enter mLRS Lua | Incorrect baud rate | Confirm transmitter baud rate is 400k |
| Binding failed | Firmware version mismatch | Confirm both transmitter and receiver have mLRS firmware |
| Transmitter unresponsive | External RF not enabled | Check transmitter external RF settings |
| No signal after binding | Receiver wiring error | Confirm receiver is connected to flight controller UART 6 |
Tips
If binding continues to fail, we recommend:
- Restart the RC transmitter, transmitter module, and receiver
- Confirm all devices have been flashed with mLRS firmware
- Confirm the transmitter baud rate is 400k
Technical Support QR Code
For any questions, scan the code to contact technical support:
